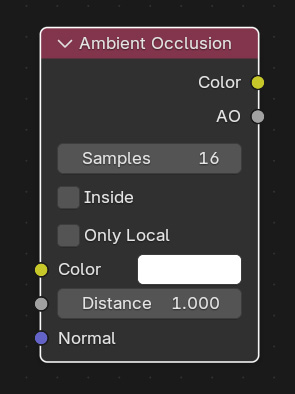
Ambient Occlusion is a calculation that takes any particular point
in a 3d scene and figures out how occluded this point is by the objects
around it.
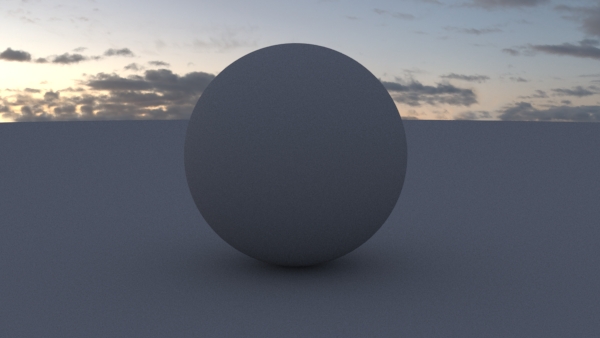
Many 3d renderers use Ambient Occlusion as part of its Skylight
calculation. A Skylight (also sometimes called a Domelight) is
a light emitted from a sphere or dome around your scene (like the real
sky), and then after the
ambient occlusion value is calculated for a point, the light value is
multiplied by the occlusion value to give you the final light
intensity. The result is an evenly lit scene with
soft shadows (or darkening) in cracks and crevices and under objects,
much like how shadows look on a cloudy day.
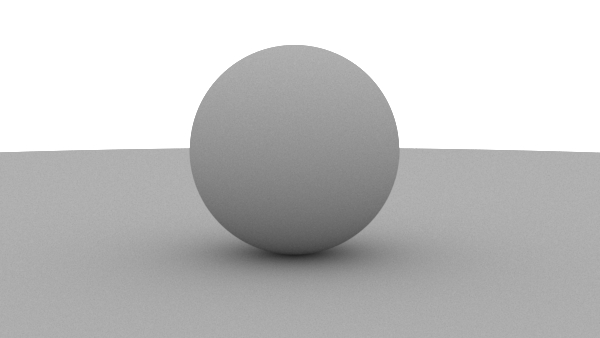
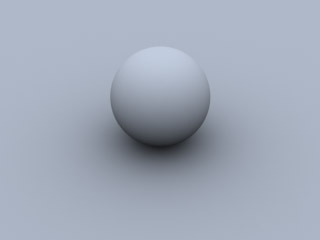
Here's a render using a white Skylight with
no other light source.
Let's do a deeper look into how ambient occlusion is calculated and
then give some examples in popular 3d programs.
How Ambient Occlusion Is Calculated
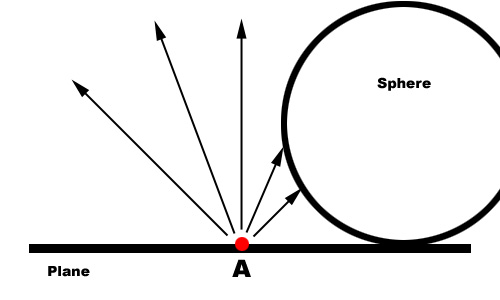
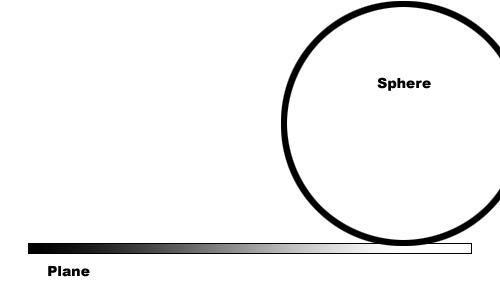
First, lets pick a point we'd like to render. Lets call this
point A. Next, the renderer shoot out a number of rays from A in a
hemispherical
direction around the face normal (since it's a ground plane, the face
normal is pointing up), and it see how often
these rays are occluded by nearby objects. So in this example, we shoot
out 5 rays (in a real render we generally shoot way more than 5 rays,
but I'm
choosing 5 for simplicity). Rays 1, 2 and 3 do not hit any object on
their way up to the hemisphere. Rays 4 and 5 hit a nearby object (the
sphere), and
so these rays are occluded. So in this image, we shot out 5 rays,
and 2 are occluded, so our ratio of occluded rays vs total rays is 2/5.
Now lets look at point B, which is closer on our plane to our
sphere. We shoot again 5 rays, ray 1 and 2 are not occluded by
anything, 3,
4 and 5 hit the sphere and so are occluded. So this point is given a
value of 3/5.
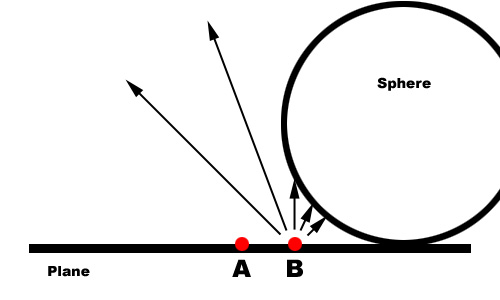
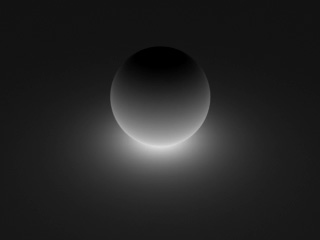
Now imagine doing this again and again, point after point on the
ground plane. For each
point we take the ratio of occluded rays over the total number of rays.
The closer this value is to 0, the less it's occluded, the closer to 1,
the more occluded it
is. So in the example above, point A would be closer to black (less
occluded), point B would be closer to white (more occluded).
In our 3d
world, that gives us the following image...
Now multiply the light intensity of our Skylight (lets say the
skylight color is a desaturated blue) by the inverse of the ambient
occlusion
image, and we get
the expected skylight image.
Note: the actual math behind implementing this technique is far
more complex, and each renderer does it a slightly different way, but
this should give you the basic idea.
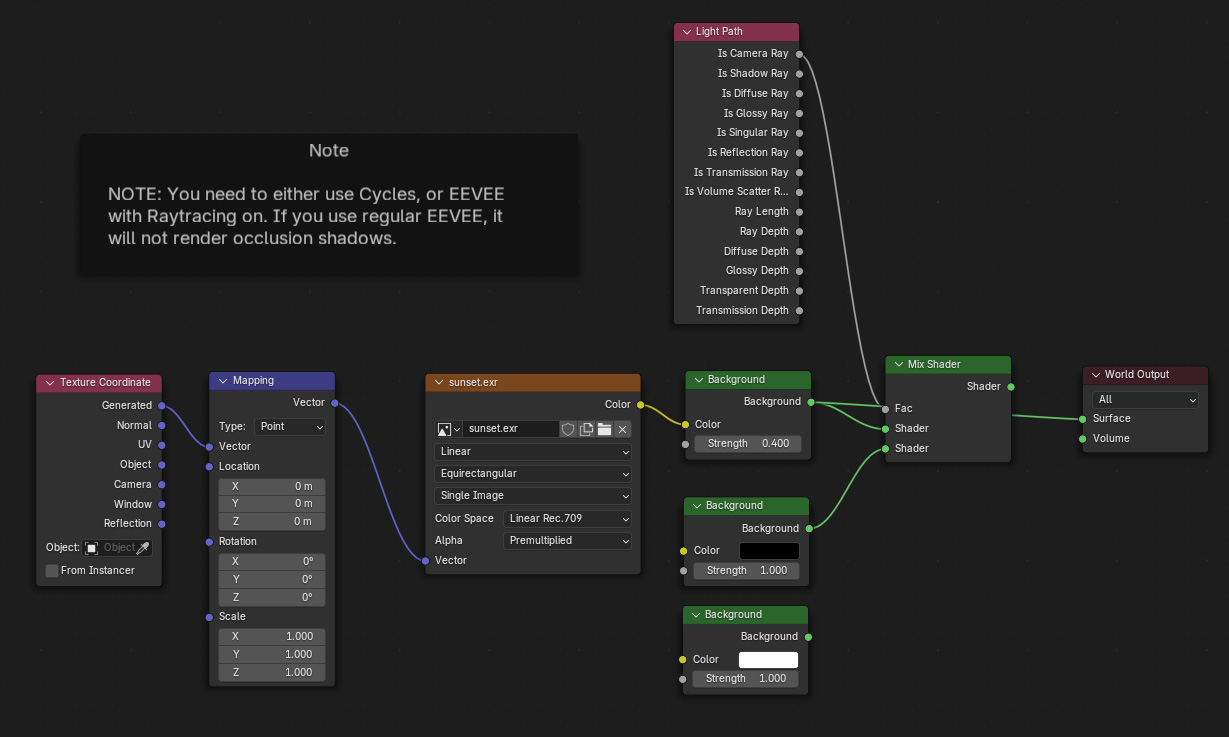
Blender Example
Unlike other 3d apps, Blender doesn't have an obvious
Skylight light type, so this tutorial shows you how to make one. Here's
the shader for Blender...