Creating, Financing and
Publishing Your Own Artbook By Neil Blevins Created On: June 21st 2018 Updated On: Nov 1st 2025 Software: None
Ever since I was a kid, I've loved artbooks, whether art of a film, the
artwork of a particular artist, or picture books that combine art and
stories. So after many years in the entertainment industry working on
other people's films and games, I decided it was time to make my own
artbook. That journey led to 4 books and a 5th on the way. So today I'm
going to share my artbook story to hopefully inspire and instruct you
on how you can do the same for your own work.
While I will talk briefly about the creative side of making books, the
talk will be mostly focused on the organizational, business and
manufacturing side of things, to give you a roadmap for making your own
similar projects.
What is an Art Book?
An "Art Book" can mean many different things. It can
be a Portfolio book, a Graphic Novel, or a Narrative Artbook. Here are
my 4 books and their types:
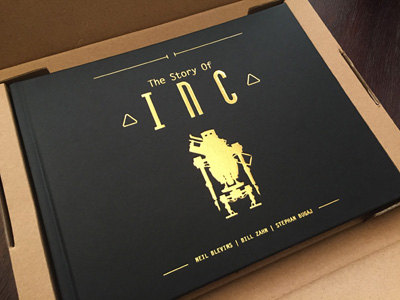
For this lesson, we will be speaking about the making of all 4 books,
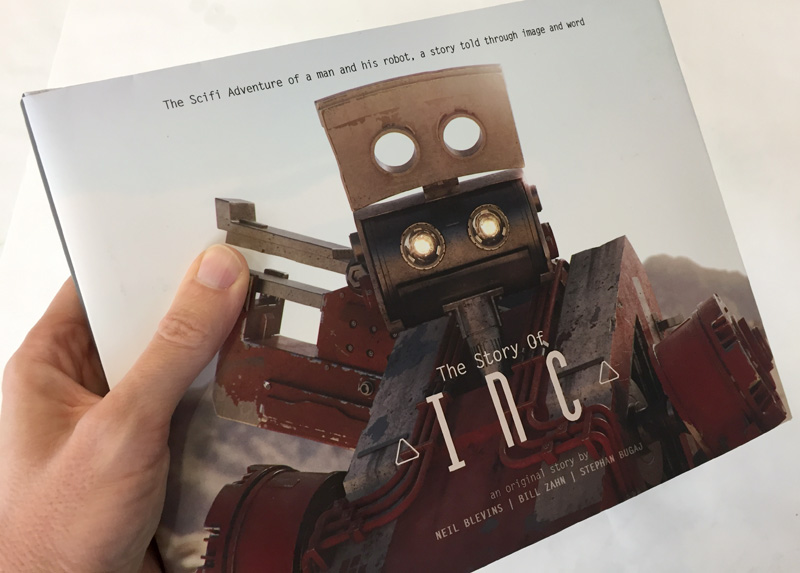
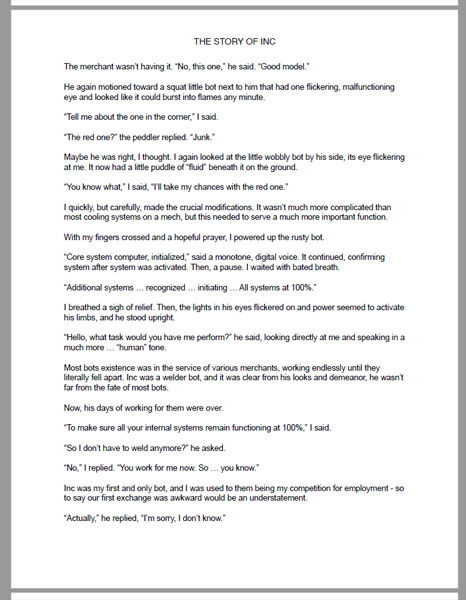
but with a focus on my first book “Story Of Inc” as an archetypal
example.
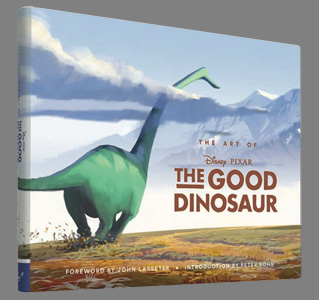
1) Inspiration
So you're an artist, and
you've decided to make your own art book. Fantastic! That's exactly
what I decided to do in the middle of 2013. I had worked for close to
2.5 years on the Pixar film "The Good Dinosaur", the film had just
stalled, and I watched 2.5 years of my work
disappear in a flash as we started the film all over again from
scratch.
It was a
turbulent time, a sad time, a stressful time, and I decided that I
needed a new personal project, something of my own to take away the
sting of my work situation.
Over the years, almost all of my personal
artwork were little one
off paintings, none of them particularly connected with each other. I
decided it was time to do a larger work, a set of interconnected places
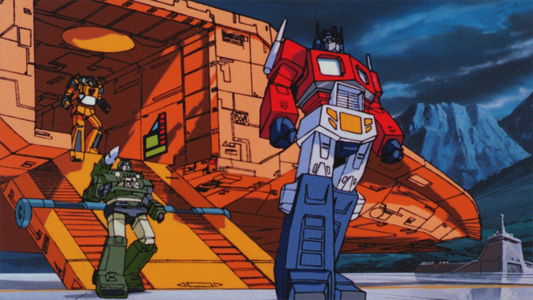
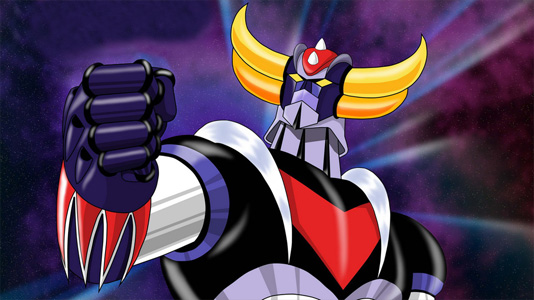
and characters. I had loved series like The Transformers and
Goldorak (the
french translation of Grendizer) as a child, and now it was time to
make my own universe to tell stories in.
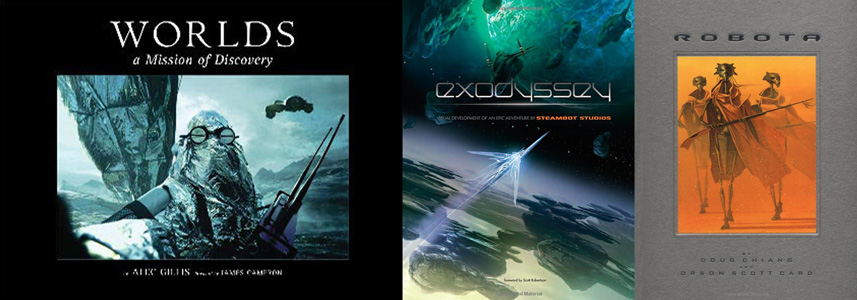
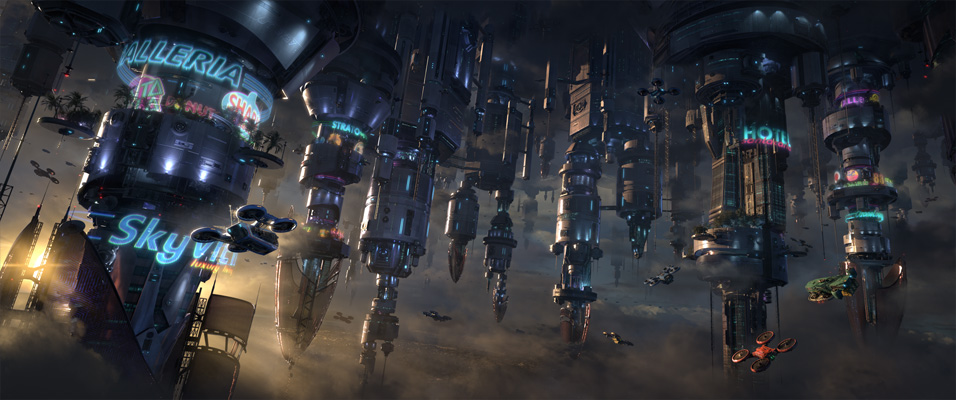
Making a film, even a
short film, was a tremendous undertaking, so inspired by other books
such
as Steambot's "Exodyssey", Doug Chiang's "Robota" and Alec
Gillis's "Worlds", I decided to make a scifi book that fused story with
paintings.
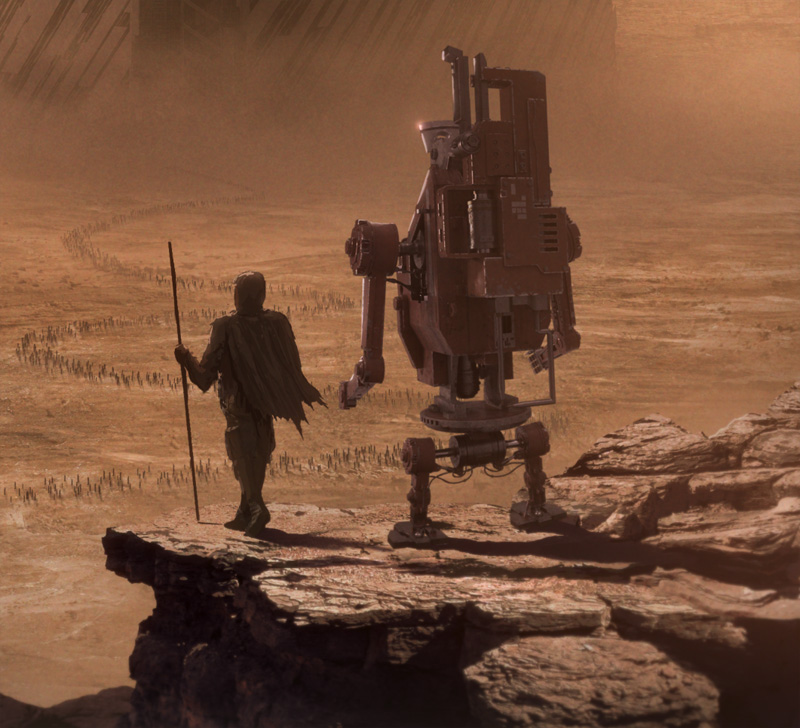
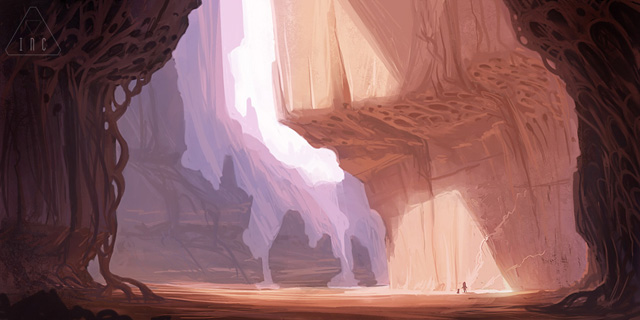
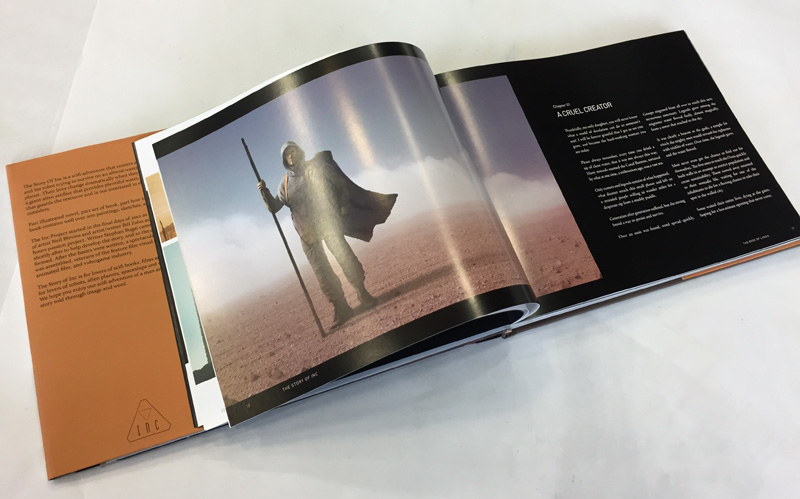
Looking over my past paintings, I decided I would take one
of them and expand it out into a larger story. The painting I ended
up
choosing was of a man and his robot, walking through a brutally hot
coral desert. It already seemed to have a narrative buried in there:
who were these two? what was their relationship? where were they
headed? Pretty soon I constructed a little narrative forming.
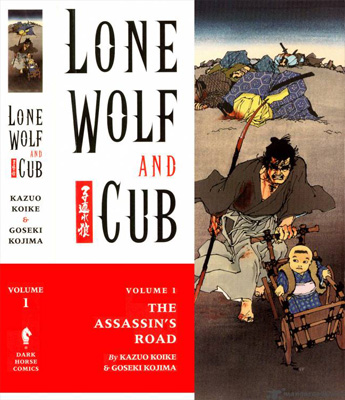
I decided to loosely base the relationship of the two main
characters
off of the Manga "Lone Wolf
and Cub", another inspiring story. It seemed to fit the bill of the
initial painting of two characters wandering the barren wasteland.
2) Reference
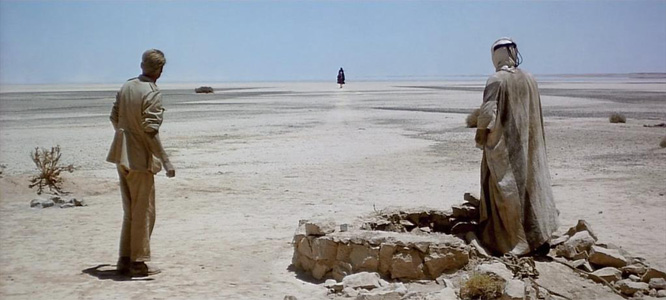
I then went about gathering tons of reference. I
watched films (for example, the
film Lawrence Of Arabia), I started collecting directories of imagery
from
favorite artists and real photos that could inform the story I wanted
to tell. I then started organizing the reference into an Art Bible. Go
here to learn more about the Inc
Art Bible.
But even
more importantly, I decided to travel to a location to take reference
photography, which I could use for 3d textures and for matte paintings
as well as inspiration.
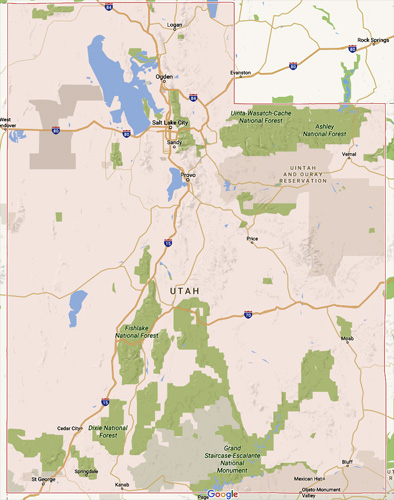
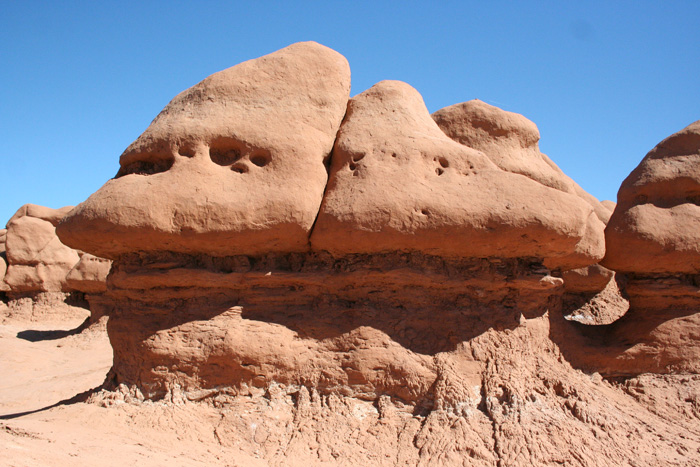
As well as desert, I also wanted large and strange rock formations, so
the closest
location to California where I could get all that was Utah. A family
vacation was planned, and we went off to visit 3 National Parks and
2
state parks. We took approximately 5000 photographs of ground, soil,
rock,
dirt, caverns, and canyons.
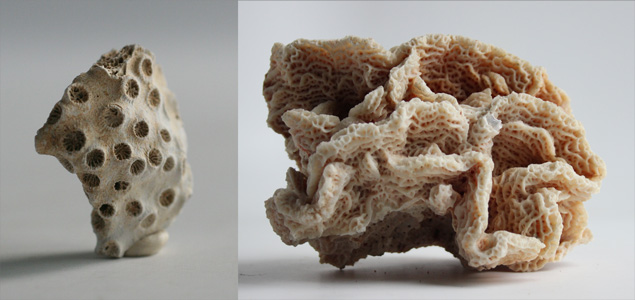
Since the desert in my story had been underwater at one point, there
would be giant alien coral
forms left behind. So I bought dozens of pieces of coral from
ebay, and took tons of photos, again, for reference, and to use for
textures and matte painting.
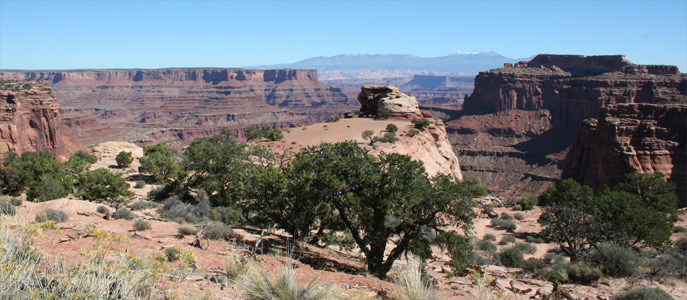
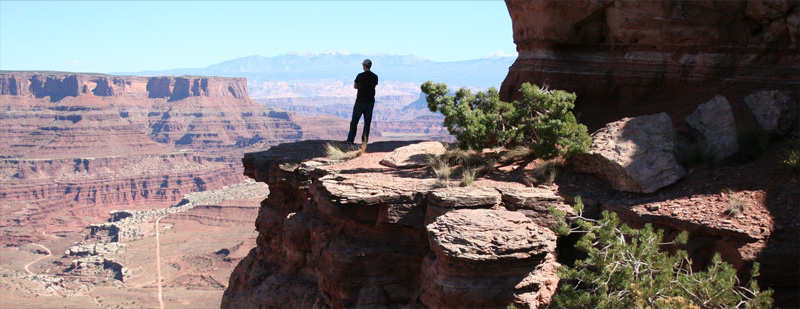
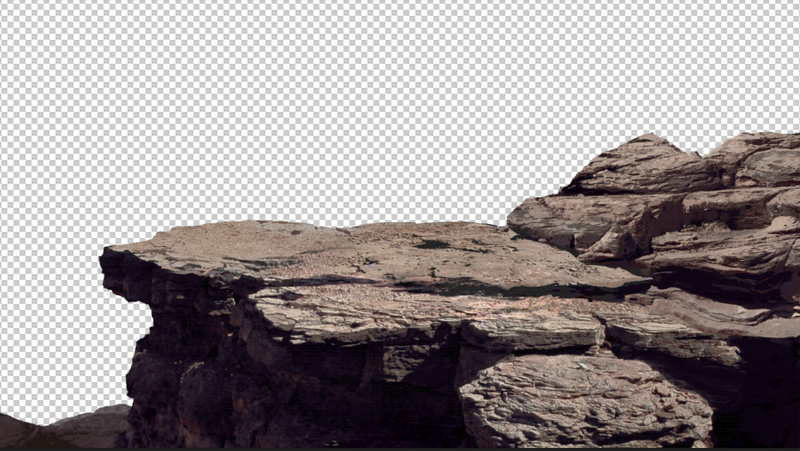
Here's a quick example of where these references were used in the book.
Here's a photo from Canyonlands...
I extracted the rock that person was standing on from the background
and painted in photoshop the parts that were missing...
Then used this in a painting for our heroes to stand on...
For a poster for the project...
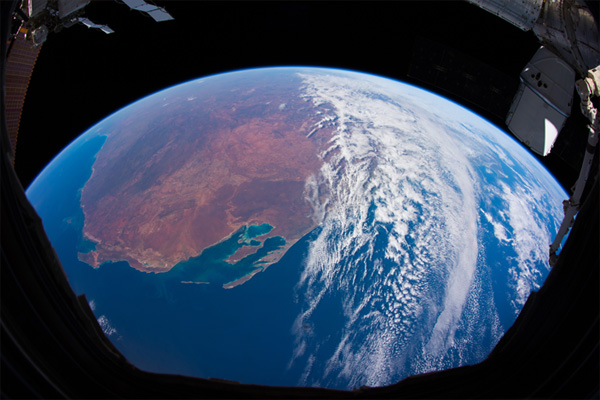
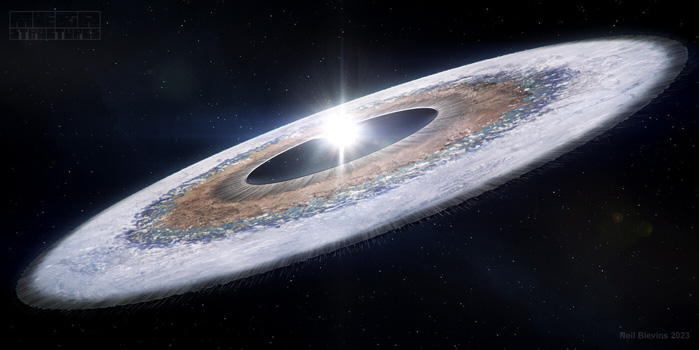
For my Megastructures book, gathering reference included many
scientific papers and articles on space and science. Also, lots of NASA
photography. And the best part is Nasa photography is copyright free
(since it's technically owned by the US people), so you can use those
images as photobash elements in paintings without the need to license
them (But I still added a thanks in the front of the book in the stock
imagery section).
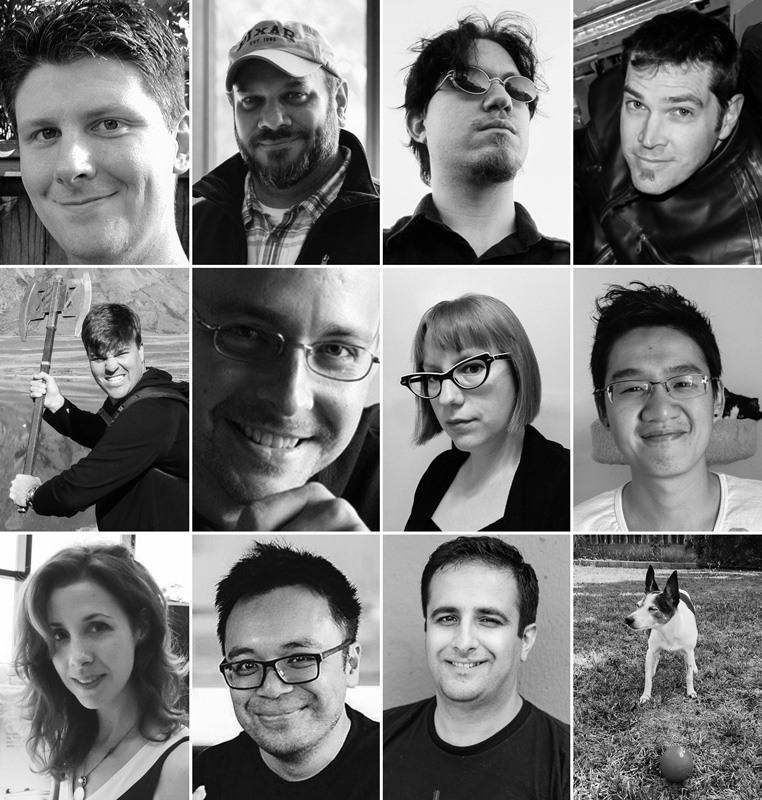
3) Setting Up The Team And Project
While doing a book all on your own may have a sort of
artistic romance to it, there are many advantages to working with a
team.
First off, working with your friends is fun!
Second, working with
many people will bring variety to the project.
Third, you have people
to help you do all the work, and since a single book can be hundreds
and hundreds of paintings, a little help is a good thing.
For "The Story Of Inc", I started
with bringing my friend Bill Zahn on board. While I do environments,
robots and vehicles, I rarely do humans, and Bill was an amazing
character artist I met at Blur 20 years ago, and have since worked with
at Pixar. Bill had spent the last several years writing screenplays, so
he seemed like the perfect person to
help hash out the story as well. I told him the ideas I had, he said
"That's
cool, but maybe we could do this instead". He took many of the
elements of my original story and changed things around,
improving my original idea immensely. Then our friend Stephan
Bugaj came on board to help shape the story. After that, I decided to
start
adding some more friends to help with the art. My old buddy from Blur
Jeremy Cook was next.
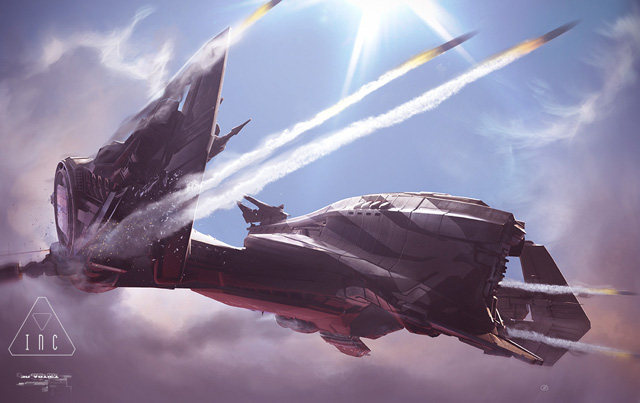
The
newest version of the story had a pirate spaceship, and Jeremy seemed
like a perfect match for the job. Now that more people were coming on
board, it was time to start getting everyone organized, and set up
legal documents.
Set up a partnership: Myself,
Bill and Stephan would be the creators
of the project. We had a lawyer draft up a contract that stated that
we all shared the IP (Intellectual Property), and set up how much each
person
would get from the sale of the book based on how much they contributed
to the project. We are all good friends, and I wanted it to stay that
way. I decided that the best way to keep things harmonious
was to have a contract that clearly stated our business
relationship, and what was expected of everyone, so there was no
misunderstanding.
Get team of artists together: we
cast the artists as if they were actors playing a
part in a film. In addition to characters and environments, we needed a
few creatures. I found Dom Qwek, one of my favorite creature
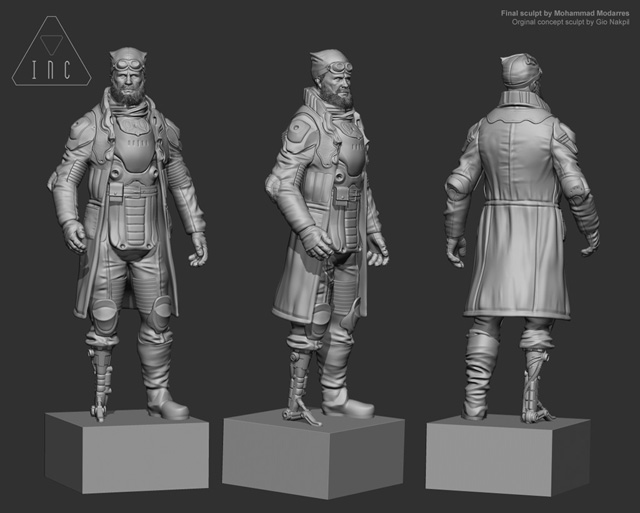
artists to help out. Bill
didn't have the time to do the final design for the alien, so we
recruited
our buddy Gio Nakpil to make the original alien designs (finished by
Mohammad
Modarres). I needed someone to
handle the Oasis environment. My friend Chris Stoski had both a matte
painting / concept background, but also an architecture background,
and he seemed perfect for the role of creating a human city.
Get a lawyer: The initial
NDAs (Non Disclosure Agreements, agreements you sign that says we're
gonna talk about secret project stuff now, so don't tell other people
about it) were just boilerplate documents I found online. The final
contracts were written by a lawyer. Lawyers are
expensive (many charge between $250-500 an hour), but they will save
your butt when things go wrong. And
believe me, things go wrong. So all of the contracts, the one for
the 3 partners, the ones for the artists, and the one for the
publisher, were all drafted by a professional lawyer.
All artists get paid: I
felt it was very important that all artists
get paid something for their time. While it's nice to give your buddy
some free artwork for a good cause, we all need to eat and pay the
rent. If we don't charge money for our art, we can't survive. So
I paid all of the artists either with a freelance rate or a % of
profits from the final book. It wasn't exactly top market rate, but it
was enough that I felt people were being treated fairly for the indy
project this was.
All work is owned by the
production: This is just to keep things
clean. All of the artwork created for the project was
owned by the project, just like if this project were a regular film or
videogame. Not only are most concept artists used to this model, but it
makes things simpler if the project ever moves into another format.
All stock images get credit:
In the process of creating the artwork for the book, some reference
images inevitably ended up being used in the final paintings. We
made
sure to get licenses from any stock imagery or models we
used (including photobash elements), and we credited these images in
the book. That way, there are no
worries
about someone coming after us legally once the book goes out to the
public. And of course, we mostly used our own photos, so we wouldn't
have to worry about copyright (like the photos from the Utah trip).
For Megastructures, originally the book was going to be written by a
real astrophysicist. But they got too busy, so I ended up writing it
myself. Added 5 more artists who helped with the paintings.
4) The Story
For "The Story Of Inc", our goal was to make a
concept art book for a film
that doesn't exist. And after poking at the story, we came up with this
basic description:
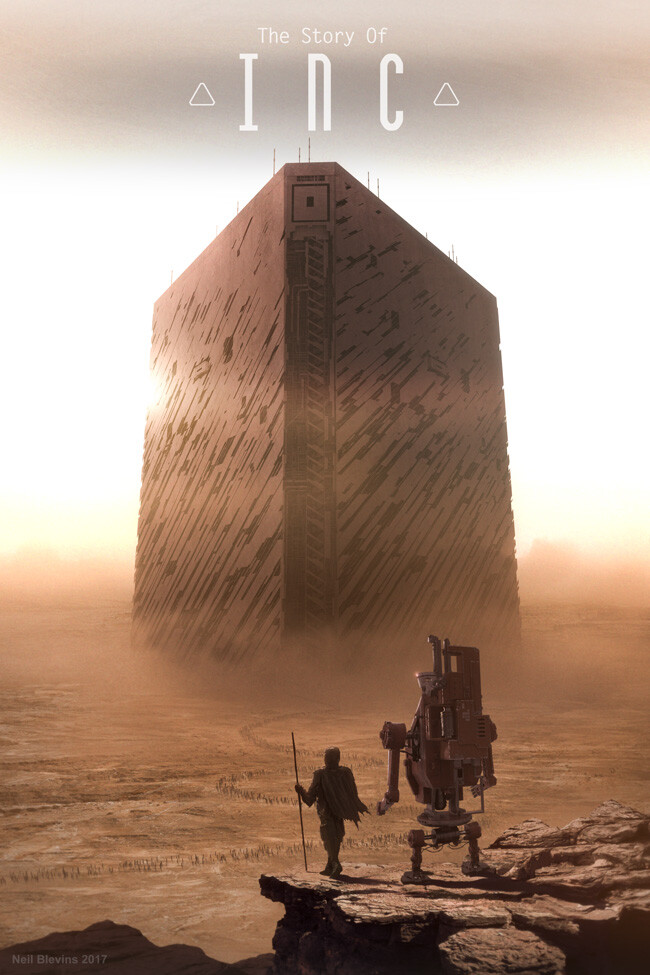
"Inc is a scifi story that centers around a man and his robot trying to
survive on an almost waterless desert planet. Their lives change
dramatically when they come across a giant alien artifact that provides
plentiful water, and a society that guards the resource and is not
interested in sharing with outsiders."
As mentioned, we went with the narrative artbook format. In the future,
it might make more sense to make a graphic novel, since it's easier for
a publisher to “get” and market because its a more standard format. But
the artists (including myself) were more comfortable doing key art than
comic art, so we went with the best format for the people involved.
We decided the book would have 3 parts, Illustrated Novel, World Of,
Making Of.
The Illustrated Novel would be a short story length novel
with images showing key moments in the narrative.
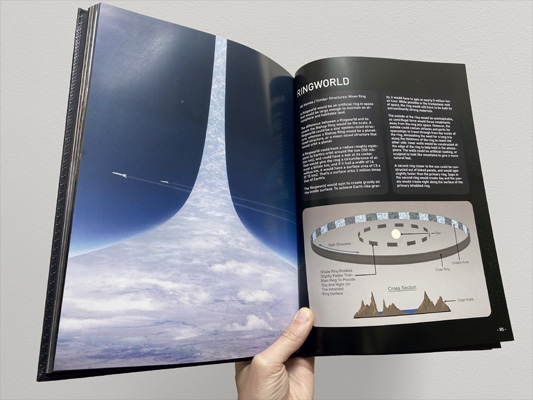
The World Of would be
images of the characters, vehicles, and environments from the story in
a
more "concept book" style.
And Making of would be a series of tutorials
discussing how the artwork for the book was made. Originally the
making of was going to be entirely online, then we added it to the book
itself (at the request of our publisher), then we ended up going back
to putting it exclusively online when we left our publisher.
Now it was time to write the story. Bill, Stephan, and I started
designing
the narrative. While maybe some writers just sit down and write, we are
more used to film production, where you get together and write a short
synopsis for each scene to the story. Then we'd discuss what needs to
happen: What is the heart of the story? What do the characters want?
What are their motivations? What are
their flaws? How would they react in their world? Then we'd revise the
scenes. And we revised them again, and again, until we had the skeleton
of a story. Then we divided up the writing work:
Bill Zahn would write the screenplay for the narrative portion of
the
book (40 pages of text)
Stephan Bugaj would write the “World Of” portion.
I would write the tutorials for the “Making of”
As we developed the project, we decided on a few story guidelines.
First,
this story was basically a Buddy Movie, so we used other Buddy films as
reference (and tried to inject something a little different to the mix
of course).
We also decided that the story would be Space Fantasy, like Star
Wars,
as opposed to Hard Scifi. So not too much time was spent worrying about
how the technology worked.
We would use the artwork to inspire
the story, and then the story to inspire the artwork, moving back and
forth.
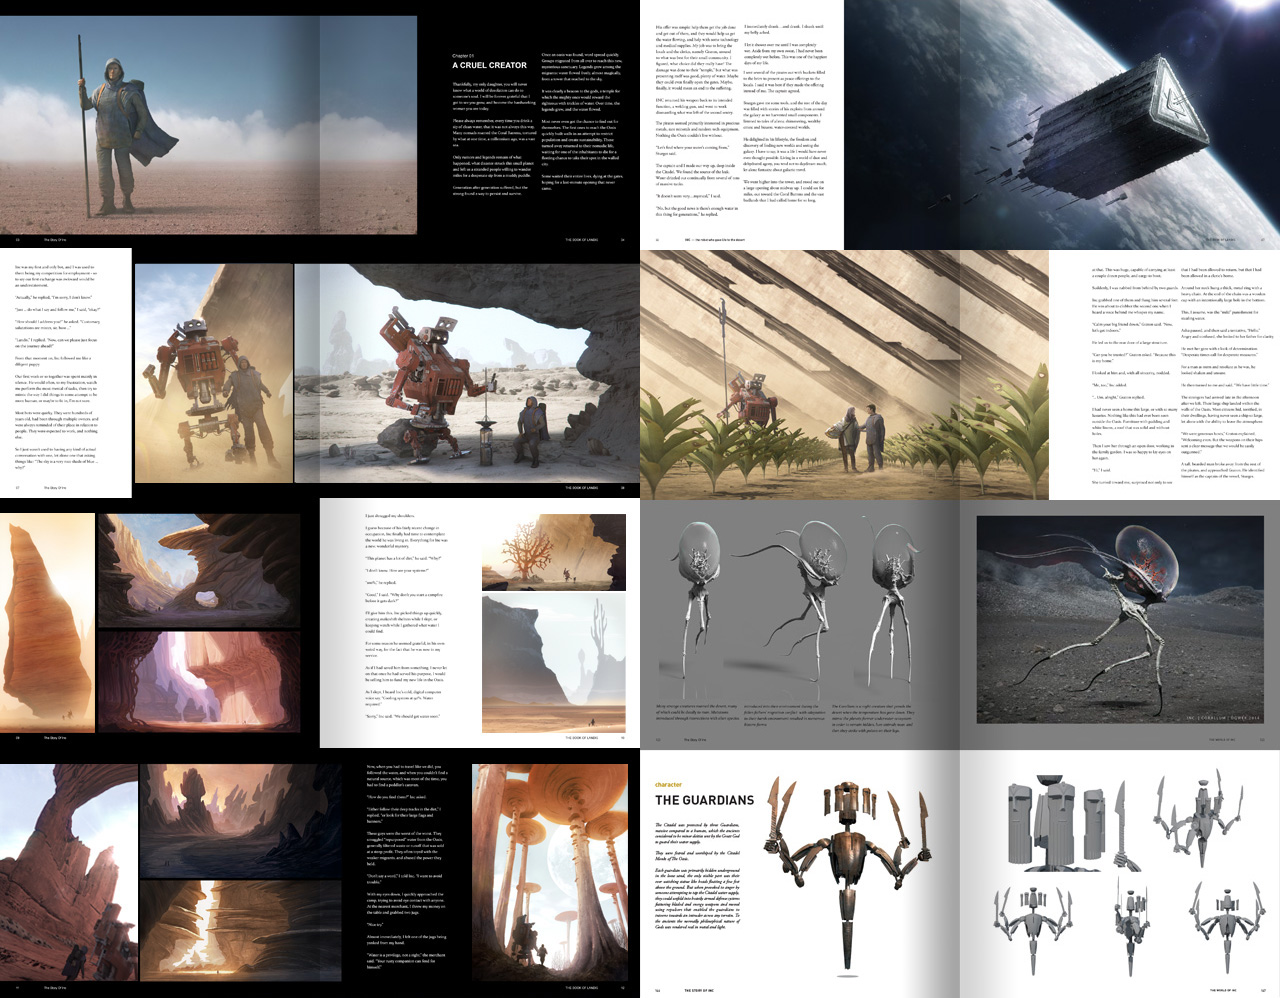
5) The Artwork
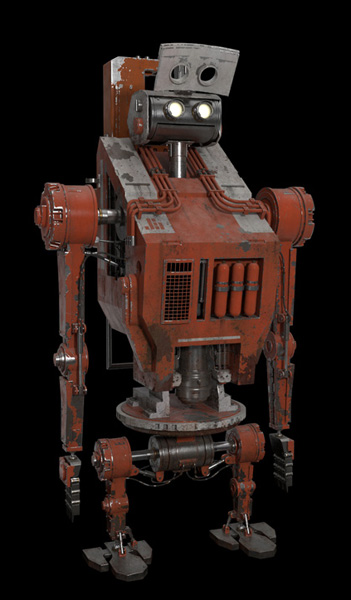
I designed and built the Robot "Inc" for the
project.
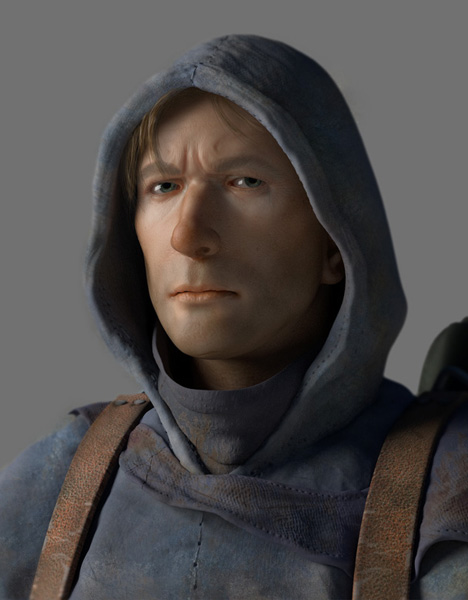
Bill, as a great human character artist, designed and built
the human Landis.
Most of the artists used a workflow that involved 2d
painting, 3d, and photo manipulation. A set of guidelines sort of
evolved. If the character or set appears in lots of images, make a 3d
model. If
it will only appear in a few images, hand paint or photobash in 2d. Use
whatever technique gets you the best looking image the quickest. It
didn't matter how you got there.
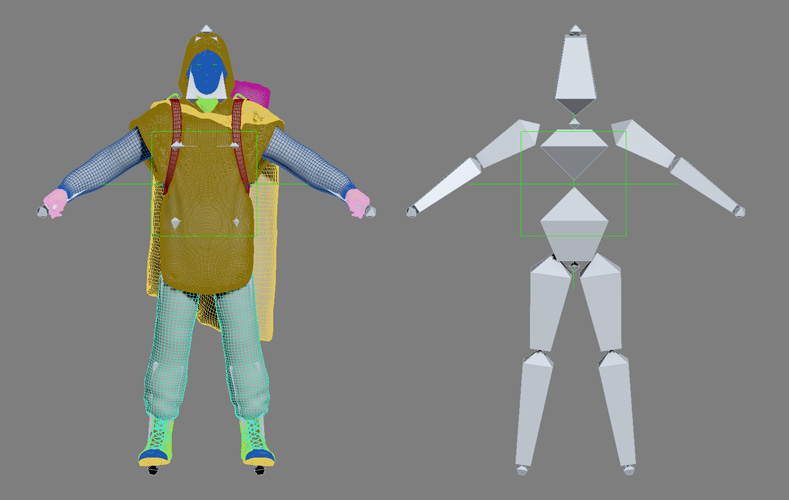
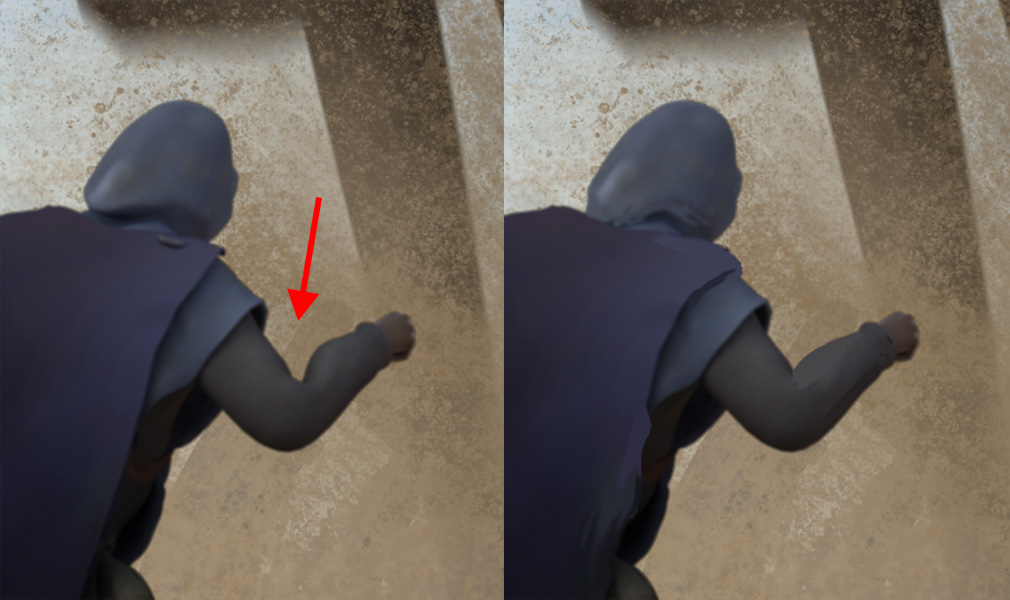
Since this was a book, and the final result would be 2d images, we used
simple rigging systems to help pose 3d characters. The rigs got us a
long way, but they weren't perfect. We painted out interpenetrating
joints, and other problems, in 2d.
Wow, the rigging job on that elbow is horrible! No problem, just paint
it away on the final 2d painting.
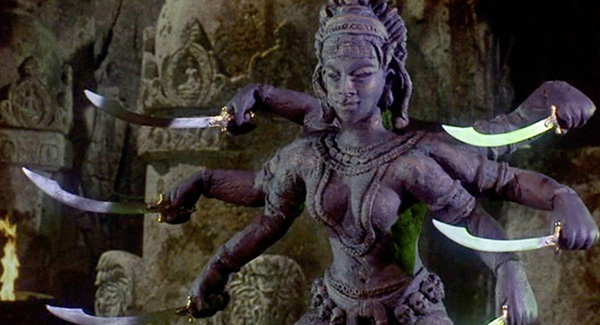
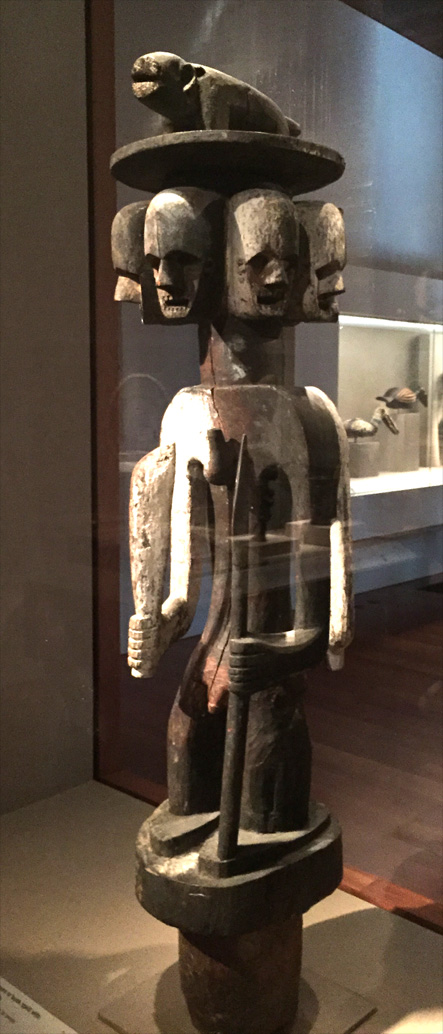
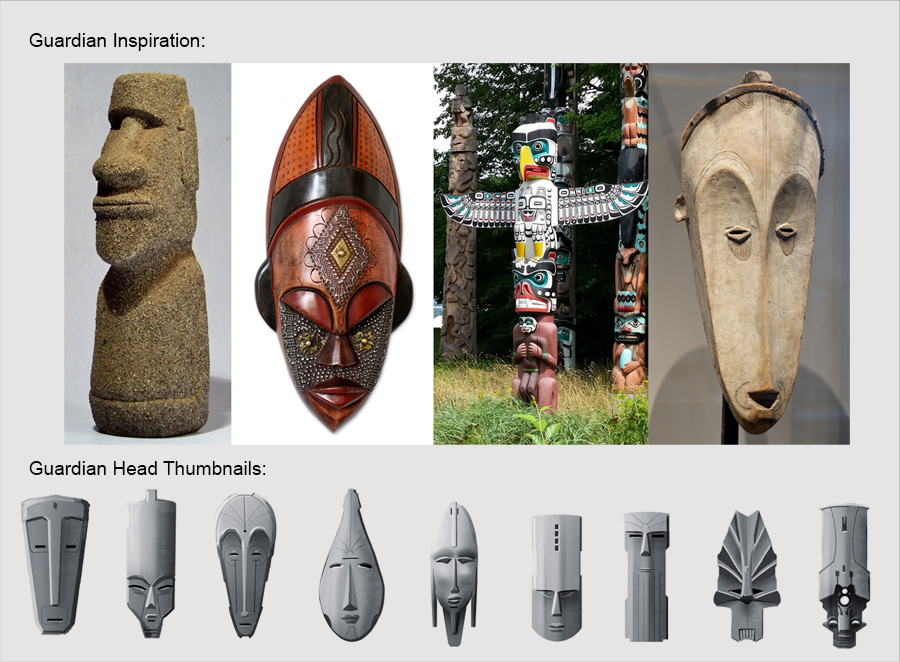
Here's some designs for one of the robot bad guys, inspired by Ray
Harryhausen and a statue in the De Young Museum in San Francisco.
Then I got together a list of all the major elements we needed to
design and then paint for the story. This is the list of categories we
came up with:
Inc The Robot
Landis The Human
The Desert Environment
Desert Creatures
The Citadel Environment
The Oasis Environment
The Settlers
Guardian Robots
The Pirate Captain
Pirate Spaceship
The Alien Mothership
The Alien
As mentioned in part 3, the work was divided up among various artists.
For the most part, we tried to give an entire category in the list
above to a single artist.
Simple concept briefs were made for the artists. Go here to learn more
about writing Concept
Briefs.
Art By Jeremy Vickery
Art By Jeremy Cook
Art By Mohammad Modarres / Gio Nakpil
Art By Christina Davis
Final Stats for "The Story Of Inc":
• All artwork was done in 1.5 years in our spare
time (we all had day jobs)
• 10 Visual Artists + myself total, with 5-6 working
at any given time
• Total artwork by all contributors: 526 images
• My contribution: 309 images
• Rest of Team: 217 images
• Total artwork in book: 225 images
Megastructures consisted of 109 paintings / diagrams and stock images.
Here's some of the people who contributed.
Art By Andy Proctor
Art By Jeremy Cook
Art By Ken Fairclough
6) Publishers
So you have two basic paths for publishing, either to
go with a publisher, or to self publish. There are advantages and
disadvantages to each.
If you decide to find a publisher, you'll need a way to sell your book
to them, so you'll need a Book Proposal, which is a document where you
give a formal outline of what you plan on making, including ab
Overview, Authors Bio, Comparable Books with Sales Figures, Chapter
Outline, Sample Chapter, Schedule, etc. To find out how to write
one, visit this page: The
Complete Guide To Writing A Book Proposal.
Some of the bigger publishers won't even talk to you unless you have an
agent. So finding an agent can be helpful to sell your book idea, but
not necessary, especially if you're seeking a smaller publisher and
hitting a more niche market.
If you do decide to go with a publisher, here's a few things to
consider.
The publishing timeline:
Hand in the Materials:
get them all of the artwork and story and other supporting information.
Editing: The materials
will be handed to an editor who will make suggestions on how to improve
the story, more artwork that's needed, artwork that should be cut. You
make edits and hand back again to the editor until everyone is happy
(or time runs out).
Layout: The final
materials will be handed to someone who will lay out the book (see
section 7)
Copy Editing (Proof Reading):
A second editing process will occur to make sure there are no spelling
errors, grammatical issues, etc.
Print Proofs: Proofs will
be printed to confirm what the final color will look like in the book
(see section 10). Artist and publisher both have to sign off on these.
Printing: The book will
be printed (see section 10)
Distribution: the book
will be sent to online and brick and mortar stores (see section 11)
From handing in materials to landing the book on a bookstore shelf can
be anywhere between 6
months to 2 years. So don't expect the process to go quickly. It won't.
And of course, if you decide to self publish, you will have to do all
of these things yourself.
A few details about a publishing deal: A standard publishing
contract gives you 7% of book's sale price, or 15%
of net. So if your book sells for $20 at the bookstore, expect to make
about $1.40. $10 goes to whomever is selling the book (the book store,
Amazon, etc), and the remaining 43% goes to the publisher for doing
all of the things in the list above.
For "The Story Of Inc", we talked to 5
different publishers. Several didn't want to
publish the project, but offered us great advice.
In the end, we
decided to go with publisher X (name withheld, you'll see why in a
minute). At first, everything seemed to be going great. There were
issues and disagreements, but they seemed pretty small in the grand
scheme of things. But as we continued to work with them over the course
of 2 years, we slowly started to realize that Publisher X was not as
enthusiastic about the project as we'd hoped. We figured out that
publishing our book was something they kinda felt compelled to do, as
opposed to being excited about it, and it showed in how they handled
our
project. A publishing deal is like a marriage. Don't get
married with someone who thinks you're just okay. Get married to the
person
who loves and understands you. That doesn't mean refuse to compromise,
though. Publishers have lots of great ideas. I know you believe that
all of your ideas are pure genius, but trust me, they aren't. It's good
to have an objective, outside view to make your project stronger. But
at a certain point, if you don't see eye to eye on
the big things, it's time to move on.
This is the first place that having a lawyer really helped out. Before
signing with a publisher, have your lawyer read
over your contract CAREFULLY. Having a great contract was what allowed
us to pull our book from our publisher when we decided that we were
going in different directions. Otherwise, they could have chosen to
kept the
book, and possibly never released it. In our case, the publisher gave
us the book back without a big battle, and we managed to come to a
reasonable parting agreement, with our lawyer helping along the way.
After Inc, we decided to self publish everything so we could retain
maximum creative control (even if we may have lost out on some sales).
7) Editing So now comes the editing
process, you have you art, you have your story, now it's time to decide
what artwork really should go in the book and have a serious look over
your text. Our publisher did the initial edit, both discussions on
artwork, then normal story editing and then copy editing. This book
didn't require it, but you may also need a fact check edit, for
example, if you're writing a hard scifi novel and want to make sure
that the physics behind some of your tech is actually feasible. It's
also time to prep those extra pages in the book, such as the
dedication, the copyright info, the index, a forword perhaps, the bio
section, artist credits, web address etc. And then finally, it's time
to get together credits for all of the stock images you've used. As
concept artists, we frequently make our artwork using photobashed
elements, and many of those elements have licenses that state you need
to give credit to the provider of the stock elements in the final
product. So we added a section at the beginning of the book outlining
all of the stock sources that contributed to the final book.
Artwork Edit
Story Edit
Copy Edit (Proof Read)
Fact Check Edit (especially important for Megastructures, since
it was part science book)
Extra Pages: dedication, copyright info, index, forword and/or
afterword, artist bio, artist credits, project web address
Stock Image Credit
8) Layout Layout is the process of
taking all the text and artwork and placing it on the page. It's not
nearly as simple as it may sound. We knew the process wasn't simple,
but after we went through it, we became even more respectful of how
difficult this job is.
What format should be book be?
Portrait or landscape? We went with landscape because this was
an art book for a movie that didn't exist, we wanted it to feel
cinematic, which meant a landscape format like a widescreen film. And
how large should the
book be? We decided to do a book approximately the same size as the
Pixar "Art
of" books.
As we worked on the paintings and text, I made a rough layout to
get an idea what parts of the story need more
illustrations, and what size illustrations we needed. I did my rough
layout in Photoshop, which is almost certainly not the right software
to
use, but I was familiar with it, and this was a rough layout, so it
didn't need
all the bells and whistles of professional page layout software.
The final professional layout is frequently done in Adobe
InDesign. However as with all Adobe products, this is a subscription,
and can become quite costly over time. Megastructures and all books
afterwards were laid out in Affinity Publisher, which is $40 pay once,
and it's 95% of full featured as InDesign, so I highly recommend
checking it out.
Once we had a first draft of the professional layout, I went to Kinkos
to photocopy the book
at the correct size. It doesn't matter if the quality sucks. This is to
verify that this is in fact the right size of book, the fonts are big
enough to read, and that
the page layout feels good.
Also, take a look at the 2nd or 3rd page of most books, which contains
all the book info such as ISBN number, Edition, Library Of Congress
Number, etc. Use that as reference for your own page of credits and
book information.
A professional layout, if the publisher doesn't do it in house, will
cost between $3000-5000. Anything lower, you're not getting a good job.
So if someone says "I can do it for $1000", walk away. Don't be
stingy on the layout. The layout is just as important if
not more important than the artwork itself, it can make or break the
entire project.
On Megastructures and beyond, I did the layout myself and didn't rely
on an outside source.
The final layout for the Story Of Inc
My kinkos test print for Megastructures...
If you do decide to do the layout yourself, two things to consider.
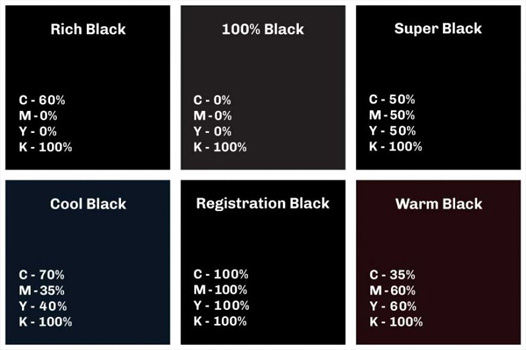
First off, learn about Rich Blacks. Basically, if you do a CMYK print,
and an area is regular black, it will only use the Black Ink cartridge.
But it will not appear as black as it could be, it will seem more like
really dark grey. A Rich Black contains just a touch of the other 3
colors, like C, M, or Y, and this will create a darker black result.
For Inc, we tinted the blacks a little red (since it was a desert
book), and for Megastructures we tinted the blacks a little blue (for
space). Read more on the subject on the web, lots of more detailed
explanations out there.
Plumgrove
And finally, consider the book's gutter. If you have a wide image, only
place it across 2 pages if it doesn't interfere with the image.
This is a bad image to use on a 2 page spread, the focal point of the
painting will be lost in the gutter. Put this on a single page.
This is a good image to use on a 2 page spread, the gutter area doesn't
have anything of large importance to the painting.
9) Kickstarting
After we left our publisher, we decided to self
publish, so we'd print
and distribute the book ourselves (we also did a major revision to the
layout of the book, paying for a professional layout artist to do the
fixes, thanks Paul!). We needed money to do it, so we
decided to put the book on Kickstarter. Doing a successful Kickstarting
campaign is a whole topic unto itself. If you're interested in the
subject, there's tons of websites to offer advice. I'll give you a
few tips that we learned from our Kickstarter.
First off, even if you have the money already to print your book,
Kickstarting has the advantage of marketing. About a third of the
people who contributed to the book were people who discovered the
project through Kickstarter. So if we had sold it ourselves without
having the kickstarter, we'd have started with only 2/3rds of the
sales. Kickstarter is a good way to get the word
out about your book and to find people to buy it.
Think of Kickstarter
as a pre-order system with built in marketing, not as a way to get
donations. Consider using it as
a way to reach new customers even if you don't need the cash.
From our research, the best time to start a Kickstarter is
between January and May. Books that Kickstart during this time have a
higher likelihood of success. The best time of month is right after the
1st or 15th (People just got a paycheck, and they want to spend it).
The best time of the week is Tues-Thurs. On Monday people are too busy
catching up on post weekend emails, and on Friday everyone is busy
trying to get work done before the weekend. The best time of day? If a
primarily USA audience, 8-10 am PST.
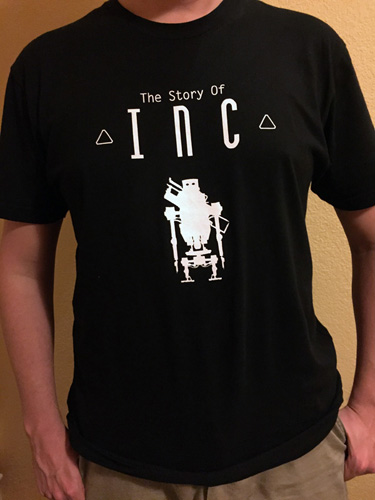
We added a bunch of rewards, from extra fine art prints, a
special edition of the book, hand drawn sketches, and T-shirts.
Remember Kickstarter takes approximately a 10% fee for their
services, so build that into the price of the rewards.
Here's some of our rewards for the Megastructure Kickstarter.
And one of the rewards for the Inc Kickstarter.
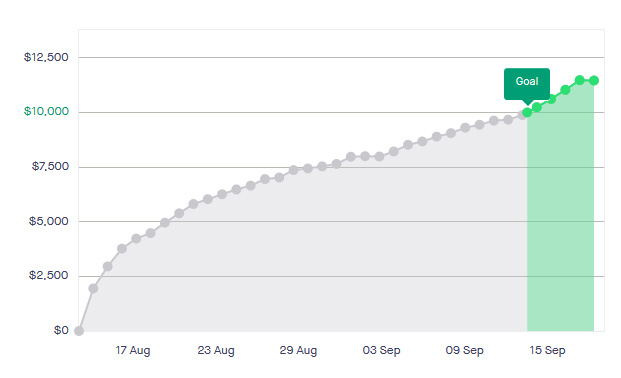
With a kickstarter, you tend to get a large portion of sales on
the first few days, very little in the middle, and a ton on the last
few days. See our graph below for the Story of Inc Kickstarter, we
thankfully had better progress than
many in the middle of the campaign, but in broad strokes our
kickstarter was pretty similar to others.
We actually ended up doing 2 Kickstarters. The first lasted 3 days, and
then we received a cease and desist letter from a well known company
that claimed the robot in the book looked too similar to theirs. This
is where a lawyer saved our butts a second time. Our lawyer told us
that there were basically two categories of companies that send these
sorts of letters, companies
looking to make a quick buck, and "true believers". The first type of
company would likely go away quickly if they received any resistance
(like a carefully worded email from our lawyer). The second type of
company believes they have created something that is truly unique, and
will fight till the bitter end to prove that you stole their idea.
After discussing the case, it was pretty obvious we had a true believer
on our hands. The lawyer told us that we'd certainly win in court,
however, it was likely to cost us between $15,000-$20,000. We really
didn't
want to spend that kind of money, so we went back and redesigned the
robot, and re-inserted him into the paintings. While I'll always have
fond memories of the original design, many people like the new design
better, and over time the new design has become the character, even
more so than the original (at least to me).
Then we did a new, second,
Kickstarter, which was a huge success! We raised $11,640 of our $10,000
goal from 230 backers, and selling 243 books! We ended up printing 1000
books, so the remaining 757 books that weren't presold in the
kickstarter were sold at comicons and through our website, and I'm
happy to report we sold out of all books in 2023, 6 years later.
For the later books, one successful kickstarter gives people confidence
in a second kickstarter, which can lead to more sales. I don't think
Megastructures would have been as successful without Story Of Inc
funding and shipping.
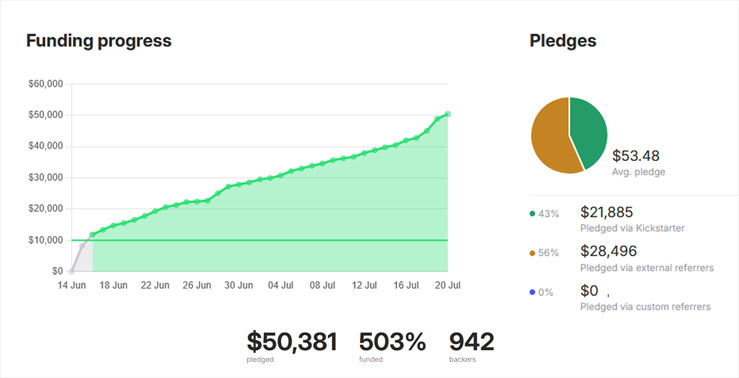
Here's the final results for the Megastructure First Printing
Kickstarter in 2021.
We asked for the same goal of $10,000, but got over $50k, with 942
backers!
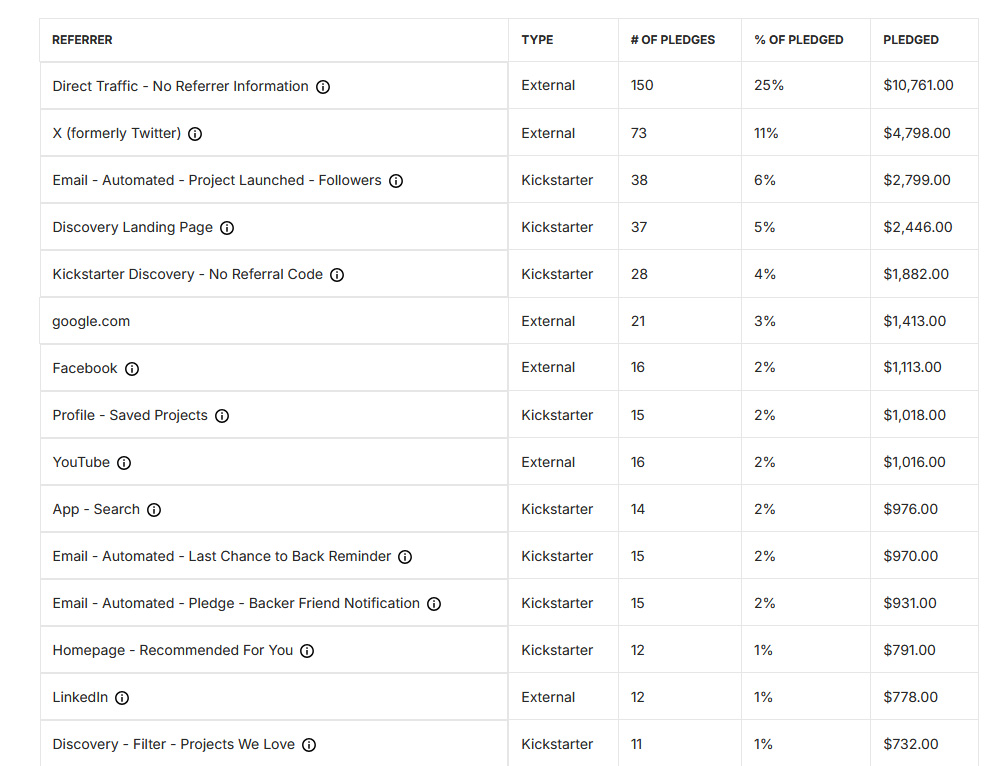
Years later, after Megastructures sold out, people kept asking
for a reprint. So we decided to do another kickstarter to see if there
was enough interest in a second printing. Turns out there was...
And here's where the people who pledged for this kickstarter came from,
Twitter (at the time, 2024) was the #1 single source of referrals after
"Misc".
10) Registering
Once you have your book, and its getting close to final layout, it's
time to registered your book. These rules may differ in other
countries, but here's the 3 things you should do in the USA.
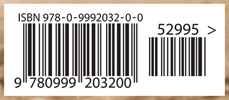
Get an ISBN, or International Standard Book Number, which
will go on the inside and outside of the book as an identifier.
Bookstores will want this, as well as Amazon, and other distributors.
You can get the number made into a bar code, which is the barcode found
on the back of most books. Here's a useful Article on ISBNs: Everything
the Indie Author Needs to Know about ISBNs for Self-published Books
and here's where to buy your ISBN: Bowker
Identifier Services
Get a Library
Of Congress number (LCCN) as well, and place it inside the
book on that 2nd or 3rd page mentioned in section 7. Then, once the
book is printed, send the Library Of Congress a copy of the book.
You can also register the book with the US copyright office as
part of getting your LCCN. All eligible work is considered copyrighted
the
moment you make it, but getting it officially copyrighted will give you
some mild
extra legal protection if someone else decides to try and steal
characters or
specific story points from your book.
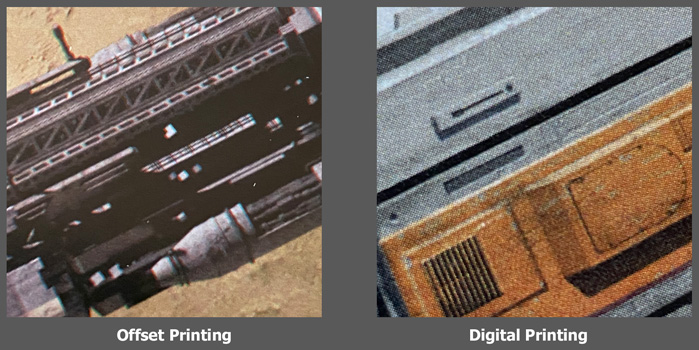
11) Printing
There are a number of ways to print a book. The main two are...
Offset
Printing (giant printing presses)
Digital Printing (not too
different from using a standard
office printer).
Here are the advantages and disadvantages of each...
Offset Printing
best color
more expensive
must print all the books at the same time
the more books you print, the lower the cost of printing each book
Digital Printing
not as accurate color
cheaper
can print “on demand”
less bulk discount
Here's an example of the print quality difference...
Next, you need to decide where to print your book. While it's nice to
print everything locally, the price difference between that and
printing in China can be substantial. The advantage of local printing
is that it costs a lot less to ship the books to you. The downside is
that our research showed that to print the book locally would be 2x3
times more expensive than China. So most books are printed in China.
There are plenty of websites out there that can give you an estimate on
how much it would be to print and ship your book from China, just give
them the number of books you want, number of pages, etc, and they'll
give you a full quote. This number is helpful when deciding how much
money you need from your kickstarter, and how much to sell the book for.
We used offset printing for Inc and Megastructures to have the highest
quality color reproduction. So we printed those in China using On The
Mark
printing http://www.onthemark.net/
after a friend recommended them. They were great, they really care
about quality, they had amazing communication, and they put up with all
of our annoying questions.
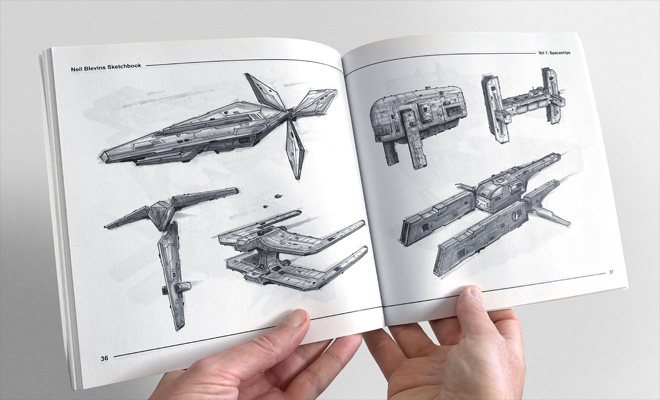
Since my sketchbook was black and white sketches, we didn't need the
amazing color, so we used on demand printing from Amazon, printing as
we needed more instead of pre-printing a ton beforehand.
The printer will need the book layout from your layout artist, also the
cover for the book, which they will likely give you a template for.
Then they will print a proof, a test of how the book should look. For
our first proof of The Story Of Inc, we did a
proof with the Digital Printer (even though the final book would be
printed with Offset Printing), and the results looked really
desaturated. So we paid a little extra and did a proof using a process
much closer to the final Offset Printing process, and that proof turned
out great. And it was almost identical to the final printed book. So
even though it's a few
hundred dollars more, go with the Offset Printing proof, so you really
see what the final product will look like.
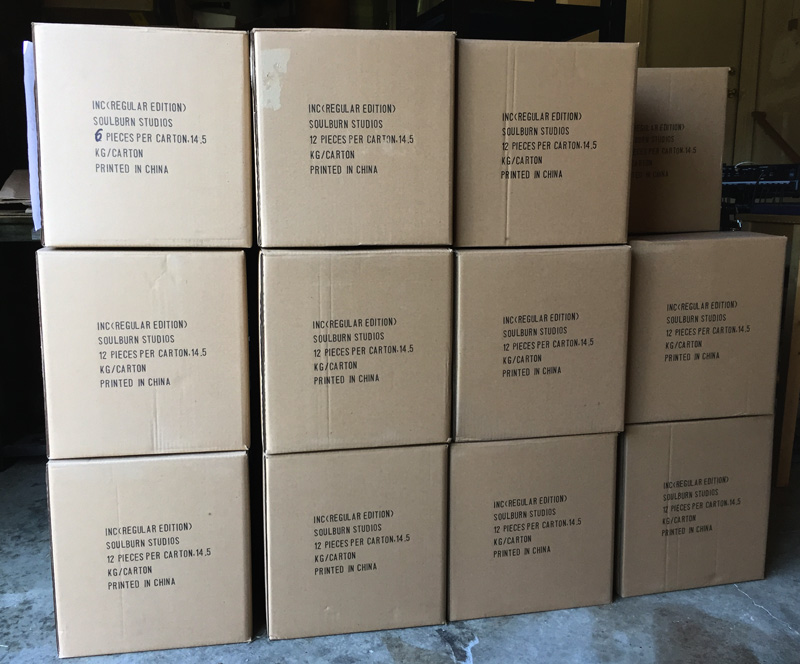
Inc cost approx $15 per book to print in 2017 (168 pages, 10.25" x 8",
1000 copies), which includes printing, proof and shipping to our
distribution center via cargo ship and truck.
Large publishers can get better deals on per book cost.
Also related is how much should you charge for your book?
• Most customers are used to $30-55 for a top
quality professional artbook
• Have seen several $80 books on kickstarter fail to
fund, so as of 2025, would recommend keeping it below $55.
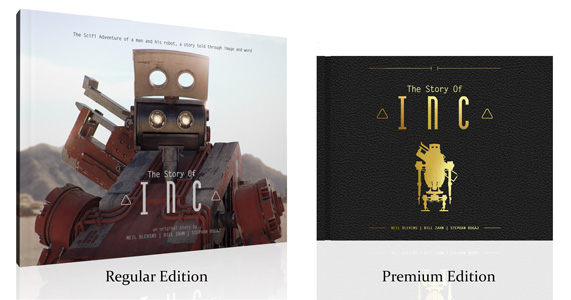
Our printer suggested doing two edition of the book, the regular, and
the special edition. The regular has a normal book with dust jacket,
the special edition was in black cloth with a shiny gold emblem. We
printed 750 regular, 250 special, and sold both as different rewards on
the kickstarter.
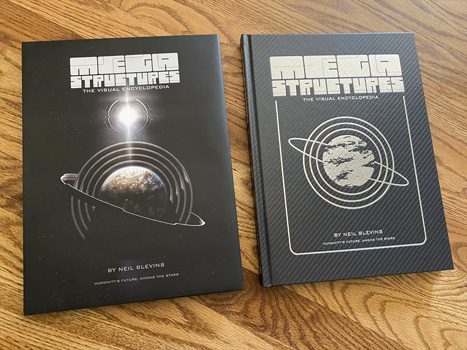
Turns out people really like having the choice of regular or special
edition, so we did the same for Megastructures...
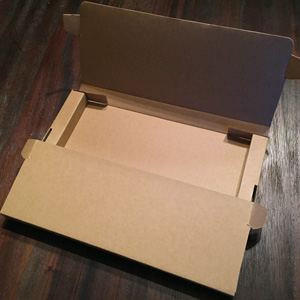
We also decided to go with using bumper boxes, per our printer's
suggestion. These are simple form fitting boxes that really protect the
book from damage. It added to the cost of each book, but can really be
a life saver, with fewer returns due to damaged books. Also, remember
to put a sticker on the outside of the bumper box with your ISBN
number, so when they are distributed, they don't need to be opened to
confirm it's the correct book.
Bumper box:
The Special Edition of the book, in a bumper box:
Finally, once you're sure everything is perfect, flick the switch and
the books will be printed and shipped to you in the US.
A tiny warning,
since we were bitten by this. Make sure you're not
printing your book anytime around Chinese New Year (Jan-Feb). The whole
country shuts down for a month and your book won't get printed or
shipped until
after Chinese New Year is over. Now we make sure to get all our books
printed in the summer to avoid this.
12) Distribution
Now that you have your book, it needs to get distributed. We already
had pre sales through Kickstarter, so step 1 was to send the books to
the Kickstarter customers who paid for to them. Then we'd do an online
store to sell copies of the book (we used Gumroad for our online store), and
went to brick and mortar book stores to get the book sold as well (as
well as conventions).
Rather than ship "The Story Of Inc" ourselves, we decided to go with
Fulfillment
by Amazon. All the books are kept in an Amazon warehouse, and when we
make a sale, we give Amazon the address to ship to and they do,
charging us once a week for the shipping cost for all the books shipped
that week. This has a number of
advantages.
It was easy to know how much shipping was going to cost for the
US and worldwide since amazon gave us all that data, so we could build
that into the shipping price of the
book. For our book, amazon charges approx $6 to ship to the US, and $20
to ship worldwide. This was in 2018. Sadly books are far more expensive
to ship now, especially for international.
Note Amazon does not ship to Canada or Israel,
so
if you get orders from those two places, you'll need to ship them
yourself using USPS (this is due to some strange international laws).
Amazon has a lot of experience shipping and keeping things in a
warehouse, so you don't have 1000 books in your garage.
One of the downsides is it's very complex to set up. Amazon is very
picky about how you list and ship the books to their warehouse. But
once you've
set it up, it takes all of 60 seconds to ship a book, so every time you
get a new sale on your online store, just go over to your Amazon
sellers account and give them the name and address. We followed this
tutorial to
set up our Amazon account: https://gameswithoutstrings.wordpress.com/2014/07/16/using-amazon-fulfillment-to-ship-your-kickstarter-product-part-1-of-4/
For Megastructures and after, we used a company called Fullfilrite
instead of Amazon, they were easier to setup.
A lot of the books were also sold at conventions. I'd sold prints at
conventions before, but books sell a lot better than prints. This is
likely because...
You get a lot more art for the same price, increasing the value
in the customer's mind
They feel like they've bought into a universe, not just a single
moment of art
Even if the book shelves are completely full, the customer always
feels there's room for one more book on the shelf!
Here's some percentages of books sold by format:
Inc: Physical: 90% Digital: 10%
Megastructures: Physical: 80% Digital: 20%
Sketchbook Vol 1: Physical: 85% Digital: 15%
Hulls: Physical: 93% Digital: 7%
It's so nice to see people still love physical books! No reason not to
sell digital anyways, it's almost free money, and help international
folk who don't want to pay for expensive shipping, but making a
physical book is certainly worth it from a sales perspective.
As far as sales go, I usually sells about 40-50 books per convention
when I'm only selling a single book, and when I have 2 or more books
for sale, I usually sell double at 80-100 because people buy both.
13) Publicity
Now it's time to publicize the book. The Kickstarter was a great first
step at publicity, but to keep the book selling...
do interviews
send free copies of your book to everyone who might be able to
persuade other to buy it (word of mouth)
Find magazines, online sites, any avenue to get the book out there
If you hope to see the book made into a film, send copies to
producers and directors
Make a book trailer! we made a book trailer as part of our
Kickstarter campaign to help get people excited about the book. It's
basically a bunch of the paintings lightly animated in After Effects
with music, sound effects, and a narrator. Check out the trailer here: https://www.kickstarter.com/projects/artofsoulburn/the-story-of-inc-narrative-artbook
This is one area that a good publisher can help, if they believe in
your book, they can do a lot of marketing, and reach a lot of people
that you are unlikely to reach on your own. So self publishing can be a
disadvantage in this regard.
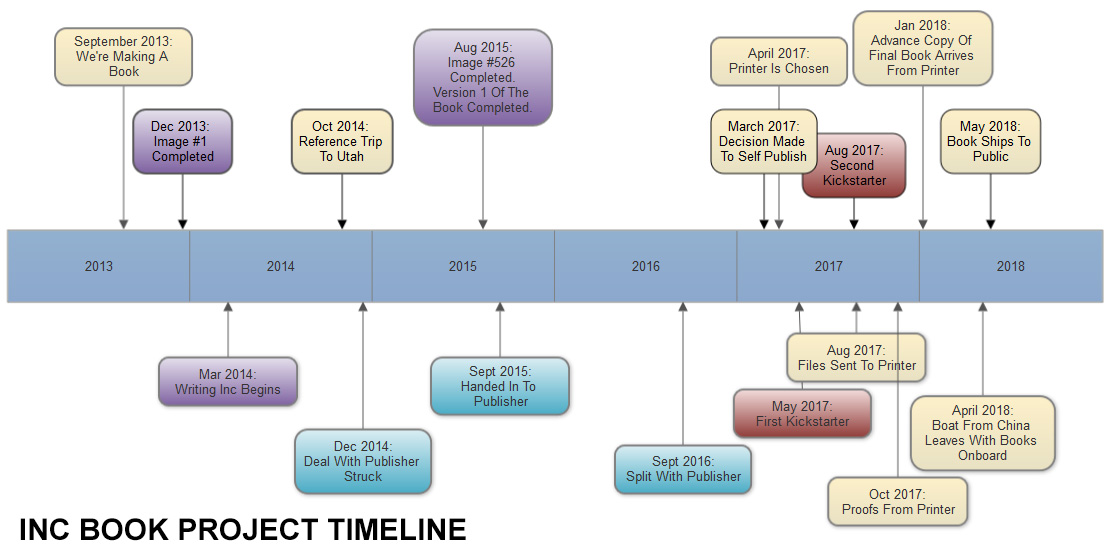
Timeline
Here's a quick timeline that shows when the major events
of the project took place. This will give you some idea how long
different portions of the project took.
Conclusion: The Hard Monetary
Reality Of Selling Books
So before we end this little article, here's a little
harsh reality for you of how much money you are likely to make.
The average book only sells 3000 copies in its lifetime.
From
what I've heard, "art of" books based on big name film or videogame
franchises sell on average 50,000 copies in their lifetime.
The cover price for most "art of" books is around $40 USD.
So let's do some math.
Profit From Using A Publisher:
3000 books x $40 (160 page book) = $120,000 USD
(all prices are in USD for the remainder of the example)
Where the money goes:
50% of the sale price of the book goes to the bookstore or
online retailer like Amazon.
42.5% goes to the publisher for their
editing, layout, printing, marketing, distribution.
And you get 7.5% of
the cover price (15% net).
So in this example:
the Publisher gets $51,000
printing costs
approximately $5 a book for 3000 books for total of $15,000
the publisher gets $26,000.
The artist gets $9,000.
I did the majority of production on our book from Oct 2013 to Sep 2015
= 23 months = 100 weeks x 14 work hours a week = 1400 hours of work. If
you
add the time spent by the other artists and writers, it's probably
double that, or 2800 hours of work to make the book. That's 2800 person
hours of work, divided by 52 weeks x 40 hours a week, which means the
book took 1.34 person years to produce.
That comes out to making $3.31 an hour
So if I worked on projects like Inc full time with a publisher, I would
make $6,716 a
year.
Profit From Self Publishing, distributing in a Bookstore:
Don't split money with publisher (yay!).
Printing price is higher because you don't get the deals a
publisher can get
you have to do all the work a publisher would normally handle,
so that increases the number of hours spent on the book
without a
publisher marketing your book, you reduce the total amount of units to
2000
say 2000 books printing cost is $15 per book
bookstore takes 50% of cover price, which is $20
artist makes $5 per book, or $10,000 total vs $9,000 with
publisher
You can of course raise the price of the book, but how far can
you raise the price before it will affect sales?
Profit From Self Publishing, Personal Sales:
• Don't split money with publisher or bookstore
(double yay!).
• Printing price is higher because you don't get the
deals a publisher can get
• you have to do all the work a publisher would
normally handle, so that increases the number of hours spent on the book
• without a publisher marketing your book, or a
bookstore distributing, you reduce the total amount of units to 1000
• say 1000 books printing cost is $20 per book
• artist makes $20 per book, or $20,000 total vs
$9,000 with publisher
• still not enough to live off of
Another way to look at it, say you need $100,000 a year to live a
comfortable life. With the above figures, I'd have to sell 44,669 books
a year. So my book would have to sell as well as an art book for a
major motion picture or videogame to make a decent living.
What I'm trying to tell you is, while most of us have the dream to work
exclusively
on our own artistic vision and get paid a living salary for it, that
dream is very unlikely.
So the next best
dream is to find a company or set of freelance projects that you enjoy
and can
believe in, make enough money off that to live comfortably, and find
some time
to make your own books on the side. Or else move to a location in the
country where your rent is ridiculously low. :)
We were very lucky to have sold over 3000 units of Megastructures.
But don't fear! There are upsides to making a book, even if money isn't
one of them. Some of those upsides include:
You have a book! That's something to be proud of. It's so cool
holding your own book in your hands.
I was inspired by books growing up, so if you do a good job,
others will be inspired by your book to make art. Pass along the torch!
People will see your book, and may hire you for other projects.
Your book becomes a giant portfolio piece, not just because of good
art, but because you have shown you have the discipline to do all the
work necessary to produce a book.
You can shop the book around for a film deal, videogames, comics,
other books.
Anyways, hopefully this discussion inspires you to
make your own book, and doesn't scare you away from doing it :) Perhaps
some of this information will give you a head start in your own
project, so you don't have to learn everything through trial and error.
If you're interested in purchasing any of the books you see here,
please visit the Book Section of
Neilblevins.com. And thanks for reading!