Banging Up Your Geometry In
3dsmax
By Neil Blevins
Created On: Oct 5th 2005
Updated On: Dec 6th 2024
Software: 3dsmax
One thing that will give away the "cgness" of your scene is
perfectly straight edges. Any edge, whether it's a table top, table
leg, the edge of a box, whatever, won't be perfectly straight in real
life. This is
most evident on beat up objects, but even clean objects have a little
randomness to their shape, and so to achieve realism it's a good idea
to bang up your geometry some.
The following are several methods for
doing so inside of 3dsmax, and some thoughts on the process.
Here's a picture to get us in the mood. A nice clean truck trailer,
but then all of a sudden, a big dent in the center. These are the
details that add realism to our models.

Noise as Modifier
So basically what you want is a slight variation to the position
of the vertexes in your mesh. One way to approach this would be to
write a script that goes through each vertex of your mesh and
randomizes its position based on some deviation value. However, there
are
a few disadvantages to this method. The main one is if you affect the
vertexes of your original mesh,
and then want to go back and edit that mesh, you now have a messy
polygonal mesh to try and modify. It's far better to to have an
unmangled mesh, and store your randomization in a modifier that can be
turned on and off, in case you ever want to go back to the original
clean mesh.
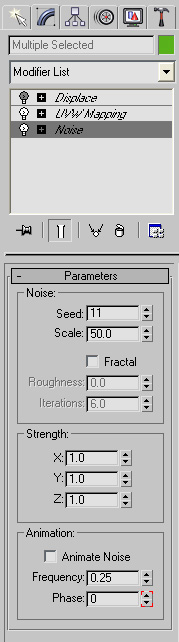
So instead of the vertex randomization method, try the Noise Modifier.
It achieves the same thing, but with extra control over the size and
scale of the noise, and it's a modifier so you can turn it off and go
back to edit your unmangled mesh anytime you want.
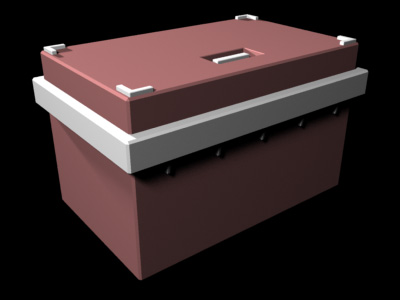
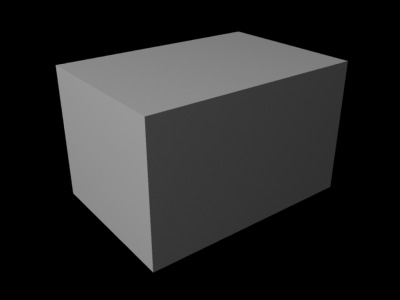
Take the following mesh for example, all perfectly straight cg edges...
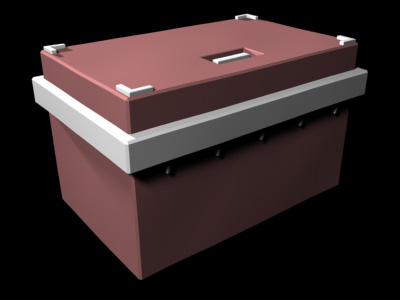
Then here it is with a Noise modifier applied, and I played with the
scale and intensity of the noise a bit.
Remember, if you want your mesh to look badly mangled, consider a
smaller noise size. If you want just general variation, a larger one
would be better. I've also increased the strength on this test so you
can see the difference, in actual production work you may wish to have
a very, very low intensity, you don't need to necessarily beat the
audience over the head with the damage, just suggest it.
And keep in mind, your mesh needs enough complexity to it to deform
properly. Here's the density of my mesh...
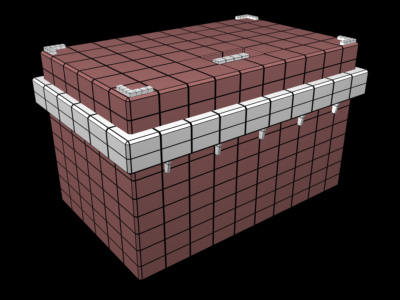
If this were a 1 x 1 x 1 segment box, it wouldn't deform smoothly.
Also, if you have several objects, make sure each has a separate and
unique seed value, so that the noise doesn't look the same on each
object.
Noise as Displacement
Similar to the noise modifier, but instead it's either a displace
modifier, or a displacement in your shader.
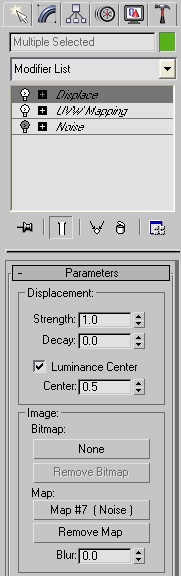
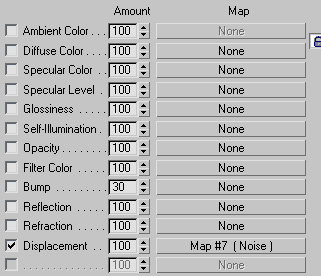
There are several advantages to this method. You
can use any map type, including bitmaps, to displace your mesh (the
noise modifier only has a single type of noise). For example, apply a
noise set to fractal and play with the high and low clamp, so some
areas of your mesh go completely unmodified, and some are heavily
modified.

Also, packages other than 3dsmax generally don't have a noise modifier,
but do have a displacement shader of some kind, so if you're using a
different 3d package this may be the best way to perform this operation.
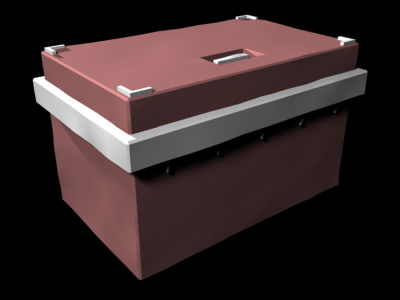
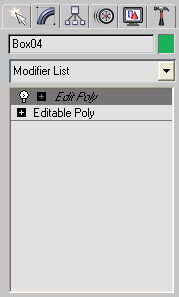
Manual Placement
There's always the option of manually placing bumps and bangs. Apply an
editmesh or editpoly modifier and start moving vertexes, or even add
new faces for more specific damage (like chipped corners, for example).
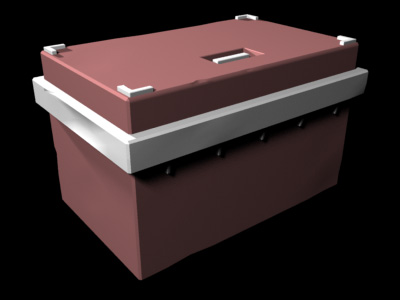
This has a few advantages, first off, your noise can be very specific.
Every set piece has a history, why did it get banged up? Did something
fall on it? Was it damages on purpose? Was it neglected? Maybe a
specific bang in a specific area can relate to the story your image /
animation is trying to tell. Take a look at the example above, I
crumpled the left hand ridge on the box. This seems like a spot a
character may pick up a box such as this, so if it's crumpled that
might infer that the character who picked this up is very strong, so
strong he actually damaged the box when he picked it up. And there's a
big gash on the right lower side, which suggests maybe the box was
dropped. So maybe the big strong guy also isn't very careful. And there
are chips off the edge of the cover, which suggests the box may get
opened a lot. You see,
from a simple prop and a little damage, as well as adding realism, we
can also get a whole story which can be used to enhance the story you
want to tell.
The big disadvantage is that it takes longer to do, and if you change
the topology of your base mesh later on, you may need to throw away
your manual bangs and
bumps in the Edit Poly modifier since it's based on geometry that may
no longer exist.
Combining Procedural and Manual
One possible strategy is this: only use the manual methods
on
"hero" objects, objects that are seen close to camera or interact with
a character. All the background objects can have more random procedural
noise like the noise modifier method.
Another is to combine both methods on the same object, start with a
noise modifier, then add a few manual bumps and bangs. The big
advantage is you still get a few hero bangs to show specific damage,
but you don't have to do as much manual work. Sometimes when the eye
sees a few specific bumps, it doesn't notice the ones that are less
specific, it just accepts that they must be manually added to.
Volume vs Surface
Another thing to consider is the type of material you're
affecting. Every kind of material shows damage in a different way, and
you should take that into consideration. For example, a large planar
object like say a plastic wall panel will tend to warp and bulge in the
middle. So when damaging your objects, damage it like a real object
would.
As well as material, consider construction history. Take a box for
example, I know we all want to save time on modeling, so if we have a
box, we generally use a box primitive...
But notice what happens when it has noise applied to it (again, I have
exaggerated the noise so you can see the obvious difference)...
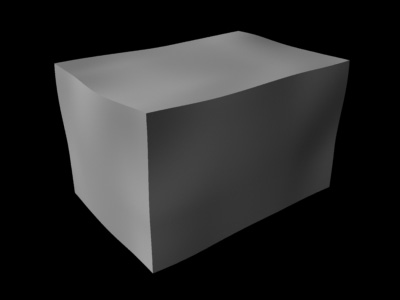
Why does this look wrong? Well, the noise runs through the object in a
uniform way. This makes the object look like a solid cube, instead of a
shell. That's because a real box is made using 6 panels that are
attached together. So when damaged, one panel may receive a different
type of damage from the next. Take a look at this image, where I've
added a different noise (with a different seed value) to 6 separate
pieces that make up my box...
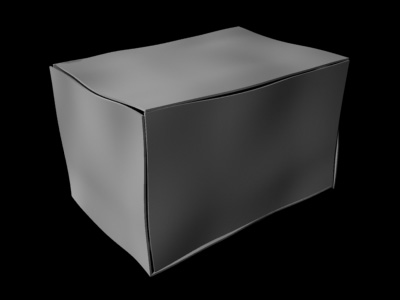
This may be overkill for far away boxes, but if you plan on getting
close, this may be required.
Anyways, hopefully this will give you a few ideas on how to rough up
your own models.
This site is ©2026 by Neil Blevins, All rights
are reserved.
To see hundreds of other tutorials similar to this one, visit the
Neil Blevins Education Site