Here's a tutorial discussing two materials, both using falloff, and how I made them.
Lifeline Pod
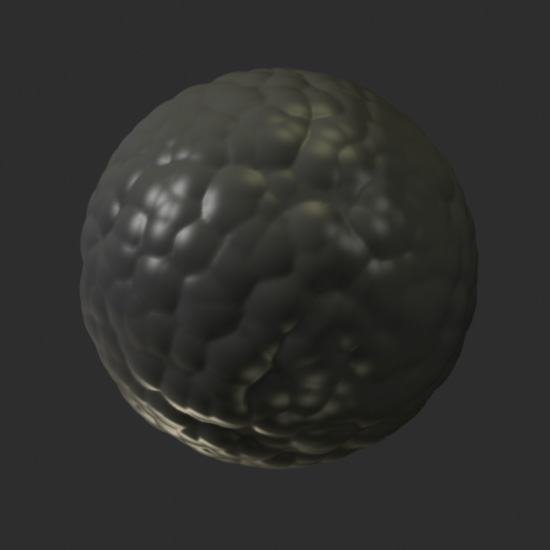
The first material is based on my Lifeline image. First, download the file (r4). This material is several layers, first, I used a cellular displacement map to make the big bumps.
Special Note: Many people
have taken this material and applied it to a regular polygonal sphere,
and not gotten the nice displacement that you see above. The sphere I
use in the example file is a Nurbs sphere. When you displace a Nurbs
sphere, it automatically tessellated into really small polygons to get
you the nice smooth displacement you see above. In order to get a
polygonal sphere or another polygonal object to do the same thing, you
need to use a Disp Approx modifier on your object. Look up Disp Approx
in the max helpfile for more information on how to use the modifier.
I then applied a smallish bump to give some variation on the surface. Notice that even though I am using just a single bump in the material, the combination of bump and displacement means I have more variety in my bump, with larger and smaller bumps. All materials in nature have variety to their coloration and bump, I see a lot of artists throwing a simple noise in their bump slot, and then wondering why their material doesn't look realistic. No surface has the same bump over every inch of its surface. Practice blending between bump maps or using bump and displacement maps to add different sized and shaped bumps on the surface of your objects.

Next comes the color, it's a reasonably complex mix of several materials, the thing to note is I use the same map I used to displace the surface to place a darker color on my object, so it looks like the coloration of the surface is lighter on the round parts and darker in the crevices. That's another thing to remember, let your bump map and diffuse color map work together, usually areas that have a specific roughness to them (bump) also has a different coloration. By using elements from your bump to color your diffuse you make your material look like it was grown instead of just thrown together.
Next comes the reflection slot, where I placed a falloff material. Since the surface of my material is supposed to be wet and slimy, wet surfaces reflect back the environment. They also reflect the environment based on the fresnel equation, which states that objects are more reflective on the edges pointing away from you then on the surface facing you, and this relationship is determined by the IOR of the surface. Since this material was made over 3 years ago before I even knew what an IOR was, I am not using a fresnel falloff, but a Perpendicular / Parallel falloff, which in this case does pretty much the same thing, except it's not as based on real world physics. Anyways, the edges of the sphere reflects the environment, which is grey.
Last comes the luminosity map. If you imagine the surface of the pod
being covered by another skin, like a thin slimy membrane or maybe a
waxy
material, you get the idea of the effect I went for here. This second
surface
follows the fresnel law, and is reflecting the scene, but instead of a
straight reflection of the environment, it's taking the light and
reflecting
it back in a different manner, providing a bit of an eerie glow type
effect.
Again, I did this material 3 years ago, and I have a much better
understanding
of materials now (and hopefully 3 years from now, I'll have an even
better
understanding), so if I were to redo it I'd probably use some different
methods such as true fresnel reflectance, and maybe a shellac material
instead of the luminosity map, but overall, this material follows how a
real material might be grown in the real world.
Special Note: If you do add
a shellac material to your pod, note that shader based displacement
does NOT work with Shellac (it's an old max bug that's never been
fixed). So if you want to use Shellac, use the displace modifier
instead on a polygonal sphere.
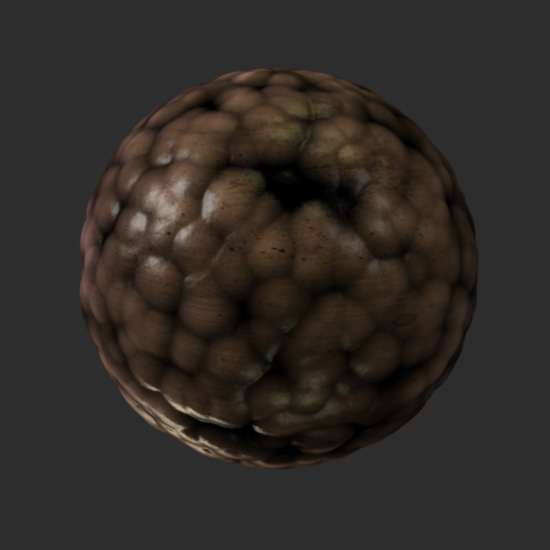
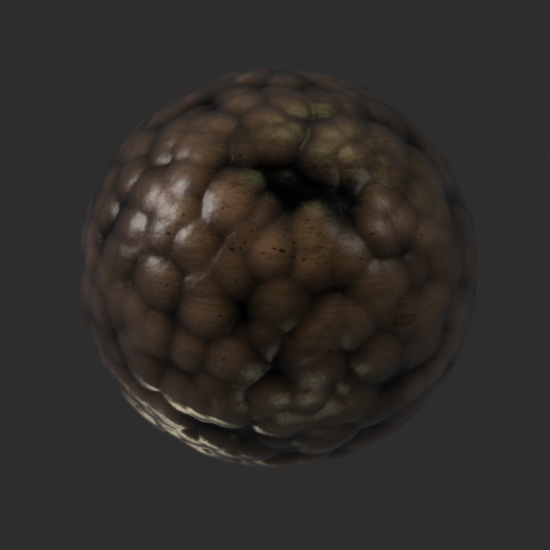
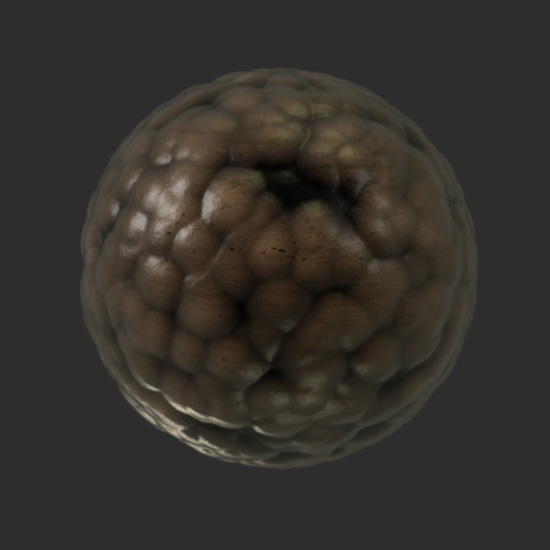
Blood Cell
I recent was shown some cool shots here for a documentary called BodyStory, basically a lot of cg shots of bloodcells and other "inside the body" shots similar to the FightClub intro. Some real nice work, all using prman for rendering, but I wanted to show that similar effects can also be achieved in max. While prman is a versatile renderer that has many excellent features, it's the knowledge behind the work that really lets you achieve whatever look it is that you want. In this case, noticing that many of the materials use a falloff derivative and various procedural noises.
Take for example this image...
http://www.jackals-forge.com/bodystory/blood_s6.jpg
I made a similar material using falloff maps in max here...
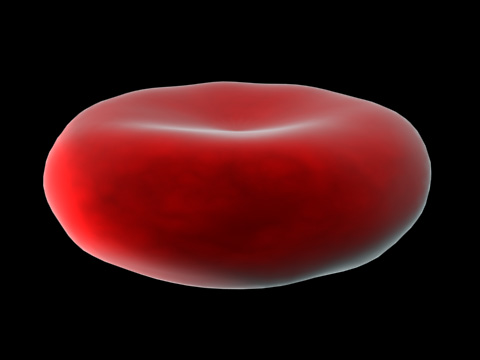
Here's the file (r4). Basically it's a falloff in the luminosity channel, and then a few layers of noise in the diffuse.
Not that max can replace everything that prman can do, but you don't necessarily need an expensive renderer to make good looking work. Use whatever you can afford, whatever you're comfortable with, and whatever can get the job done as quickly as possible.