Eye Highlights In Animation By Neil Blevins Created On: July 17th 2025 Software: Blender or 3dsmax (vray)
When making characters, one of the most important elements are the
eyes. Many would say they are the "window to the soul". While there are
several
aspects that give life to the eyes of a character, one important
element are eye highlights, which are the white circles you may have
seen in the eyes of 2d cartoon characters. But what makes a
good 2d eye highlight doesn't necessarily translate well to 3d, so this
lesson will go into what these highlights are, and how to best
replicate them in 3d animation.
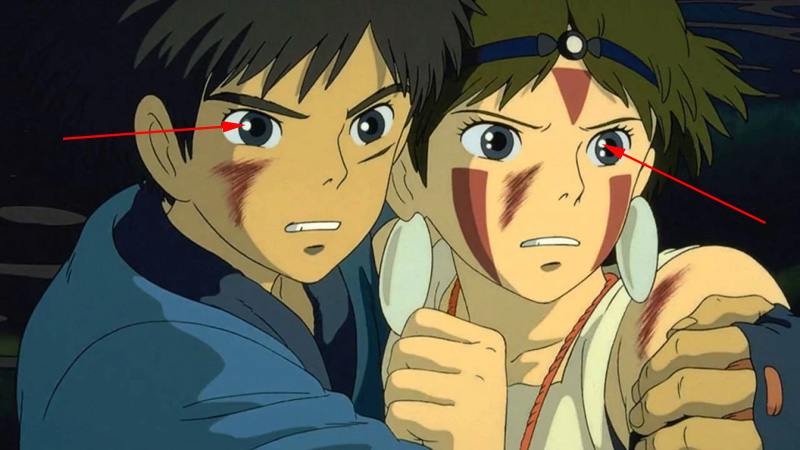
Use of eye highlights in Princess Mononoke by Studio Ghibli
Eye Highlights in Real Life
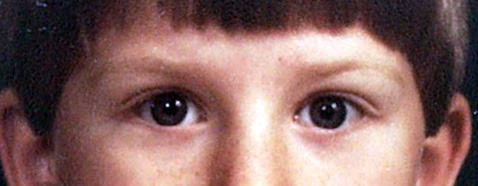
Highlights are actually specular reflections of bright
light sources. So "Eye Highlights" are just bright reflections in the
eyes of a light in your environment. For example, notice the two white
dots in each of these eyes...
These are actually just reflections of two light bulbs that are in the
room near the camera. And the two bulbs each reflect in each eye,
creating 4 white dots. If instead of a round light bulb, the object
being reflected was say a florescent light, the highlight in the eye
would be a long rectangle instead of a circle. Learn more about
reflections and highlights in this lesson: Specular
Reflections.
Eye Highlights in 2D
Based on the real world, artists started adding stylized
highlights into their drawings and 2d animations. They were so
effective people started adding them even when there was nothing in the
environment to justify them.
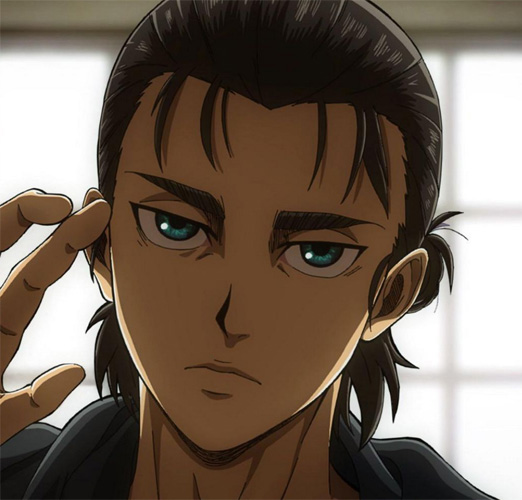
Anime does this a lot, for example, in this screengrab from Attack On
Titan, notice the window is behind the character, and the window is
really bright, and so is likely to produce an eye highlight if the
character were facing the window. But instead they are facing away from
the window, and yet still have strong eye highlights. This is a cheat
that is not physically correct, but in cases of stylized 2d animation,
you can frequently get away with it without distracting the audience.
Attack On Titan eye highlights
Eye Highlights in 3D
That 2d cheat is harder to get away with in 3d. Even if
stylized, a 3d film needs to more closely follow real physics. But
don't fear, there's still a little leeway to make something believable
but more artistically controllable.
In the ideal world, you achieve an eye highlight in 3d by making your
eyes reflective, and then placing a light pointed at the eyes to
produce the highlight. But this does limit you potentially, since to
place the eye highlights
to a pleasing spot in the eye, you may have to change the main lighting
in the scene. And this can be not only difficult, but could potentially
ruin the lighting on other parts of the character or on the
environment. So how do we control our eye highlight
placement without having to move the rest of the scene lighting?
For this, we take an old trick from live action films, and have an
additional light
source in your scene that only appears as specular reflections in
the eyes, and doesn't illuminate the scene otherwise. That way, no
matter
what the scene lighting is doing, you can always add that little
highlight to the character's eyes to make them feel more alive.
Lets give more details on how to do this in 3d software.
Software Agnostic Setup
The basic ingredients are as follows:
Eye Shading: High Specular Value, high IOR, low roughness
Light Placement: pointed at eyes from direction of any existing
keylight, 2-3 times further than the camera.
Make light Spec only, no diffuse
Have light only affect the eyes, no other scene objects
Blender Example
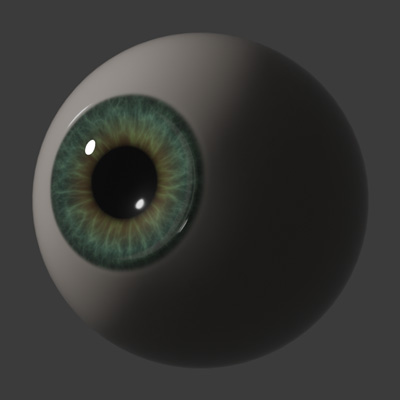
1) Give the eye's material a high specularity with very little
roughness and an ior of approx. 1.5. This makes the eye material very
reflective. Note: If doing this causes the environment to become too
prominent in the reflection, then reduce the IOR or IOR Level a bit and
increase the intensity of the Eye Light so that the highlight it
produces is still bright but the scene reflections are less intense.
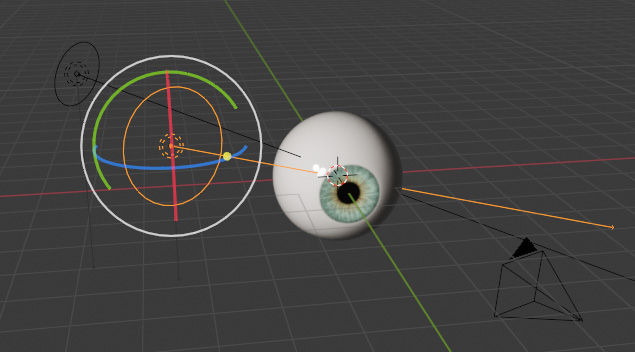
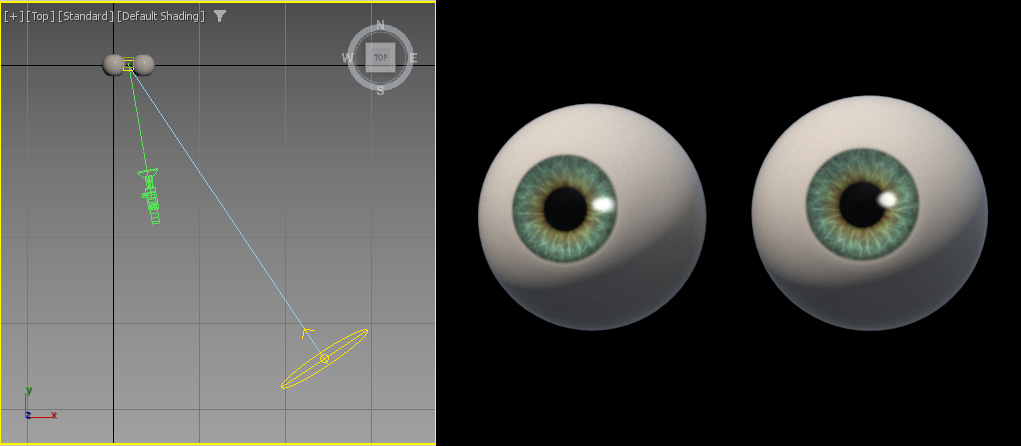
2) Along with the current scene lighting, add an area light to the
scene and point it towards the eyes (The Eye Light). Play with distance
of the light to
the eyeballs to get a good placement, I tend to find the light needs to
be 2-3 times further than the camera. Adjust the size and brightness of
the light to get the highlight shape and intensity you're after.
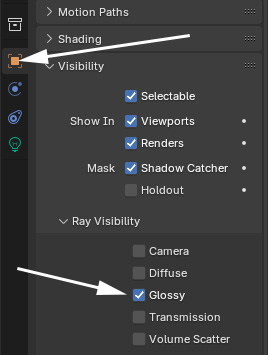
3) Select the eye light, go to the object properties tab, and under ray
visibility, uncheck everything except "Glossy". This will make this
light only
affect the Specular Reflection of the eyeballs.
4) Finally, lets make sure the light only affects the eyes. Go to the
"Shading" area of the eye light's "Object Properties" tab, go to Light
Linking, click "New", and drag your two eyeballs from the Outliner into
the Light Linking List. Now the spec only eye highlight light will only
affect the eye objects and nothing else in your scene.
3dsmax (vray) Example
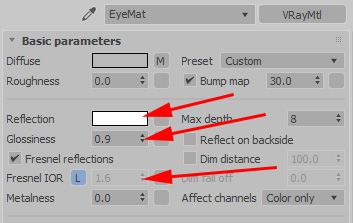
1) I start with a VrayMtl. Give the eye's material a
Reflection Value (white) with very high Glossiness and an ior of
approx. 1.6. This makes the eye material very
reflective. Note: If doing this causes the environment to become too
prominent in
the reflection, then reduce the IOR or Reflection Value a bit and
increase the
intensity of the Eye Light so that the highlight it produces is still
bright but the scene reflections are less intense.
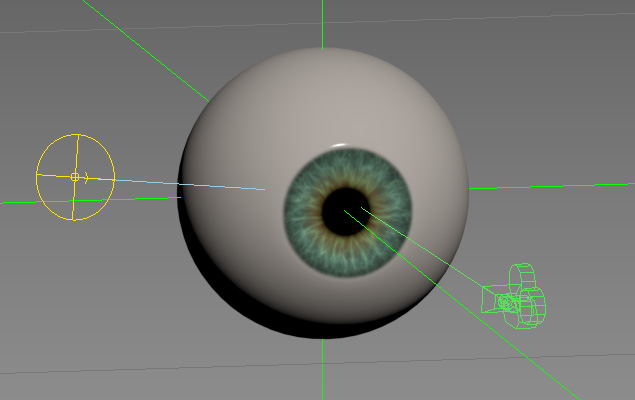
2) Along with the current scene lighting, add an area light to the
scene and point it towards the eyes (The Eye Light). Play with distance
of the light to
the eyeballs to get a good placement, I tend to find the light needs to
be 2-3 times further than the camera. Adjust the size and brightness of
the light to get the highlight shape and intensity you're after.
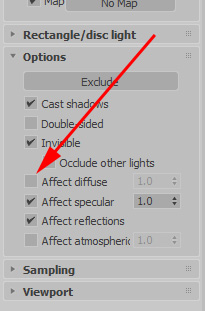
3) Select the eye light, go to the Options rollout, and Uncheck "Affect
Diffuse". This will make this
light only
affect the Specular Reflection of the eyeballs.
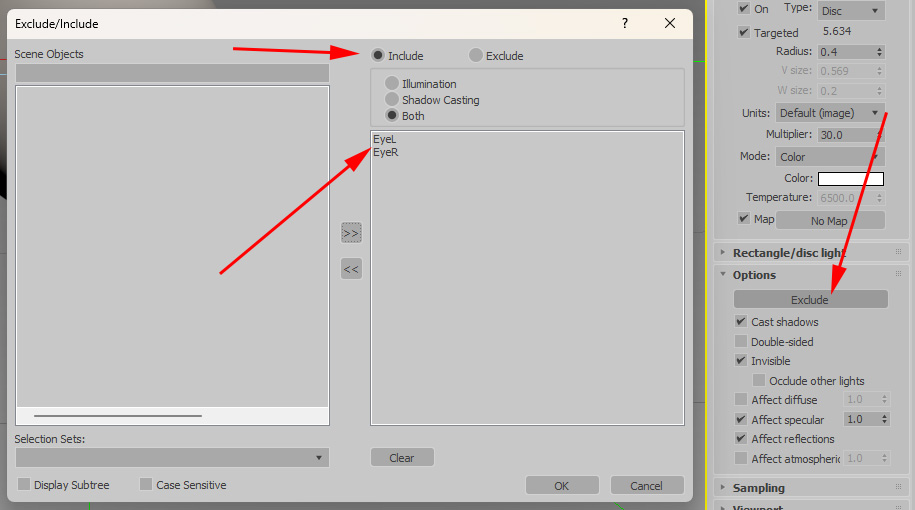
4) Finally, lets make sure the light only affects the eyes. Go to the
"Options" dropdown of your eye light, click the "Exclude" button,
change
the mode to "Include" and then add your two eyes to the list. Now the
spec only eye highlight light will only
affect the eye objects and nothing else in your scene.
Eye Highlight Placement in 3D
and 2D
So one big note, the flexibility of adding a special light
to create eye highlights in your scene comes at a cost, which is your
scene can look totally broken if you're not careful with the placement.
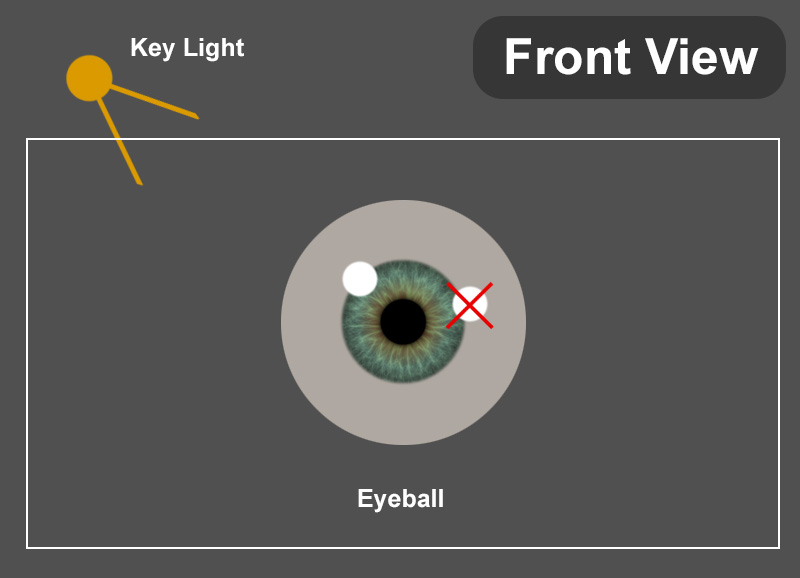
To keep the placement looking believable, try and keep the highlight
pointing towards the
keylight in your scene. Basically, while we don't need to have a
scene light produce the highlight, we do want it to appear that a scene
light COULD have created the highlight. So for example, say you have a
Keylight in the upper left of your frame, move your eye highlight light
so that the highlight it produces is in the upper left of the eye. Same
thing applies to a 2D scene, whatever part of the frame your keylight
appears to be in, place your 2d painted highlights in that direction.
While it usually is, it doesn't always have to be the keylight, but any
light that makes logical sense. Like if there's a computer screen in
your shot, and your character is looking towards it, placing the eye
highlight in the same direction as the computer screen also makes
sense. Or even place more than 1 highlight light if you have multiple
really bright light sources in your scene.
Also note, with a real 3d light source, you're not going to get the
highlight placed on each eye in exactly the same spot compared to the
pupil / iris. There may even be a moment if you're animating your
character where the highlight may appear in one eye but not the other
due to the angle of the eyes to the light. And that's ok, it looks more
realistic this way.
And finally, if you're making a 2d animation instead of a 3d one,
always make sure
the highlight appears on the same side in each eye in screen space. A
common mistake I've seen in student work in 2d is
to paint a highlight, then mirror the eye, but not keep the highlight
on the same side.
So avoid this, it looks unnatural...
And instead make sure it looks like this...
Conclusion
So next time the eyes of your character look dull or lifeless, add this
special eye highlight, I think you'll see how much it adds to your
scene.