False Color Textures By Neil Blevins Created On: June 12th 2014
Updated On: Dec 5th 2024
Software: Any
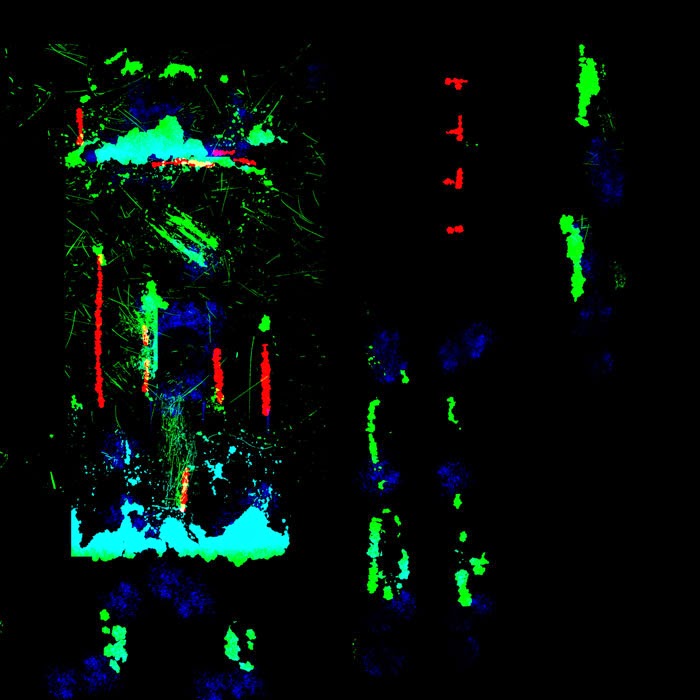
Here's one of the painted texture maps for the main robot in my project
"Inc".
Your
first question might be "what the heck is this, doesn't look like any
texture map I've seen". This texture map is a series of 3 greyscale
masks, one mask per channel RGB, and will be used to blend between a
metal, paint and rust material. This technique is called False Color
Textures, because the texture isn't meant to look like the final thing
on your model (like a color map), instead its 3 different values put
into a single bitmap, but meant to be split apart once you bring the
texturemap into your 3d program.
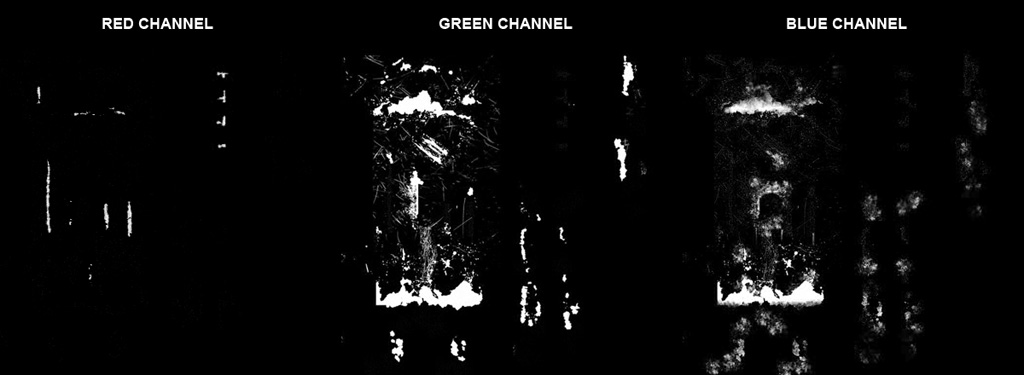
This funky colored image is really just 3 separate greyscale bitmaps:
These sorts of images can be either painted as 3 separate greyscale
maps in photoshop and then combined, or in my case, I just paint on 3
different layers using only the color red, blue or green, and then set
all 3 layers to Additive layer mode to create the final image.
Now let me explain how I'm using these 3 channels in my material in my
3d app:
First the model gets a metal material.
Then on top is
layered a paint material that contains procedural paint chipping.
Then the red
channel of this texture map adds some paint back in places to cover
over the procedural
Then the green
channel removes larger chunks of paint, revealing the metal below
Then the blue
channel blends a rust over top of the metal and paint.
Why use a single
false color image instead of 3 greyscale maps? Two reasons...
You now only have a
single bitmap to deal with instead of 3. Means far less clutter in your
maps directory, especially if your model has a lot of bitmaps, and more
difficult to accidentally misplace related bitmaps.
Some renderers
internally convert all greyscale bitmaps into rgb, which wastes bitmap
memory. So this technique can save memory in some instances. (1 rgb map
instead of 3 in memory).
If using 3dsmax, there are a number of ways to extract the channels
from your bitmap to
be used in your material
Use Cuneyt's ColorCorrect plugin (in the RGBA Space Channels
Mapping area)
Use max's built in ColorCorrection node (in the Channels Dropdown)
Use RGB Tint, just make the desired channel white and the others
black (thanks to Mitch Gates for the tip)
Check your favorite 3d app to find its way to take an rgb image and
split up its channels.
Anyways, just another tool, something to consider when you have a bunch
of related greyscale maps.