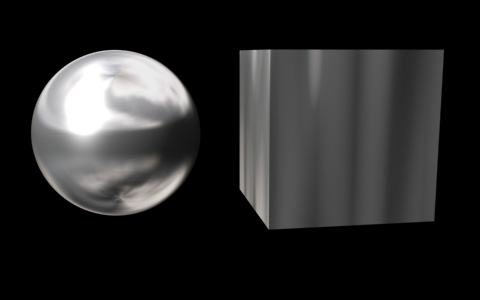
Ever notice how a metal shader in a CG application can look great on
a curved surface
such as a sphere, but that same shader looks bad on a flat surface like
a cube? What's up with that?
The reason is simple. Metals are highly specular surfaces, and hence
a lot of their color comes from a specular reflection of their
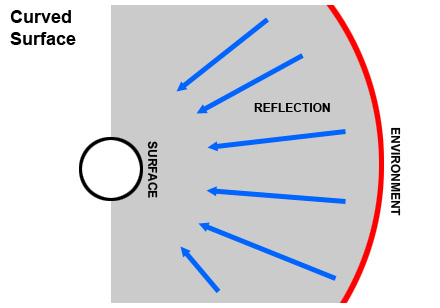
environment. On a
curved surface, any given area is able to reflect more of the
environment since the surface points in several different directions,
capturing more of the environment in its reflection. On a flat surface,
the surface is all pointing in a single direction, hence capturing less
of the environment in its reflection. It's actually reflecting just
like the sphere, but reflecting so little of the environment that it
appears to be one solid flat color.

Notice the faces of the surface pointing towards the viewer reflect
only a portion of the environment.
Notice the faces of the surface pointing towards the viewer reflecting a much larger portion of the environment.
How to fix this? Well, in real life, if you look at a flat metal
surface, that surface probably isn't really flat. Due to bad
manufacturing, or
heat or water damage, etc, that surface is actually slightly warped.
You may not be able to see it immediately, but it's there, and hence
what looks like a flat surface is actually a slightly curved surface,
and hence the reflections are a little more interesting, and so you
don't get the boring flat reflection you see above. So how do we
replicate this in cg?
Large Soft Noise
One way to fix this is with a very large sized by low intensity bump
map,
applied to your material. This will simulate that slightly warping that
causes flat surfaces to be not quite flat, and will give them a
more realistic reflection.
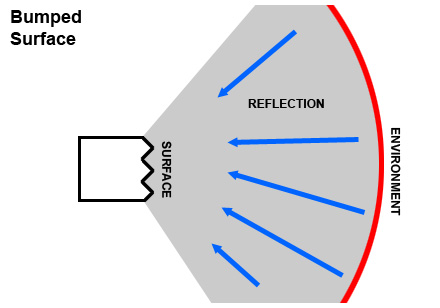
Notice the faces of the surface pointing towards the viewer reflecting a larger potion of the environment than the flat surface did. Also note the chaotic surface of the diagram above is as crazy as it is just to show off the principal, in actual fact you'll only be ever so slightly modifying the surface with a very low intensity bump.
So lets apply a procedural noise map to the bump slot of our
material (as an example, this is from 3dsmax, but every major 3d app
has a similar procedural noise)...
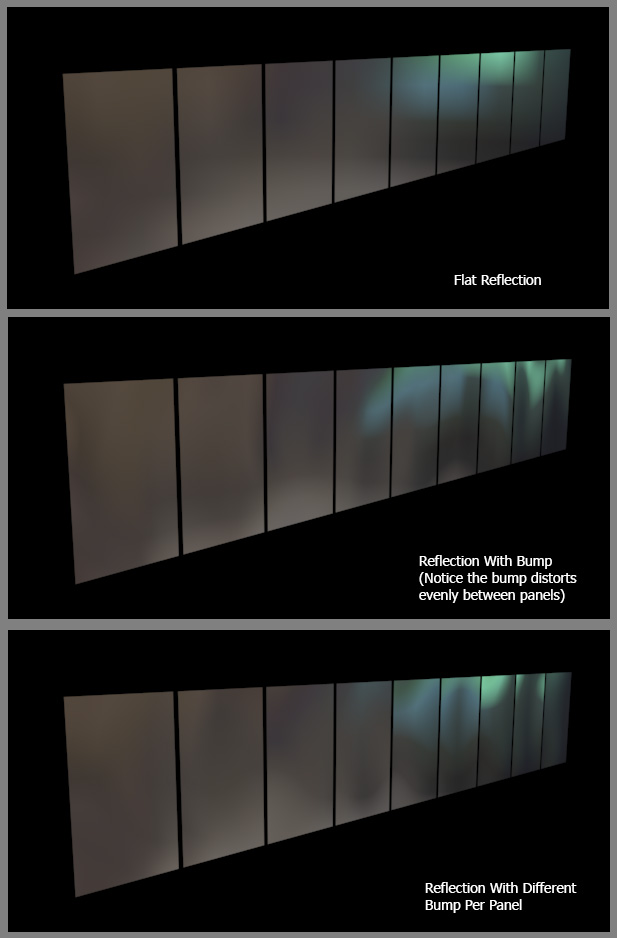
And we get the following result...
Now you have a more interesting reflection.
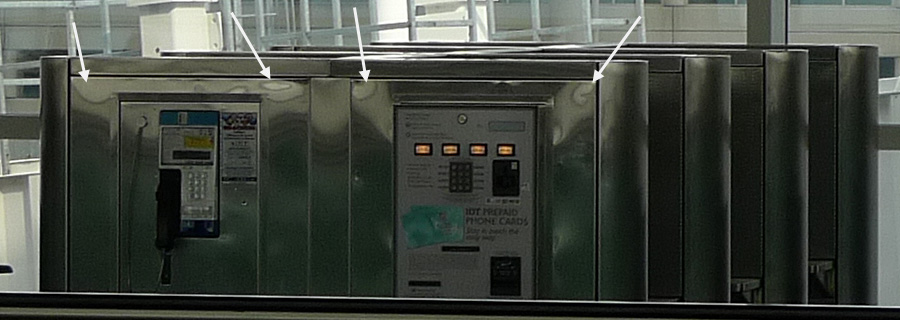
Here's a real photo of the effect. Notice how the reflection on
these metal phones in an airport get all distorted due to a warble in
the metal, even though the surface seems flat.
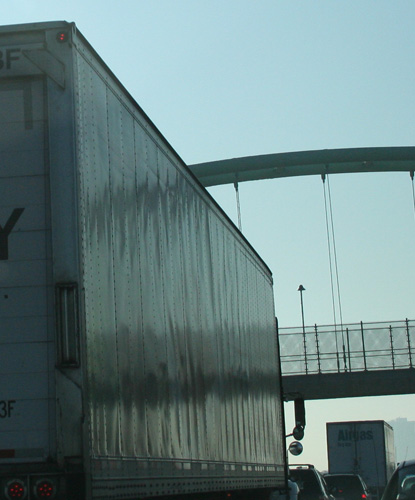
This surface isn't metallic, but it is reflective, and you can see
how the soft bump on the side of the truck distorts the reflections of
the bridge, even though the side of the truck seems to be flat.
You can use this bump technique both for a photorealistic image, as
well
as something a little more stylized, like those "chrome logos" you've
probably seen for videogames
and in commercials. Without the bump map, your text may look boring...

But add the bump, and you'll get something more visually
interesting...

In fact, if you animate the environment map, say moving it
horizontally, you can get that nice "reflection passing over the
surface" look, perfect for logos.
As a practical example, here's a logo I did for Blur Studio (the
client was Bandai) which uses this exact technique to do the chrome in
the logo.
![]()
Breaking Up Panels or Windows
Ramy Hanna has a good tutorial on a similar technique to break up flat panels (when you have multiple pieces of geometry, like windows in a building, instead of a single piece of geometry like the side of a truck.)