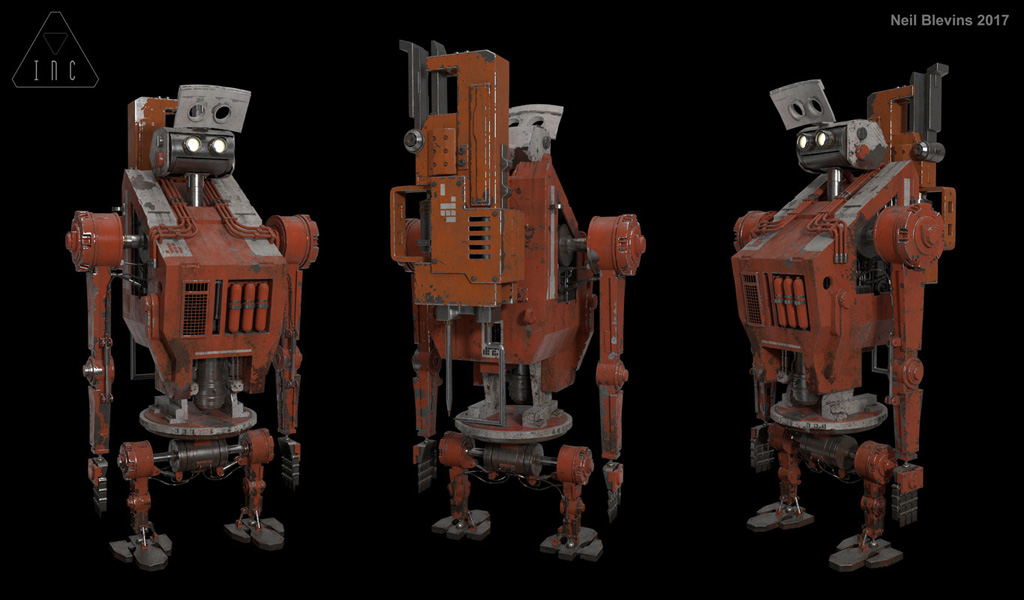
Designing Inc The Robot By Neil Blevins Created On: Oct 15th 2017
Software: None
This tutorial discusses the Design, Redesign, Modeling and Texturing of
Inc The Robot.
Designing Inc The Robot
I started off being heavily inspired by the classic robots from the 70s
and 80s. I also knew a little about his personality, he needed to feel
innocent, kind of awkward, a bit like a child's toy or even just a
child
himself, all due to his place in the story.
After designing the basic robot (version 1), he needed a past vocation,
and I
settled on construction. Now that he had a history, I could add the
remaining details based on that history, and I got heavily inspired by
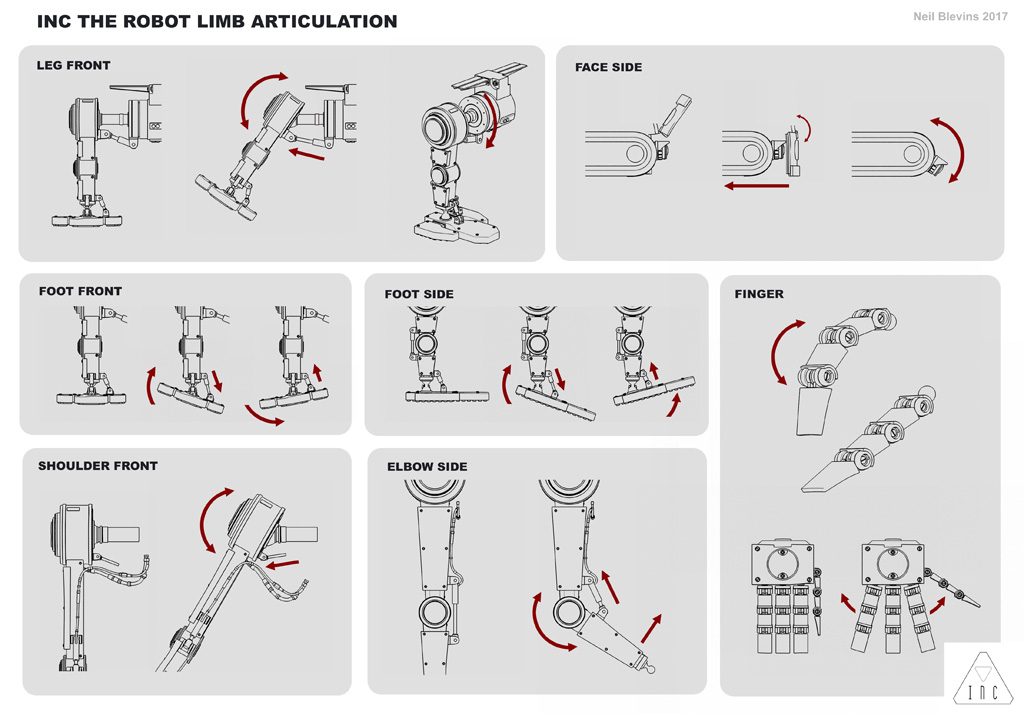
construction equipment. This arms and legs would be
modified I-beams. His joint would be based on hydraulics, like a power
shovel. I wanted his joints to be as realistic as possible, so I tried
to avoid fictitious joints wherever I could, but still give him a
decent range of motion.
The initial face I gave him had no mouth, and so I decided to have a
little mask that retracts to reveal a more articulated face. The mask
sort of reminded me of a welders helmet, which worked well with the
construction idea, so I decided he would be a welder. When it was time
to design his gun, I decided it would be far more interesting to give
him a modified spot welder. First it would make his weapon more unique,
and second it helped fortify the story of his original occupation. The hope was that the story
inspired the design, which then inspired
the story, which then inspired the design, round and round till we
reached the ideal result.
Everything was done when there was a concern that the final design
looked too much like an existing property. With so many trashcan shaped
robots out there, I figured designing yet another one wasn't going to
be a big deal, but turned out I was wrong.
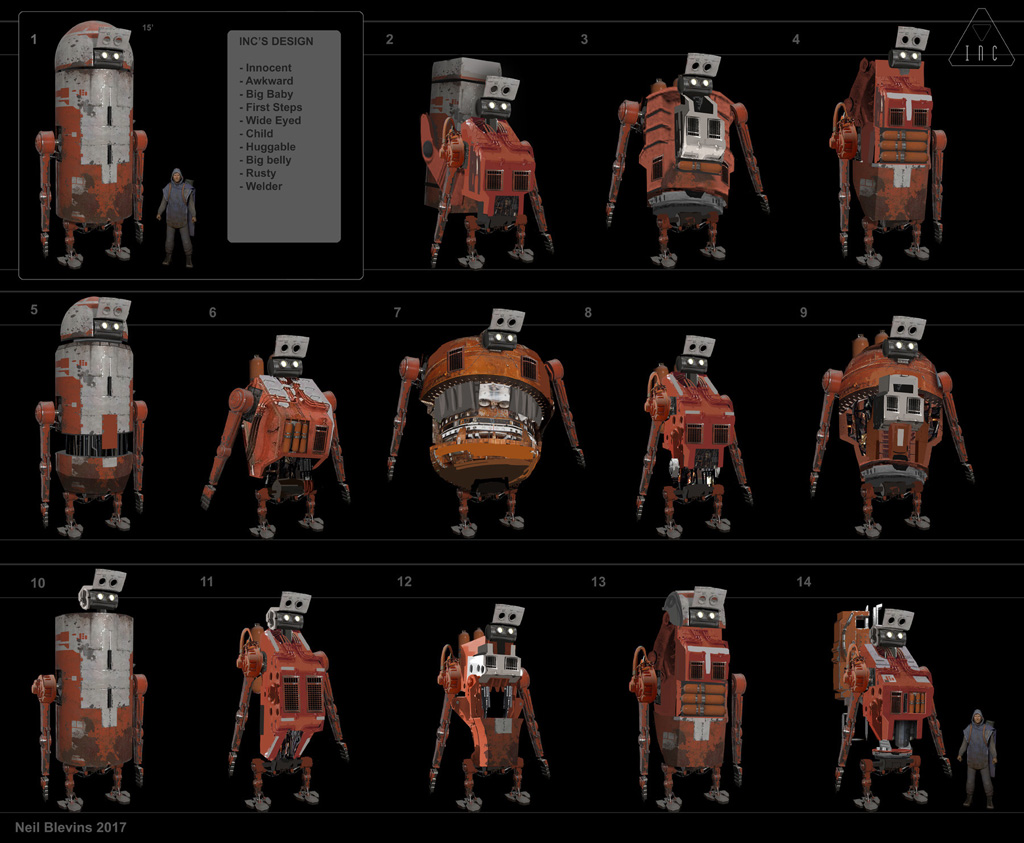
So, a redesign was necessary. All of the original things about his
personality had to remain true, he needed to look cute and cuddly, like
a big wide eyed child. So we couldn't lose that in the redesign. So
first I photobashed together 12 alternate silhouettes, using
lots of construction equipment reference,
all the time keeping our word list in mind. His body could be many
shapes, but the new shape needed to satisfy the story requirements
exemplified by these words. We started with design 1, decided to keep
the arms and legs as well as the face (since that's his soul), but the
silhouette had to go.
Once the page was filled, we showed these images to a bunch of artist
friends to get feedback. Most important when getting feedback is why
they like what they like, because if you understand the why, you can
fix the design issues in your own creative way, rather than it becoming
a design by committee.
Many favored the taller robots, since they had the same height as
design 1. One person pointed out that number 13 had a head too similar
to "M-O" from Wall-e, so we nixed that one. People liked the chubby
number 7, but felt he may have trouble getting through doorways or
reaching for objects, he's supposed to be a little awkward, not super
awkward. Number 9 and 3 were in the same chubby design realm, but a
little more balanced. Number 2 kept coming up in people's favorites,
they felt the big backpack made him look like a young kid going to
school. People also liked 8 and 6, and the fact that you could see
through the chest of number 12, which really made him feel robotic.
My favorite was number 8 (my opinion before we got feedback from
people), so I went back and started with number 8, then modified the
design based on what people liked and disliked in the other designs to
arrive at the final number 14. For example, instead of putting the
backpack from 2 directly on number 8, I scaling up his welder weapon
and placing it on his back to served a similar visual purpose to the
backpack.
Hopefully this gives you a little insight into the design process, how
to start with a firm idea of what you need to accomplish for the story
and for the character's personality, make a bunch of variations, get
feedback from a large selection of people, and then use that feedback
in a constructive manner to get the best design possible.
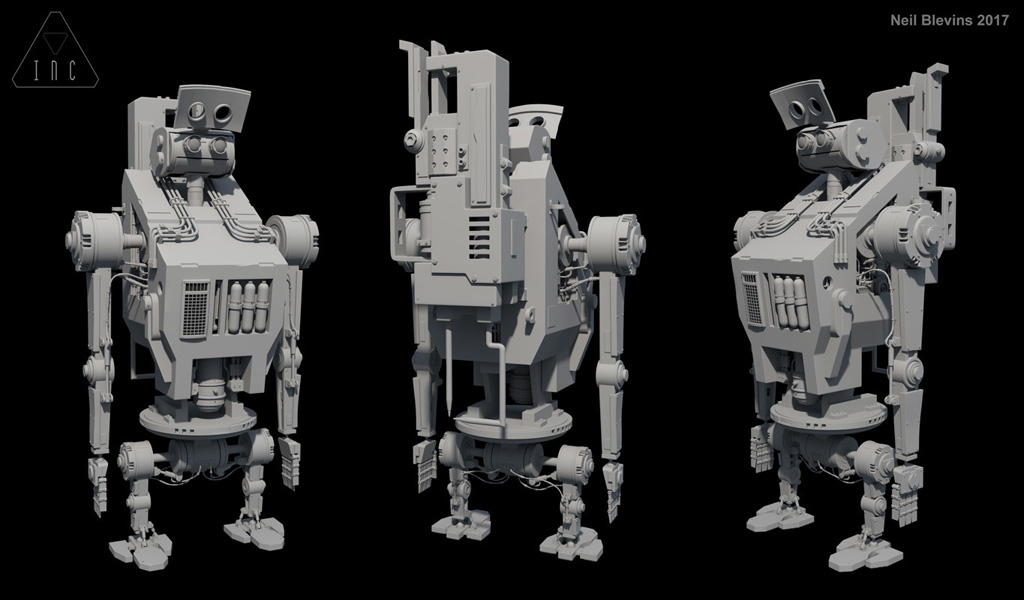
Modeling Inc The Robot
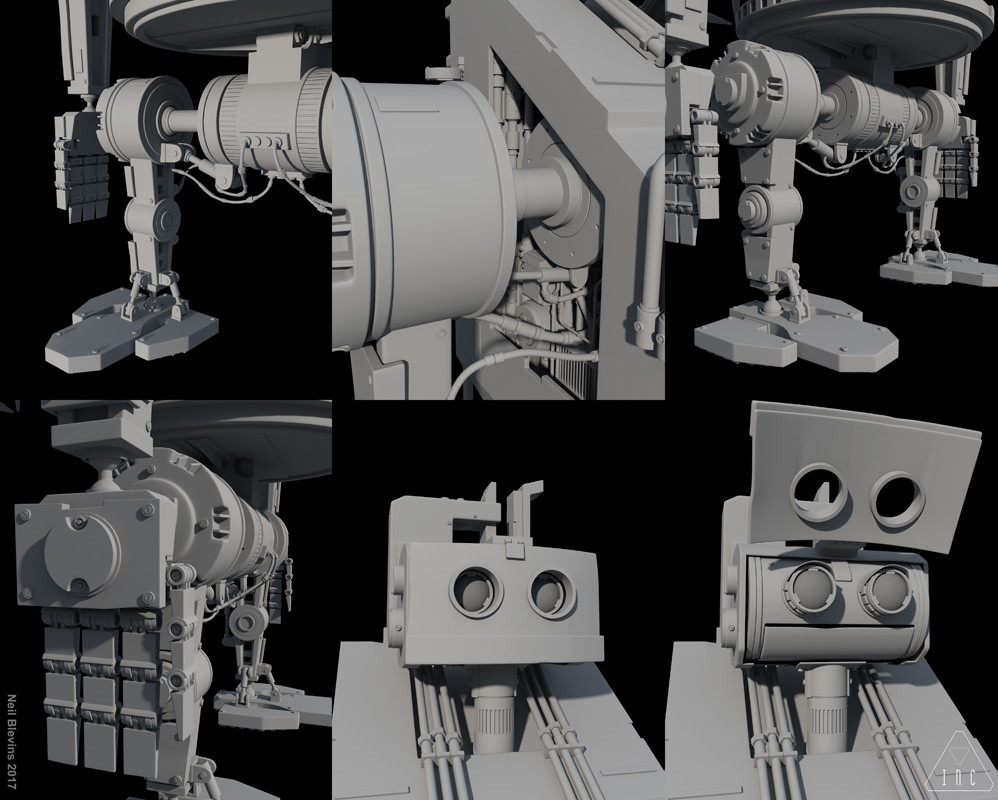
Inc was modeled inside of the 3d program 3dsmax using poly modeling,
and then subdivided to add extra detail. First I made a lowres version
and then proceeded to replace each part with a higher resolution model.
I work like this because if I try and model the entire high res model
at once, I get overwhelmed with the amount of work. If I break it into
small pieces, like ‘Today I will only worry about modeling the hand', I
have the inspiration to keep going.
I also shared as many parts as I could, for example, once I had made
the legs, the arms were just modifications of the same pieces. This is
called kitbashing, it's frequently used to save on time modeling too
many separate pieces, but it also helps unify the design, since similar
parts are used again and again over the robot's surface.
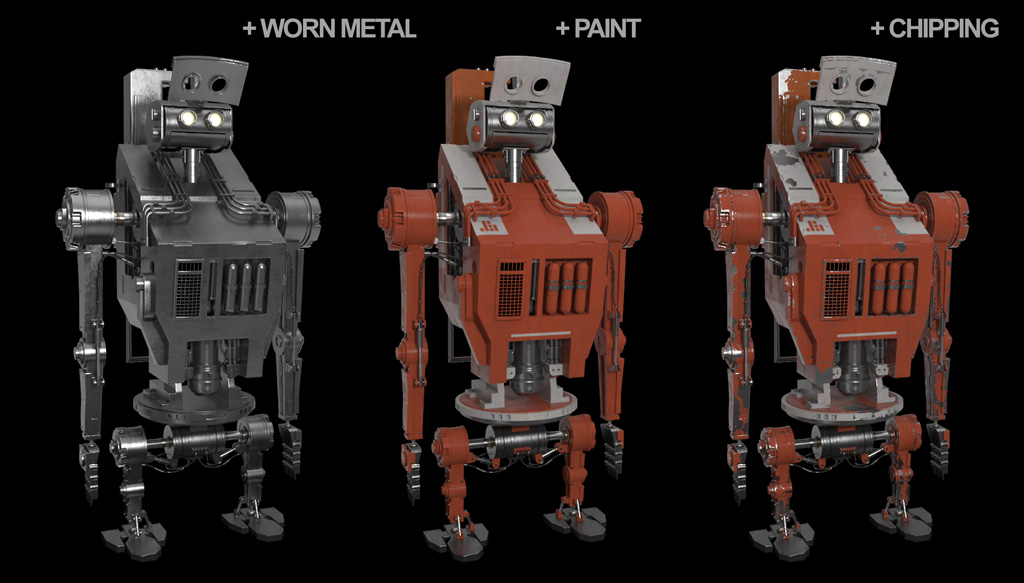
Texturing Inc The Robot
I texture my hard surface machines in layers, starting with a metal
base material, then layer a paint material over top, and scratch up the
paint in spots to reveal the metal underneath. I then add decals like
logos on a new layer, then I paint on rust, dirt and dust. In many ways
I try and mimic the way you'd paint a traditional model if I were
painting a model kit with acrylic paints.
Here's a set of progressions showing all the layers of materials placed
on the surface of the robot.
Visit the link below for lots more imagery and turntables of Inc The
Robot: