Layer Breakdown: The Final Push By Neil Blevins Created On: June 29th 2022
As many of you know, I've been playing a lot recently with AI generated
artwork, especially creating robot designs. However, one thing I've
been unable to achieve in midjourney (the AI I've been currently using)
is a 3/4 view of the robot designs. All of them end up being frontal
view only. This is likely because the images the AI trained on either
haven't been 3/4 view, or maybe they have but that particular attribute
hasn't been labeled, and so the AI hasn't learned what a 3/4
perspective is. While I'm sure this will be fixed in the future, I've
been playing with giving the robots depth by projecting the artwork
onto simple 3d geometry. So this tutorial discusses this technique
which I used to make my painting "The Final Push".
You have two choices with this lesson, watch me discuss the issue in
the video below, or read the full text.
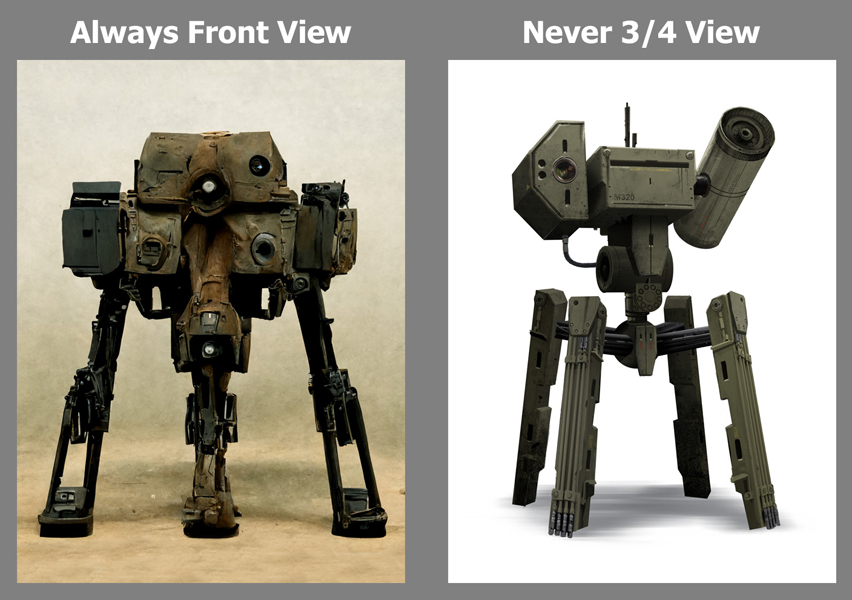
The Problem And Solution
As discussed above, all of the robots made by midjourney appear from
the front view.
What I would like is to be able to also make robots from a 3/4
perspective, see below for the difference.
So in short, here's my workflow: Personal Painting -> AI variations
-> Simple 3D Geometry -> Project Texture -> Pose & Render
-> Paint Over top
Workflow Details
I start with a painting of a robot I made 6 years ago.
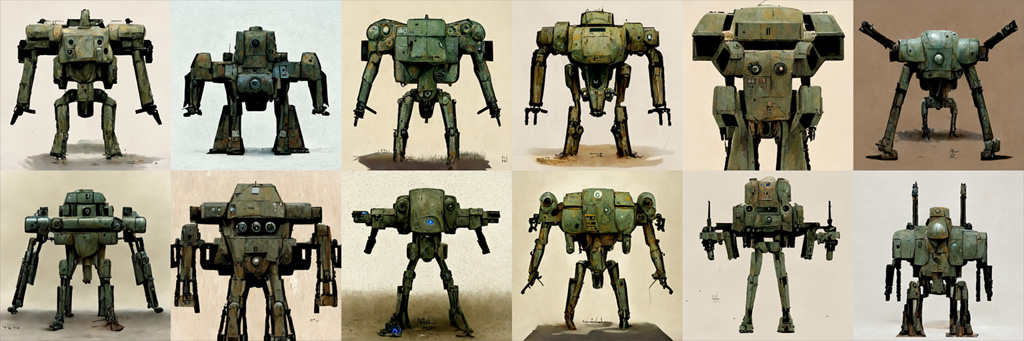
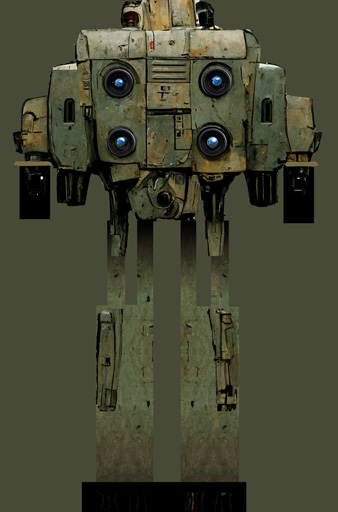
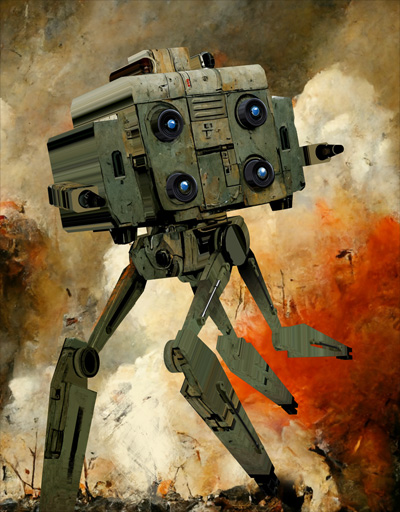
I then feed it to the midjourney AI along with the prompt "Battle
Droid". So it will take my image and take my words and produce its own
paintings as a result. Here's one of those paintings that I really
liked...
I then took this painting, brought it into photoshop, added more
details, and made the legs longer, and set it up as a texture map.
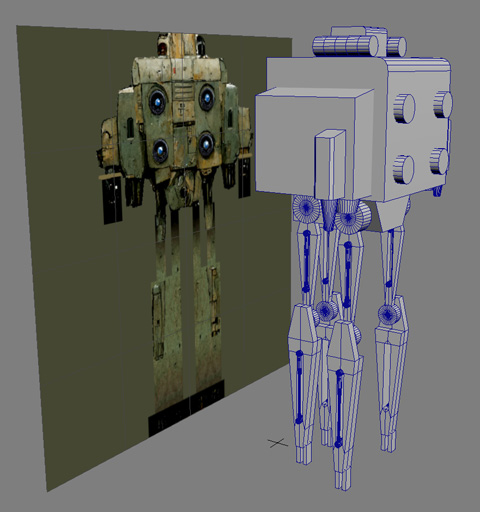
Next I applied this texture map on a flat plane inside 3dsmax, and
traced the image with simple 3d geometry.
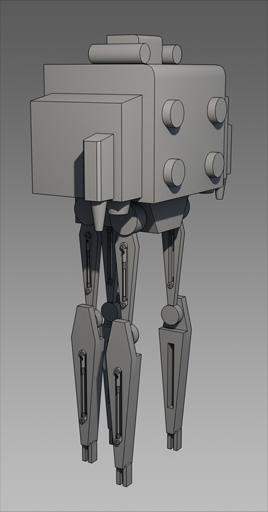
So here's the 3d geometry, mostly boxes and cylinders...
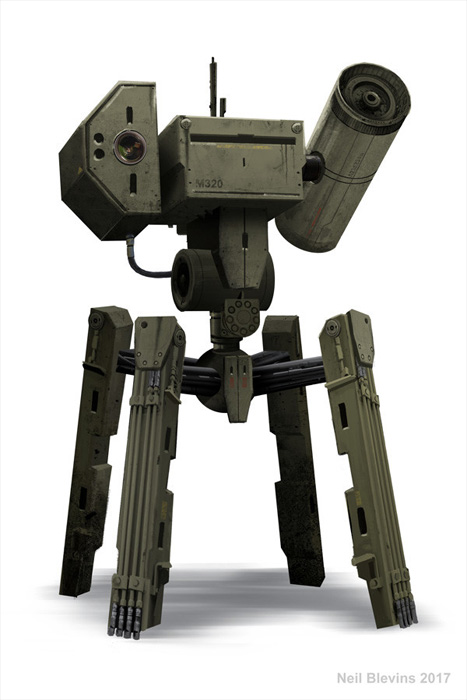
And then I projected my texture map onto the geometry using a simple
planar UV map from the front. Here's the mesh from the front view...
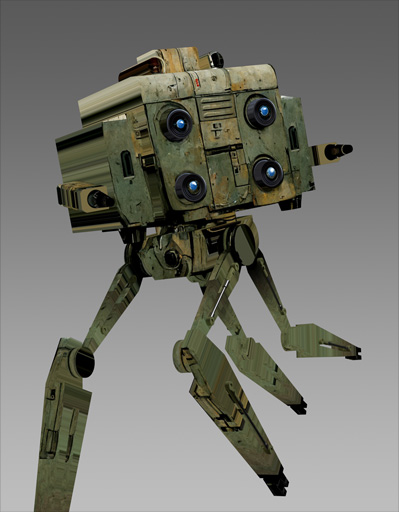
I then set up a simple skeleton, and posed the figure, and rendered it
from a 3/4 perspective...
Notice you have texture stretching on the side. This is due to the uvs
being planar from the front. If this was going to be a full 3d model
for an animation, I'd fix this with say a BlendedBoxMap inside of
3dsmax, but since this model was only for a still image, it made more
sense to fix it bu painting later in 2d inside photoshop.
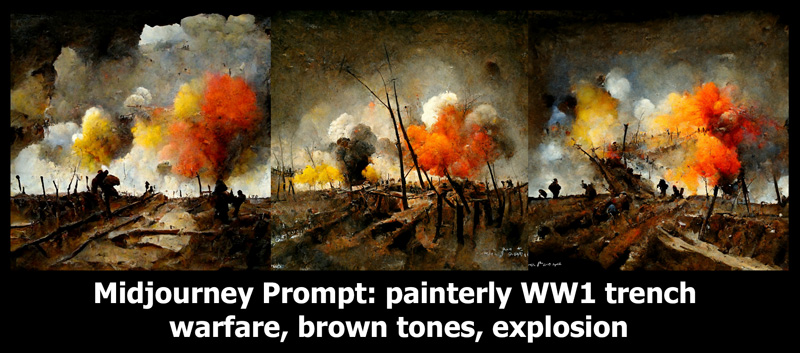
So now the background, I wanted a painterly background of a
battlefield, so I supplied midjourney with a prompt: "painterly WW1
trench warfare, brown tones, explosion". I didn't provide it was a
starting image like I did with the robot, so it made the paintings up
all on its own.
I then took elements of those painting, mixed them, and enlarged the
result and cropped. Here's the result of that painting behind my render
of the robot.
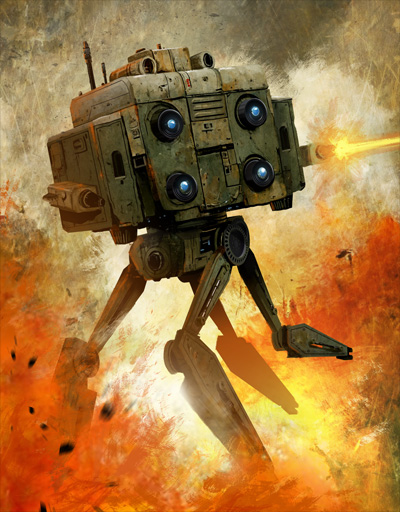
Then I went ahead and painted ontop of the image in photoshop.
I added an explosion on the front, also added a bunch of details to the
robot, including fixing all that texture stretching on the sides.
Finally, I did a few final filters, adding some glow, some contrast,
and a slight lens distortion
Conclusion
So that's the workflow in a nutshell. Again, in the future I'm sure AIs
will be able to deal with this automatically, but until then, this may
help you use the AI results and present them in a more dynamic view.