Here's a tip and example file on one method for mapping complex
shapes inside of 3dsmax.
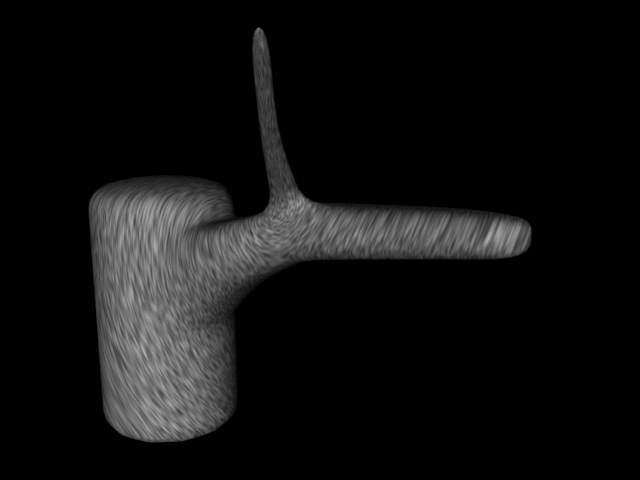
Take this shape, which is the beginnings of a tree. Notice the bad stretching where the mapping coordinates are not properly aligned to the surface of your complex mesh.
Applied to this tree is a noise map, set to UVWMapping coordinates 1. Although noise is a procedural texture, and therefor can be applied procedurally to xyz (which means it won't have any stretching), bitmaps must be applied to UVW, and so even though I'm using noise in this example, since I am applying the noise to UVW, it will have the same obvious stretching problems that any standard bitmap would. Please feel free to replace the noise texmap in my example file with any bitmap of your choice.
First, download the file (r4).
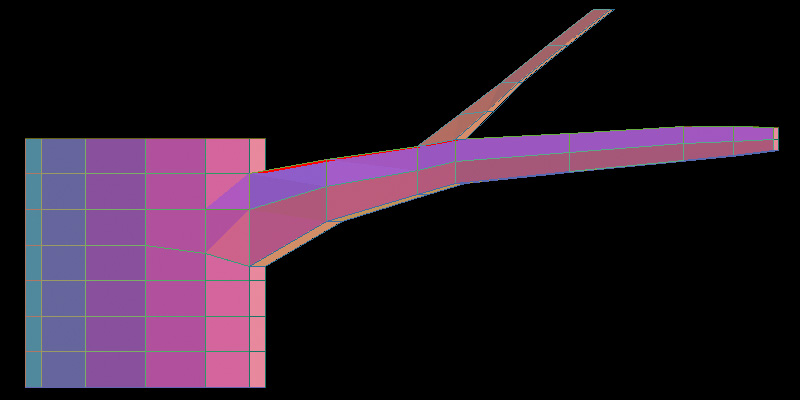
This method for mapping basically takes advantage of the fact that you can apply several sets of mapping coordinates to your objects, called map channels, and then you use masks in a blend material to determine which channels are visible on what part of the object. First, I apply 4 UVWMapping Modifiers, three set to cylindrical that follow the trunk and two branches of the tree, and one set to planar that sees the tree from the front. I then set each modifier a different map channel, channels 1 through 4.
Here, for example, is map channel 2.
Now I render out the unwrapped mesh from the perspective of map channel 4 (the planar one).
I know bring this map into photoshop, and paint two masks...
Mask 1
Mask 2
Here's a basic explanation, consult the file for a more detailed understanding of how this actually works. Basically, I make 3 copies of my noise, all identical except the first one uses map channel 1, the second map channel 2, and the third map channel 3. I then place these noises in three materials called Area 1, Area 2 and Area 3 (respectively). I then blend these three materials, using the two masks I have painted to tell the blend materials where I want each of these three materials applied.
So, for example, Area 1 (which uses map channel 1) is applied first to the whole object (placed in slot1 of a blend material). Then Area 2 whose noise map uses the map channel which is aligned to the first branch gets put in the second slot of the blend. Then I use Mask1.gif in the mask slot to say "Put the Area 1 material on the main trunk, and the Area 2 material on the branch." Then this material is changed into another blend material, this time blending between your current material that blends Area 1 and 2 with your Area 3 material that is applied to the second branch using mask2.gif. Here's what my material tree looks like.
Again, consult the file for more information. The last step is I took each of my three first mapping modifiers and changed their tiling until the noise map looked about equal on all three areas.

You may notice a little stretching at the joint areas, but more careful painting of your maps and adjusting your geometry can usually get rid of that. Also notice, since I am using a mask to blend between maps, around each joint is an area where you're seeing 50% my first noise and 50% my second noise. This usually works fine for noise, but for a pattern that's more regular such as scales on a dragon, you may notice the scales fading in and out at these areas, so this technique is best used only for maps that blend well together.