Microscope Material
By Neil Blevins
Created On: March 27th 2005
Updated On: Dec 17th 2024
Software: Blender or 3dsmax (vray)
Go here
to read this tutorial in Russian.
Since I've had a number of email
requests over the years, here's a tutorial on how to go about
making a basic electron microscope material.
Reference
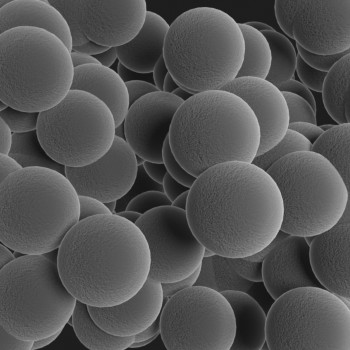
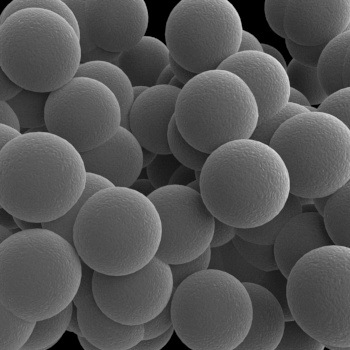
Here's some reference pics to show the effect...
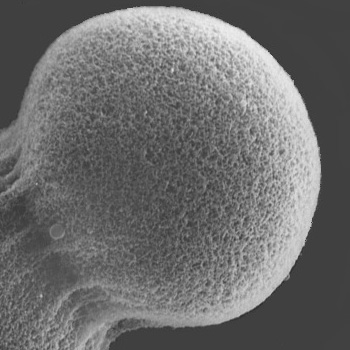
This image is from the Rippel
Electron Microscope Facility.
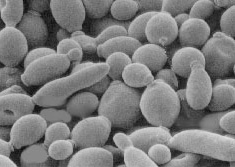
Beer yeast.
Software Agnostic Material
The basic ingredients are as follows:
- Shading: Standard
- Color: A falloff or Facing ratio that make the faces
pointing
perpendicular to the camera to be light grey, and the ones pointing
towards camera to be dark grey.
- Spec: None.
- Bump: An interesting noise or combination of noises
- Emissive: about 50%
Ways to make it more realistic:
- A more complex bump map that either uses a combo of procedural
noises or even a triplanar map
Blender Example
Here's the shader for Blender...
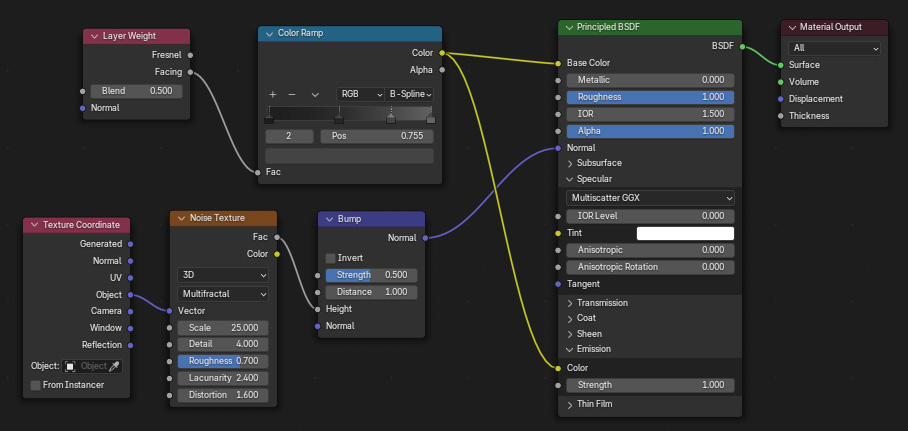
I start with a PrincipledBSDF.
To the color I place a facing ratio, which you do in Blender with a
Layer Weight node. I then run that through a Color Ramp to get finer
control over the balance of light grey and dark grey.
Any Specular Reflection is turned off (IOR Level in the Specular
section to 0).
For the bump place a Noise Texture. I played around with a number of
settings and types to find something a little more visibly interesting
than regular perlin noise. Using the Distortion parameter really helped.
Finally, I hooked the Base Color map also into the Emission Color, and
set the strength to 1, to give it a slight glow.
Here's the resulting render.

Here's the blend file, Blender 4.3: microscope_material_blender.zip
And here's a test scene with some more complex lighting...
This uses an area light to
give a little directionality to the lighting but still get soft
shadows. Then I adjusted the
material a bit to get the desired visual results.
Every scene will require some tweaks, but hopefully this material
will be a good starting spot for whatever scene you want to make.
Here's the blend file, Blender 4.3: microscope_material_blender_scene.zip
3dsmax (vray) Example
Here's the shader for vray in 3dsmax...
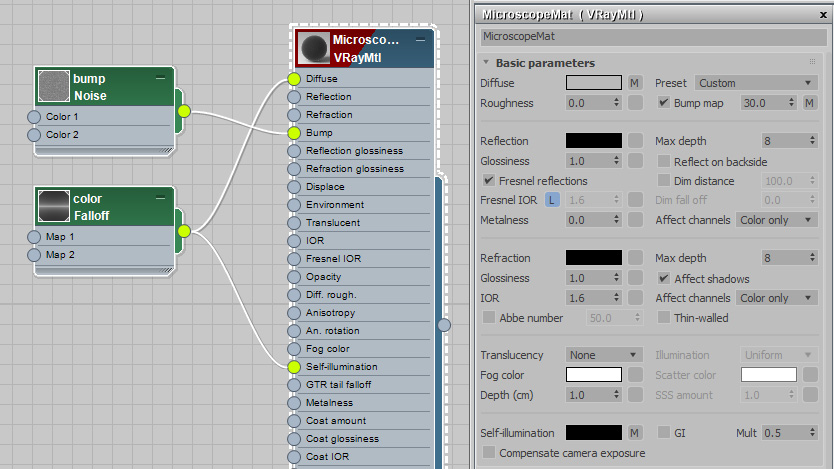
I start with a VrayMtl.
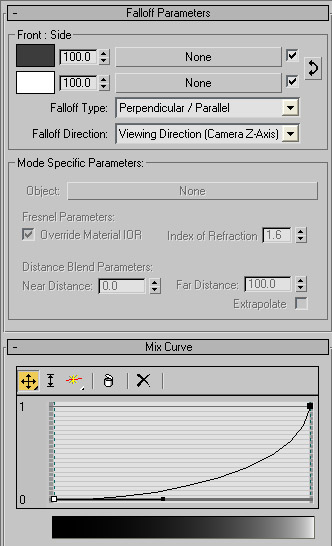
A falloff map is placed in the color, set to
perpendicular/parallel, with dark grey and light grey. I also
manipulated
the Mix Curve underneath to achieve the exact balance of white and grey
I was after.
Any Specular Reflection is turned off.
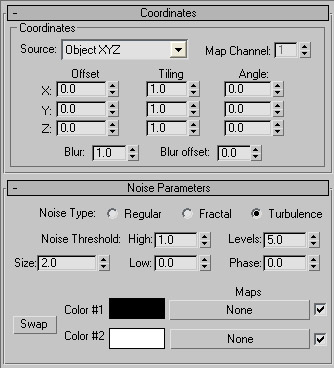
For the bump place a noise. This is just the most
basic of noises, for your work I highly recommend mixing several noises
with a mix map, or perhaps using some other more interesting procedural
noises froma 3rd party plugin.
Finally, place the diffuse map into Self Illumination and set the
Multiplier to 0.5, so it glows but accepts some lighting information as
well.
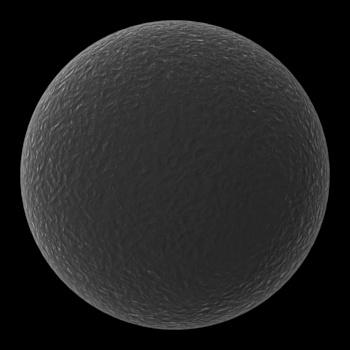
Here's the resulting render.
Here's the max file, 3dsmax 2022: microscope_material_3dsmax_vray.zip
And here's a test scene with some more complex lighting...
This uses a dome light to get really soft shadows, and an area light
to
give a little directionality to the lighting. Then I adjusted the
material curve a bit and brought down the Self-illumination Multiplier
to 0.07, so it's more affected by the lighting in the scene.
Every scene will require some tweaks, but hopefully this material
will be a good starting spot for whatever scene you want to make.
Here's the max file, 3dsmax 2022: microscope_material_3dsmax_vray_scene.zip
This site is ©2026 by Neil Blevins, All rights
are reserved.
To see hundreds of other tutorials similar to this one, visit the
Neil Blevins Education Site