Modeling Using The 3DSMax
Modifier Stack By Neil Blevins Created On: Oct 3rd 2006 This is an article about how I use max's modifier
stack to make changes to my models. While some of this is covered in
the basic max tutorials, I hope this provides some examples of how you
may wish to use the modifier stack in actual production, or this
article can be used by the curious who don't use max but are interested
in how a different piece of software approaches procedural modeling
through a flexible history system.
There are many 3d apps, and each deal with the idea of "history" a
little differently. I define a "history" as a way to modify a model,
and then later go back and change those modification without the need
to start over. In max, the history is called the modifier stack, a user
controllable list of changes to your model that you can go back and
modify after the fact. Maya has its construction history. Other
programs like modo don't have a history feature yet (but I'd be pleased
to see one). My personal workflow relies quite heavily on a history,
and I've found max's modifier stack to be a nice compromise between a
more procedural system like Houdini, and maya's "once it's changed it's
changed" attitude.
Maya's history will let you go back and tweak some settings (like for
example when you apply uvmapping), but it
won't let you delete, reorder or temporarily turn off modifications
without some major fussing in the schematic editor. Also, some things
get recorded while others don't (like vertex movement).
Furthermore, when things are recorded, they're frequently recorded with
each change as a separate entry into the history. To me, a history is
all about clumping various changes into discrete
packages that can be modified, reordered or temporarily turned off.
Maya has some methods for doing this, for example, deformers, but it
seems to me that deformers and construction history should actually be
part of the same unified system, they're both modifications to a base
piece of geometry that you want to go back and tweak at a later time. I
don't want to slam Maya here, it's a really useful piece of software,
but I feel the max modifier stack is a far more flexible history
method, and that's why I use max as my primary modeler.
With that in mind, I'd like to talk
briefly about the max modifier stack and how I use it in production,
giving several case examples.
Using The Stack, The Branch
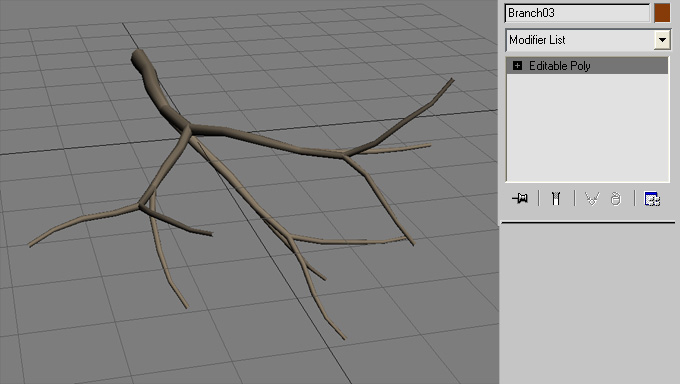
First off, a standard scenario. "Neil, we need plants. Please make a
branch." So I go ahead and make a branch.
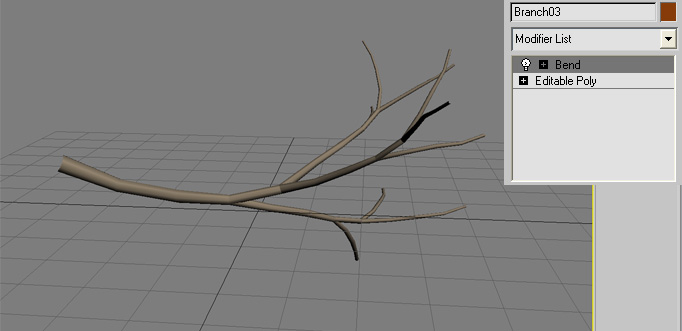
Looks fine, but it needs to be bent. So I apply the bend modifier.
Looks good, gets approved. Now 3 months later, we see the model in
context in the shot. "Hmmm, I think that would look better if the
branches weren't as bent." In other programs, I would be stuck
attempting to use another bend to unbend the first bend (which never
looks right), or I'd have to save several copies of my scene with
unbent geometry. However, say I saved off a pre-bent version. Then bent
it. Then modified the shape further. Then I'm told to revert to the
unbent version. I don't just lose my bend, but any changes I did after
the bend. In max, I just go back to my bend modifier, and change the
value, viola. Or maybe the director says he doesn't want it bent
anymore at all, I can just remove the bend modifier and I'm back to my
original geometry.
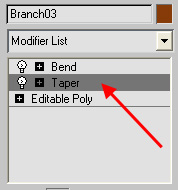
Or the director says "That's great, but can you have the branch
tapered?" Well, I really wanted to taper the branch before the bend
occurs. In max, it's pretty straight forward. I place a taper modifier
before the bend that I had already set up, and voila.
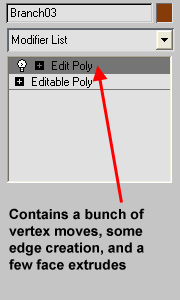
Here's an example of multiple tweaks in a single modifier. Say you bend
your branch, and the bend causes a few of the sub-branches to be
mis-shapen. You can apply something called an edit poly modifier, which
is like a container for a bunch of changes at a specific spot in the
stack. So now lets move 10 vertexes to make the branch look nice again.
All 10 vertex moves are included
in this modifier. In maya, each vertex move wouldn't be recorded at
all. The modifier stack allows you to package sets of changes into a
single node. The edit poly modifier allows the user to decide which
things are actually only one thing, and then to package them
accordingly.
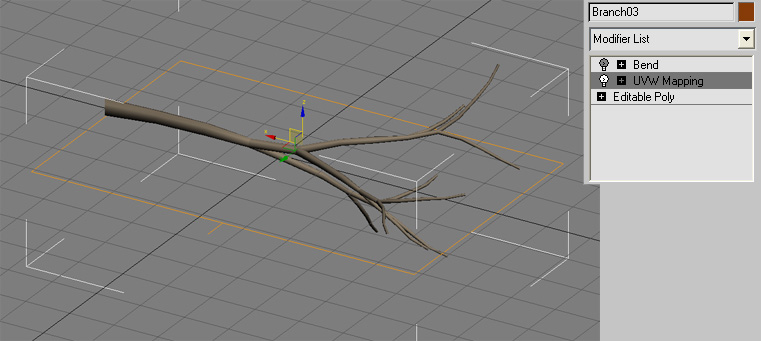
Another common event. I've made my branch. I've bent it. Oh, now I need
to add uvw mapping. Well, a planar map from the top would have been
good, but
damn, my branch is already bent. If only I could go back and map before
the bend. A mapping type is a modifier like anything else, so you can
place it before the bend, and now you can map your flat branch before
the bend occurs.
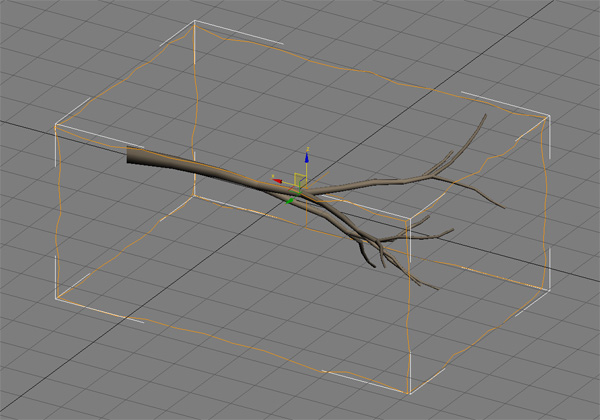
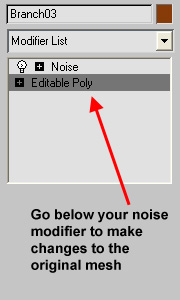
Another example, I have my branch, now I'm asked to mess it up a bit so
it's not so even. I can add a noise modifier, which moves the vertexes
of my object based on a noise function I can control the size and
intensity of. Looks great, now all of a sudden I'm asked to tweak the
branch shape. Well, that's going to be more difficult with the noise
modifying my shape. The answer is to turn off the noise modifier, then
adjust the branch shape, the turn the modifier back on. Now I have the
new shape without losing my noise settings.
Or maybe the noise isn't enough, and the director wants very specific
damage to the branches. Well then, add an edit poly modifier and go to
town, adding extra edges, faces, moving vertexes, until you get what
you're after. Show it to the director, he says, "Great, now can you
move those sub-branches to the right?" As in the last example, you just
turn off
the edit poly modifier, move the branch on the base mesh, and the
changes move up the stack, so any changes you do to the base mesh
affect the changes you made in the edit poly modifier. Show it to the
director again, he says "Nah, never mind, I preferred it looking
pristine without the damage." Just delete the edit poly modifier and
you're all set, one click.
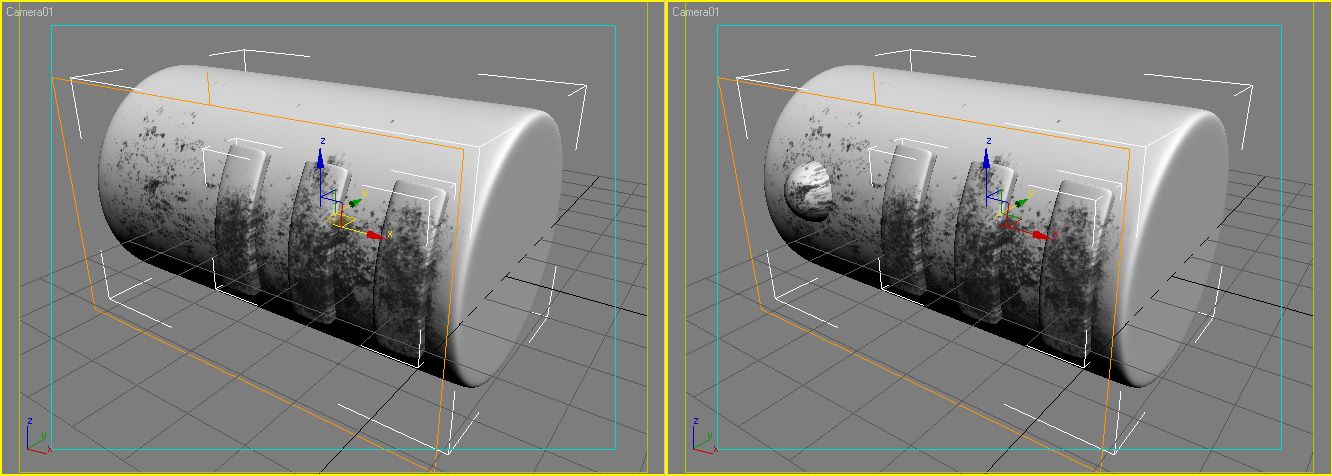
Using The Stack, Preparing A
Mesh For Meshsmooth
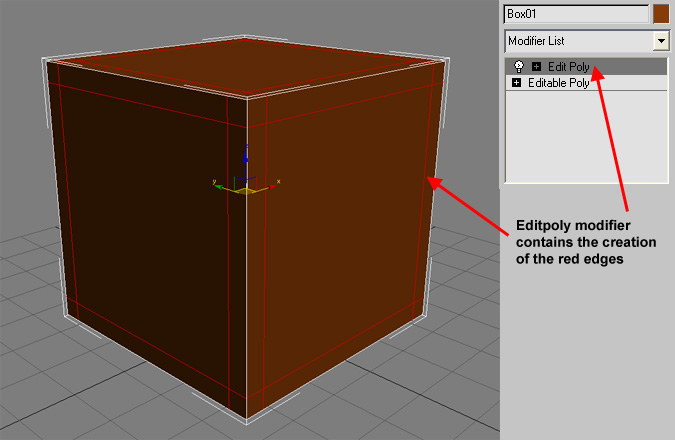
Another example. I have a complex mechanical shape (pretend the box
below is a complex shape). I want to prep it
for subdivision using meshsmooth. So I model all the basic shapes, then
apply a edit poly
modifier and add all the extra spans for my object to crease properly
when it gets subdivided.
But then the director asks for some serious changes to the topology of
the mesh. Man, that would have been way easier to do to the original
mesh and not to the one with all the extra edges. Just delete the
edit poly
modifier, make your radical changes, then apply a new edit poly and put
your creasing edges back. This isn't useful all the time, depending on
how many
edges you've applied it might be easier to just modify the post-edged
geometry, but it can be helpful when the direction of the model changes
suddenly and radically.
Using The Stack, The Shell
Modifier
A final example, the shell modifier. A lot of times it's easier to
model something that's 2d, and then worry about giving it thickness
after the fact.
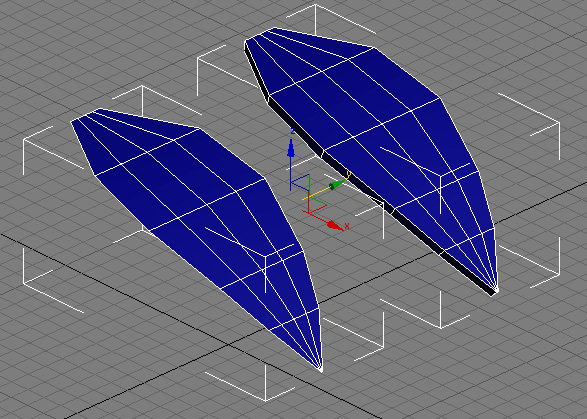
Say you're modeling a single leaf, and then the director says "It's too
thin, it needs to have thickness." The shell modifier adds thickness to
an object (sort of like extruding the faces, except it leaves the
original faces as well. So if you add a shell modifier to a plane, you
get a box, not a box with a hole in one end).
Now the director says "cool, could you tweak the leaf shape?" No
problem, since it's easier to modify a 2d shape than a dimensional 3d
object, you go back to your original mesh and change it, then go back
to the top of the stack to see you bend and your shell modifier result.
Now the
director says "Cool, but I think the leaf is feeling too thick." Just
modify your thickness value in the shell modifier.
The shell modifier is also great for making clothing and armor. For
example, say you want a thick sock. Just select the faces of the foot,
make a copy, then apply the shell modifier, now you have a 3d thick
sock around the character's foot.
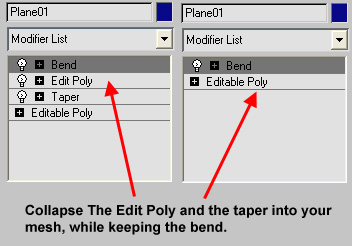
Collapsing The Stack
And of course, at any point you can collapse some of the modifiers onto
your original mesh, basically baking the geometry when you decide that
no more changes are going to get done. But you can bake up to a point,
so say you're sure all your lower edits are fine, but you still want
access to that bend at the top of the stack, leave the bend and bake up
to the level right below the bend.
References and Instances
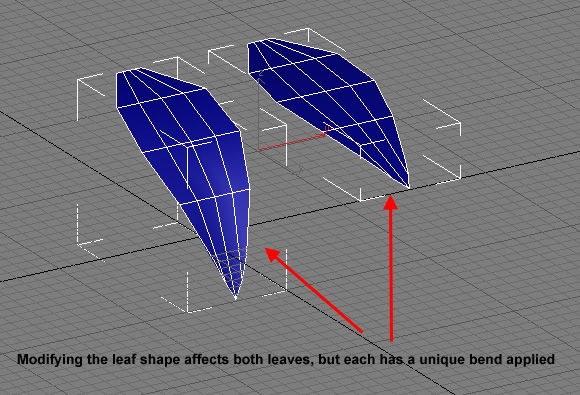
Also, modifiers can be references instead of instances. For example,
say you have two objects that are instances of each other. And say you
want each to be bent, but a different amount. You can apply one bend
modifier with one value to objects 1, another to object 2, but make the
modifiers references, so even though the base object is an instance and
will inherit changes you make to either, the bend remains a different
amount.
So there we have a few common scenarios that happen all the time in
production, and why I prefer the modifier stack method for doing my
modeling.
Disadvantages Of The 3DSMax
Modifier Stack
Of course, max's modifier stack has its issues.
For example, if you move a vertex in an edit poly modifier, and then
remove that vertex at the lowest level of the mesh, the edit poly
modifier gets confused as to which vertex you moved. This is
understandable, but it means that once you place an edit poly modifier
anywhere, you really can't add or remove vertexes / edges / faces
anywhere below that modifier.
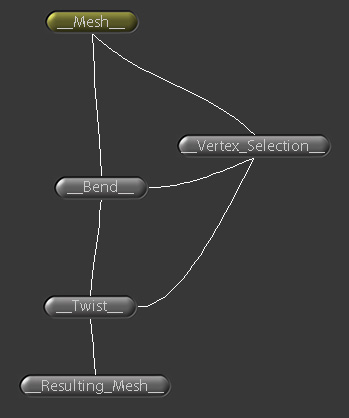
Also, I'd much prefer a modifier schematic view than a modifier
stack, since
not every function is best though of in a linear fashion. For example,
say I have a mesh, I choose a set of vertexes, and I'd like to bend
these vertexes,
then later twist them. If I had a schematic graph instead of a stack, I
could select the vertexes as a node, then make a bend and a twist node,
then hook up my vertex selection to both modifiers. Just like shake or
digital fusion for compositing, you have input frames (your mesh), you
have things like blurs and color corrects (modifiers) and you have your
output frames (your resulting mesh).
Or modifiers could be though of as separate entities from the objects,
so you have a bend in space, and any objects you assign the bend to
will automatically get bent. Max has something similar to this right
now called spacewarps, but many modifiers are not available as
spacewarps, and again, spacewarps and modifiers basically do the same
thing, so I think it would make make more sense to combine both systems
into a
single system. For example, max has no UVWMapping spacewarp. I find
this a big disadvantage. This scenario comes up a lot, say I have a set
of
objects that I want to apply planar uvwmapping from the side. Now say
you want to
add a new object, and have it receive the same mapping. It would be so
easy if the planar mapping were a separate object that you could bind
to your new geometry, and then your new object would inherit the
modifier with a few clicks of the mouse.
Conclusion
Anyways, modeling for me really involves 2 things. Sets of changes that
you just want done and don't care about tweaking later, and sets of
changes you do want to tweak later. For example, I don't want to model
a character from
a box and keep around every vertex movement that let me arrive at the
final result. But once you have 90% of your model done, there's always
small tweaks like bends, twists, maybe moving some vertexes for morph
targets, etc, small things that you'll want to tweak after the fact, or
that the director will want to tweak months after the model is
finalled, and that's where the modifier stack really shines. So the
power of the stack is also in not using the stack when its not
appropriate. It lets the user decide what changes are important and you
want access to later, and what changes just need to happen and you'll
never need to go back.