Multiple UV Tiles (UDIM) In
3dsmax By Neil Blevins Created On: Mar 17th
2009 Updated On: Jan 13th 2015 Software: 3dsmax Go here
to read this tutorial in Russian.
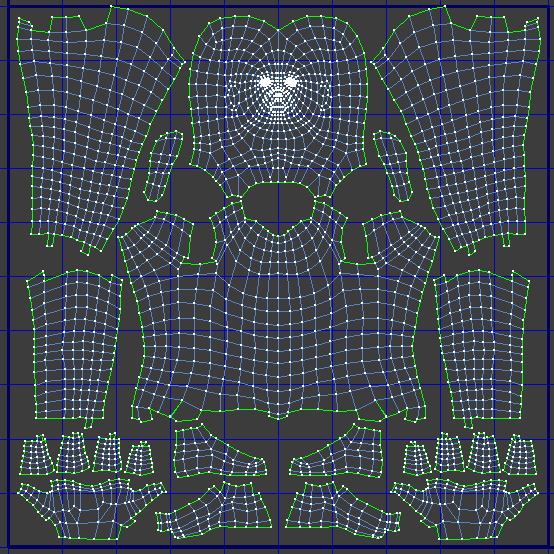
Here's a common problem. Say you have a human model, and now you've
unwrapped it using max's Unwrap UVW modifier.
You plan on painting a single 4k texture map for the character.
Now say your shot involves a closeup of the face, and then some medium
shots of the body. And you need something more detailed than a 4k map
in order to get enough detail on the face for the closeup. What can you
do?
Well, you can create an 8k map, which will give the face more detail.
But you don't really need all that extra detail for the body, since you
won't see it close up, and it's
a shame to use up the extra memory an 8k map will use when all you need
is the face to have more detail.
You could also select the faces of the head, apply a Material ID of 2,
with the rest of the body having a material ID of 1, and then apply a
subobject material to your object, basically making a separate material
for the face, and one for the body. But that's a waste since you now
have 2 materials that are basically identical, the only difference is
the map it uses.
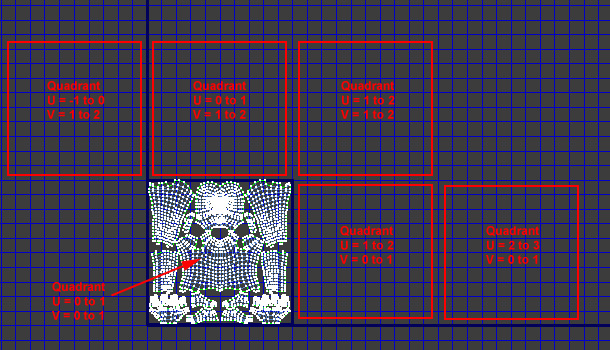
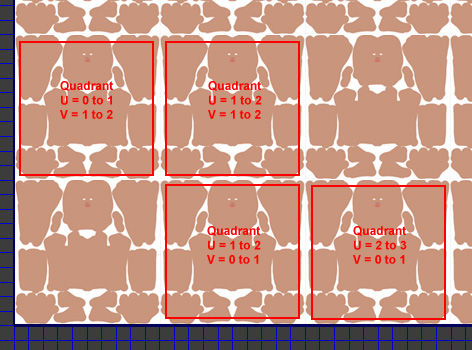
The method we're going to talk about for this lesson is using multiple
UV tiles. This technique is now frequently refered to as UDIM, or
U-Dimension. You may have noticed a bunch of other uv quadrants beyond
the
standard 0 to 1 in your uv editor. So what are they for?
Say you paint a color map for your human...
If your bitmap has tiling turned on...
Then these areas just receive an exact repeat of the texture that's in
the first quadrant.
But if you turn tiling off, you can actually place different
maps in these quadrants.
Here's an example.
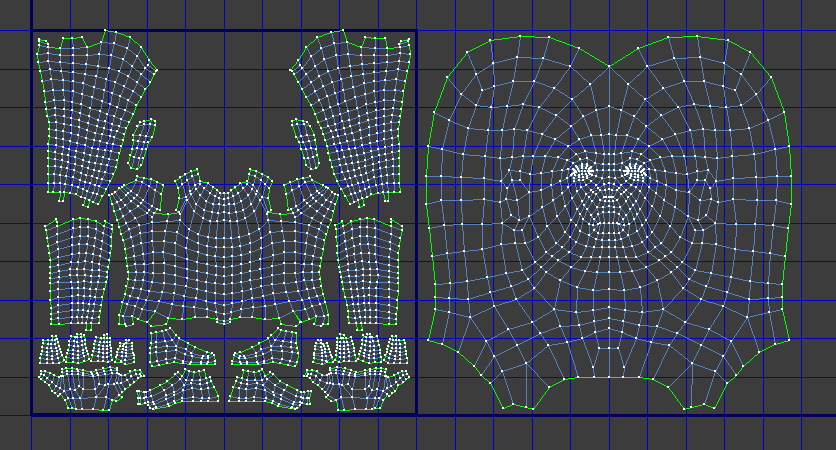
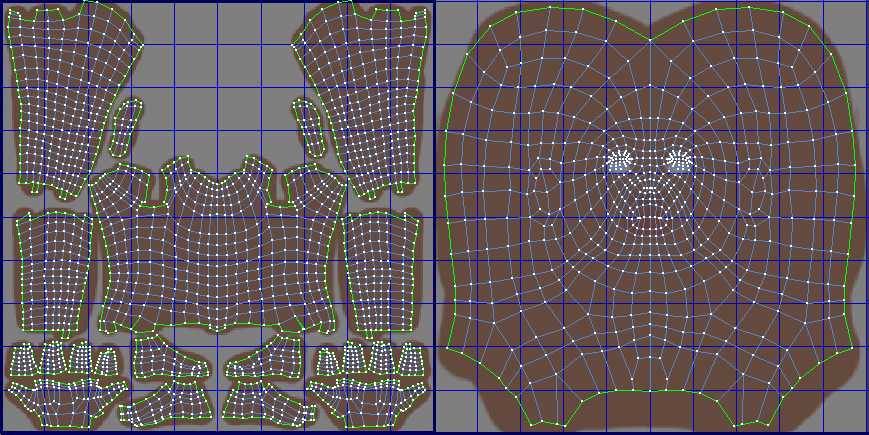
Select the UVs of the head, and place them into the second quadrant.
Resize both the head UVs and the rest of the body to take up as much of
the quadrants as you can.
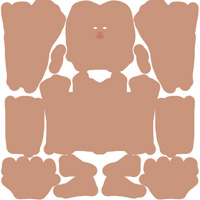
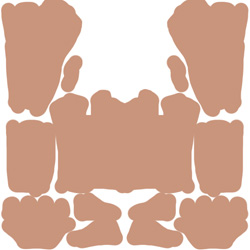
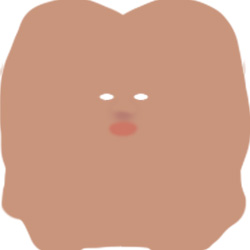
Now paint two 4k maps, one for the body, and 1 for the head.
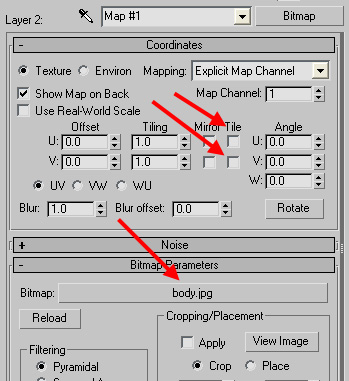
Body.jpg
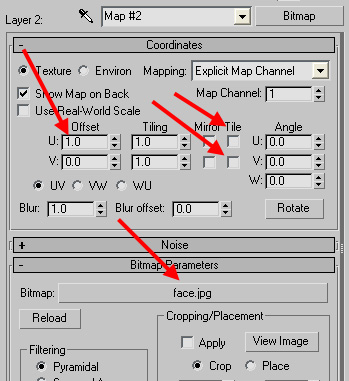
Face.jpg
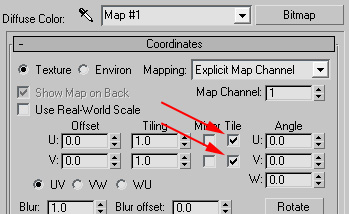
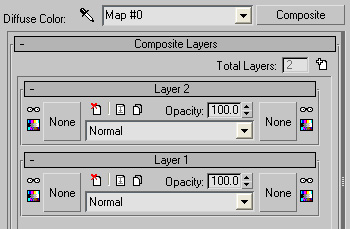
Now go into your material's diffuse map, and place a Composite Map.
Make 2 layers.
In the first slot of the composite map place a bitmap map (Layer 1).
Inside
there, load your first image (the body image), and make sure to turn
off the 2 "tile" check boxes.
Now place a bitmap map in your second slot of the composite map (Layer
2). In
that bitmap map place your Head image from photoshop. Again, uncheck
the 2 tile check boxes. And then in "U Offset" place a value of 1.0
instead of 0.0. That
will push this texture map into the second quadrant, since the 2nd
quadrant starts with a U value of 1.0.
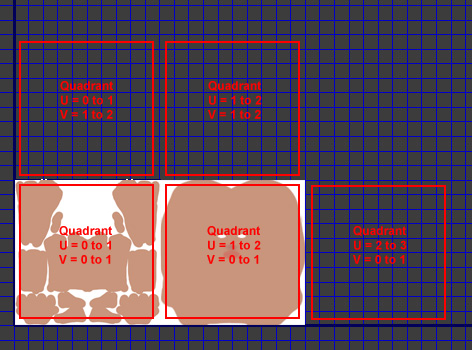
So here's a diagram of how your two diffuse maps and your uvs match.
Now you have managed to assign two bitmaps to the diffuse map of the
same
object. You avoid making a subobject material, and you avoid creating a
giant 8k bitmap when two 4k maps will do nicely, which uses half the
memory of an 8k map. And you can use this
technique to place bitmaps into any quadrant you'd like, so you're not
just limited to 2 maps, you can use as many maps as you want, as long
as you adjust the "U Offset" and "V Offset" of each layer's bitmap to
match where the UVS are for that object.