Go here to read this tutorial in Russian.
To create things like Chains or Tentacles, I often use 3dsmax's path deform feature. The basic idea is to creat an object, repeated it several times in a row, then used path deform to bend it to the shape of a spline. For this example, I will use a chain link.
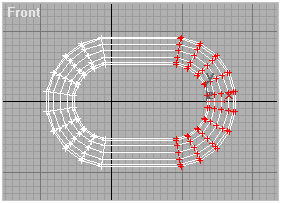
1) The first step, create a chain link by making a torus (seg 20), then rotate it 9 degrees. The reason I rotate it is due to the next step, I use Edit Mesh, choose all the vertexes on one side of the torus, and pull them to the right, to make the elongation of the link. To do this, I needed to rotate the torus so there were no vertexes on the North-South axis. The formula I used was 360degrees divided by number of segments divided by 2 is the number of degrees to rotate it.

2) Then I converted the object into an Editable Mesh.
3) Then make a rotated copy of the link, 90 degrees in the left viewport. I used the Angle Snap Toggle to rotate it exactly 90 degrees quickly and easily. Then move it to the right to form the second link.
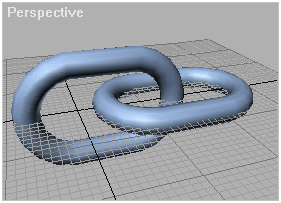
4) Next, copy these two objects using clone move, limit the move to
the
x axis, and repeat the pattern by supplying a high number in the
"Number
Of Copies" field in the Cloning dialogue.
5) Now select your first link, choose the Attach function in the
Editable Mesh, and attach all your links together into a single object.
6) Move the pivot point of your object so that it's at the end, like
the diagram below. Make sure the pivot is pointing straight up and down
(Click on the "Align To World" button in the Pivot section of the
Hierarchy Panel)

7) Now go to the Utilities Panel, and click on "Reset Xform", and
hit the "Reset Selected" button.
8) When you're done, convert your object into an Editable Mesh, so
there are no modifiers in the stack.
9) Next, make a spline in the general shape you want the chain to
follow.
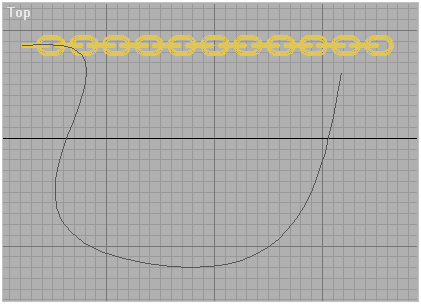
10) Now, to deform the chain, select the chain link object, and
apply a
"Path
Deform (WSM)" modifier to it. Don't use the regular "Path Deform"
modifier, I've had way more luck using the WSM version.
11) Click on "Pick Path" and select your spline. Then click on "Move
To
Path". Then click on the appropriate axis (in my example, x was
the right axis), and voila, your chain has been deformed to match the
spline.
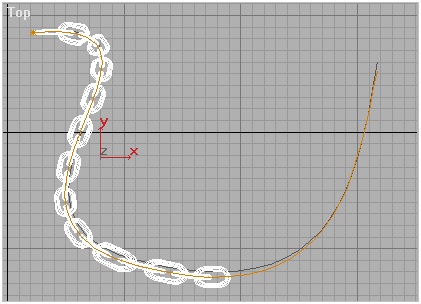
If you don't have enough links to completely cover your entire spline (like in my case), remove the modifier, and add some more links to your chain (another method is to add way too many links to your chain in the first place, and just delete the ones that pass the end of your spline.)
Also, you may notice that some of the links have been deformed from their original shape. This is because I used path deform, which will deform the mesh. To make a proper chain where each link does not deform and simply follows the spline, I'd have to use a new method (using snapshot, or something like that, and see note). However, this path deform method is dirt fast, and with a little tweaking, you can minimize link distortion by editing your original spline. Remember, if you edit your original spline, your chain links will automatically follow. The best way to remove distortion is to make your path as smooth as possible. Paths where the spline changes direction radically in a short space will cause lots of distortion to your mesh. With a little tweaking, you can minimize distortion, and no one will be the wiser (you didn't notice it in Fallen Angel, did you?)
NOTE: If you use the "Normalize Spl" modifier on your spline, you can also remove most of this distortion. However, some testing has shown a few bugs using this method (mesh objects still being deformed in strange ways if the object doesn't have evenly distributed faces), so try the modifier out, and see if it works in your situation. Thanks to Mattias for the tip.
The tentacles coming out of the head of my Fallen Angel character
are
no different, except instead of chain links, I created another kind of
mesh, copied it many times, then deformed it in the same way, and
tweaked
it to minimize distortion.
Here's the max file, 3dsmax 8: tentacles_and_chains.zip