Here's a quick tutorial on Traditional Texture Painting.
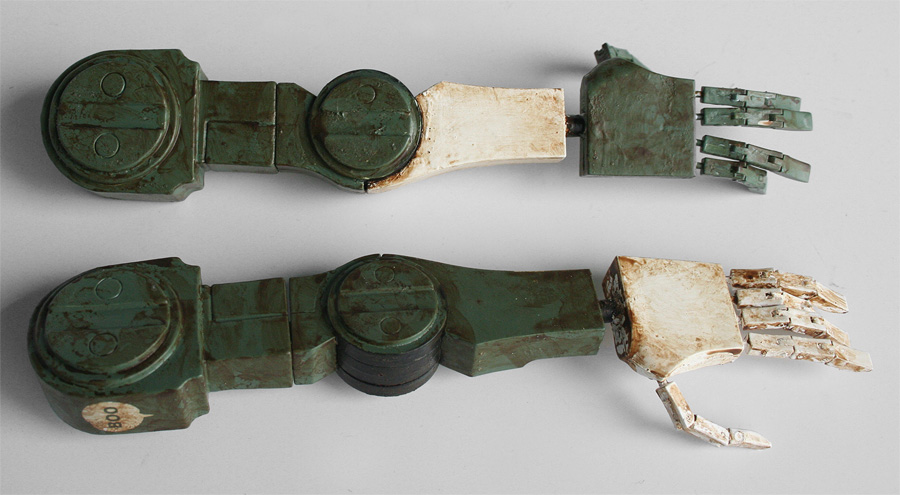
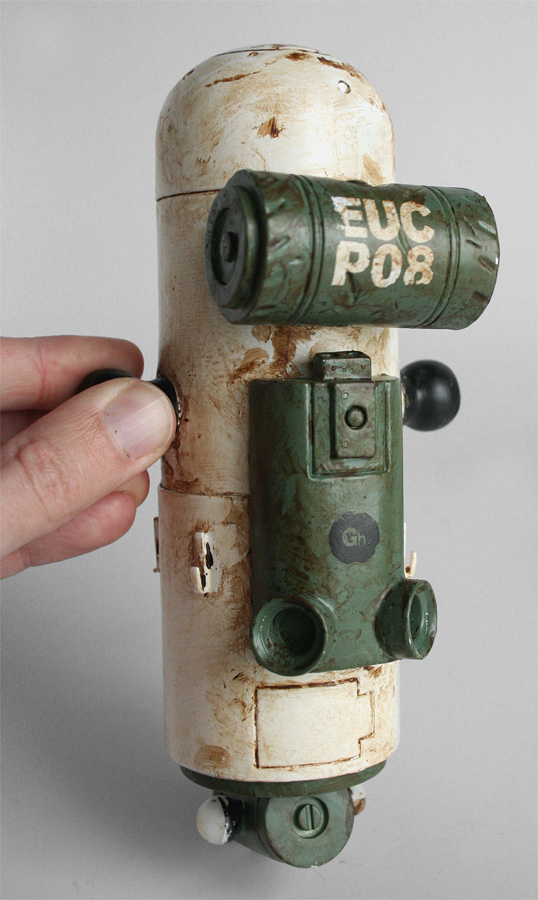
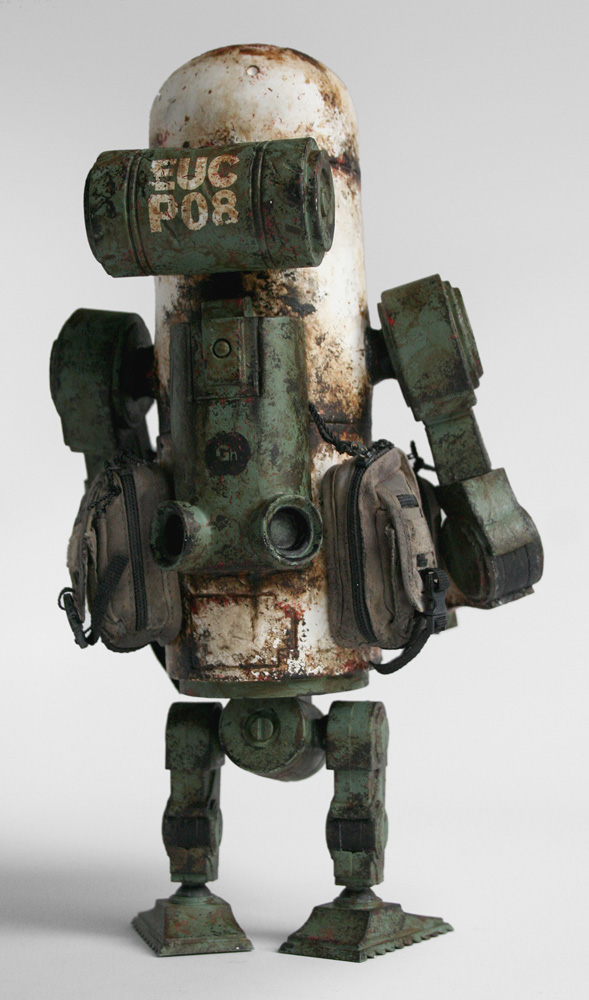
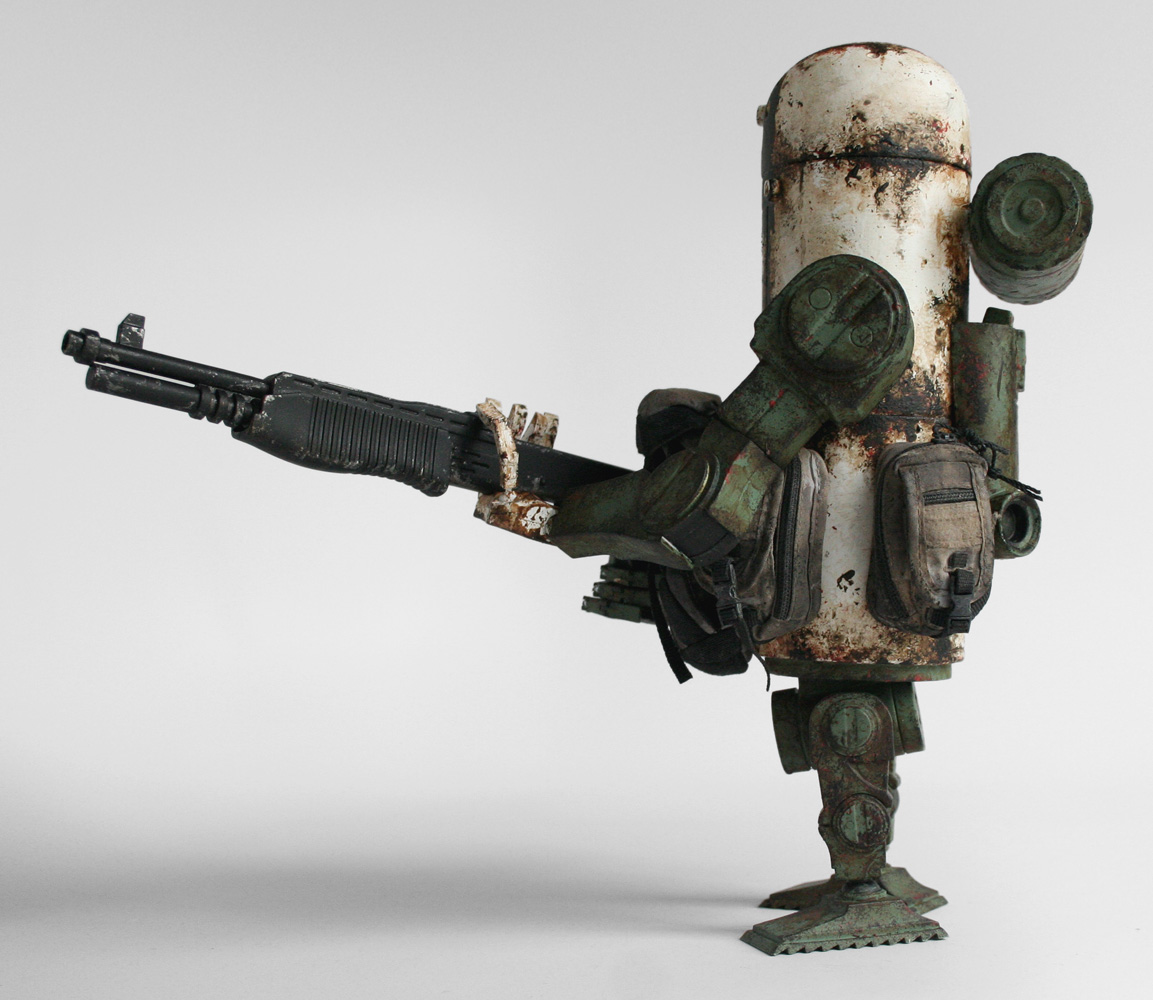
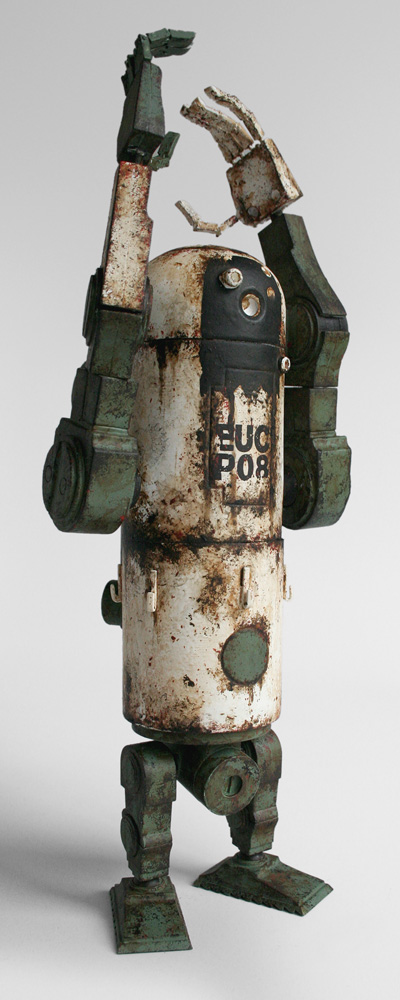
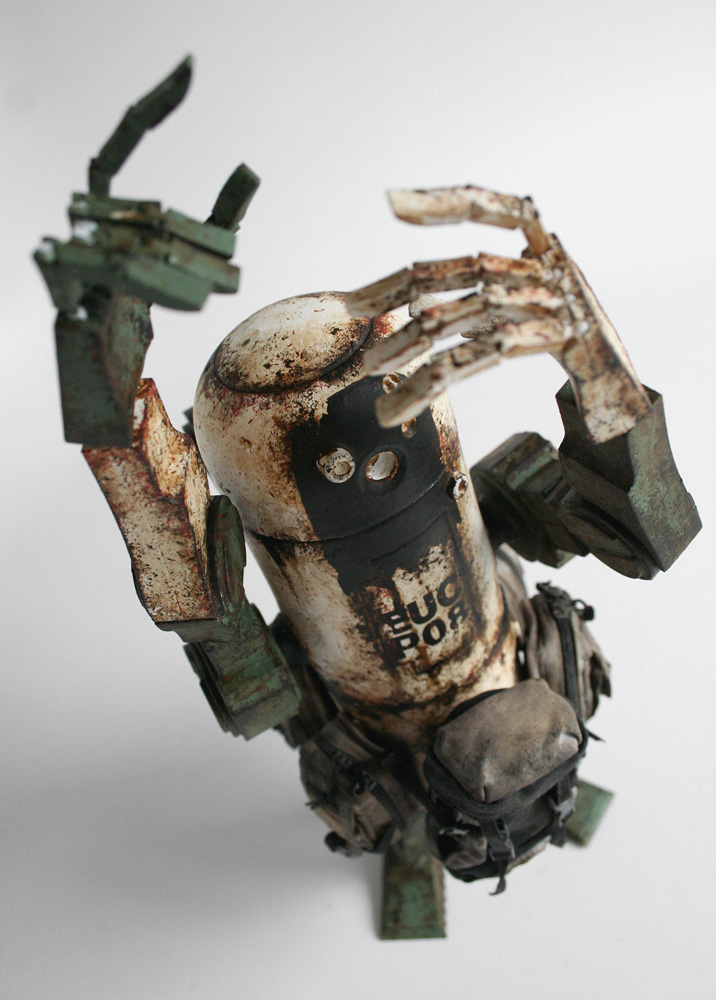
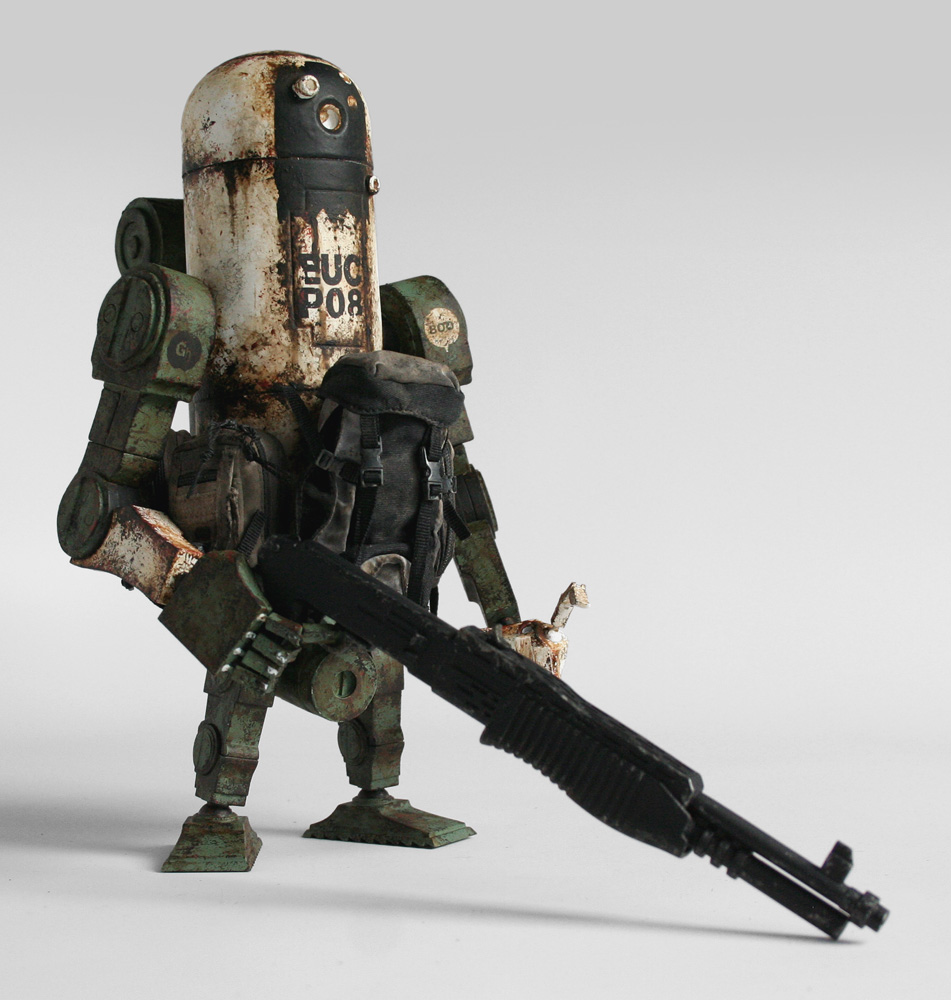
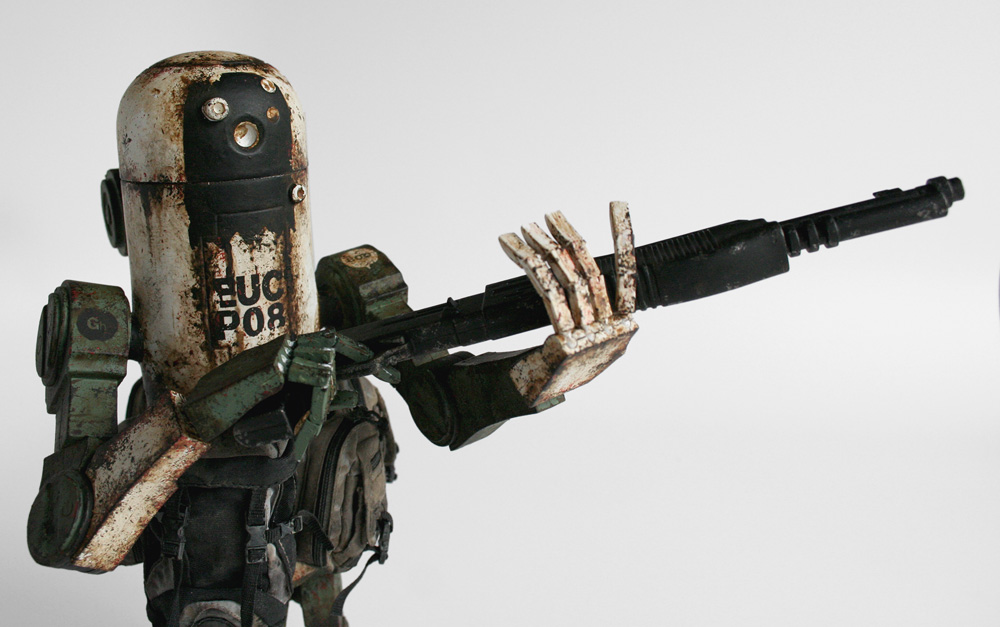
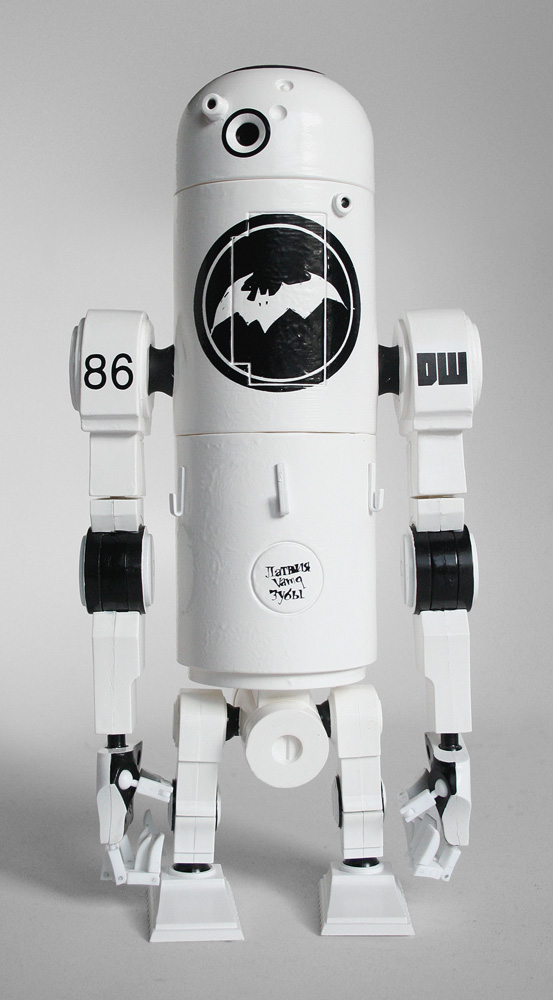
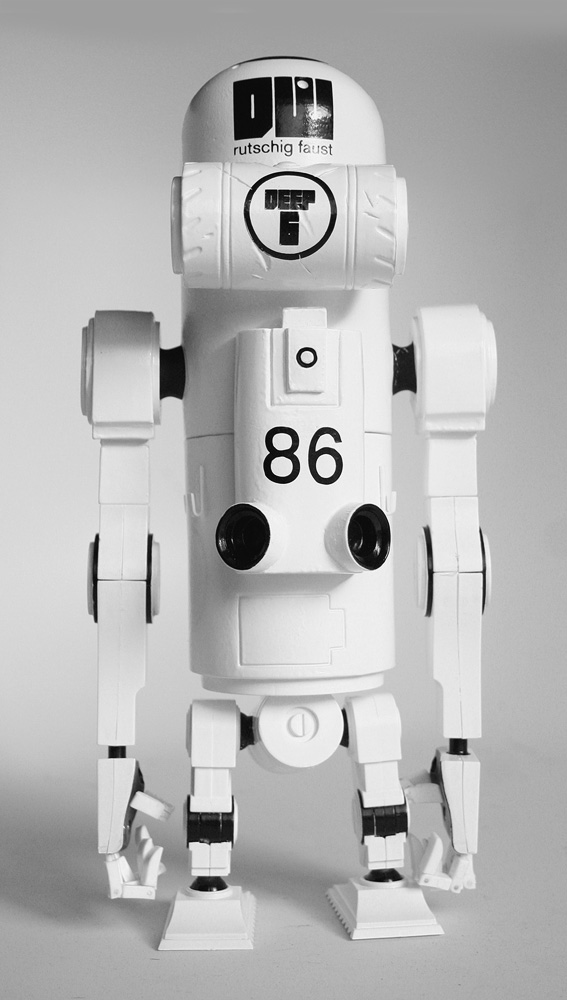
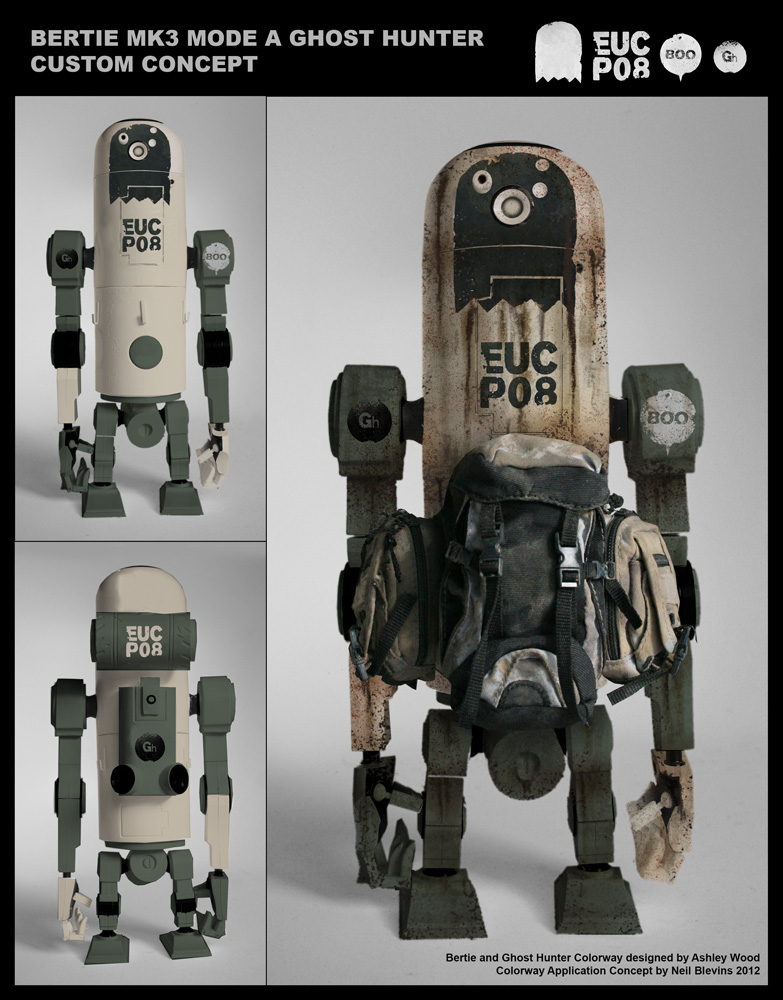
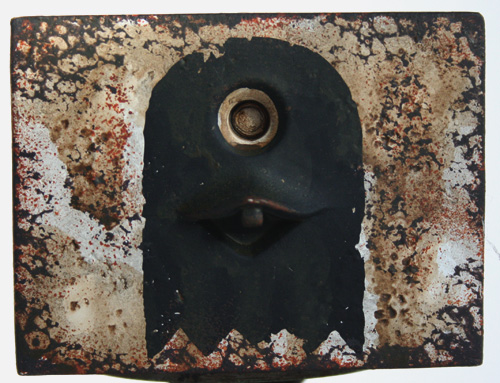
Artist Ashley Wood has a toy company (3A), and as I'm sure you all know, I love his World War Robot series. As well as just buying the premade toys, there's a whole culture of artists who take these toys and customize them by giving them custom paint schemes, adding or removing parts, etc. I've dabbled in this, changing colors, adding weathering, etc, but decided it's finally time to paint one from scratch. The robots sold by 3A come in different color schemes (called colorways), there's Iron Panda, Gravedigger, EMGY, a whole ton of them. So I decided to take a WWRp Daywatch MK3 Bertie and repainting him in the Ghost Hunter colorway, a colorway that doesn't exist on this particular robot.
There are so many different ways to go about painting these robots,
the steps I present below are the method I decided to use, it is by no
way the only or best way to do this sort of thing. But I figured
sharing my experiences would be helpful to sort out in my own mind the
process, and maybe there's some tips here other people can use. I
missed the whole era of traditional model making in visual effects
films, it was already digital by the time I entered the job market, so
maybe this is my way to hearken back a bit to the way things used to be
made.
Equipment: Hair Dryer, Camera, Photoshop
Step 1: Get Robot: Bought a
WWRp (1/12th scale) Daywatch MK3 Bertie Mode A on ebay.
Step 2: Photos: Took photos
of robot to make concept art.
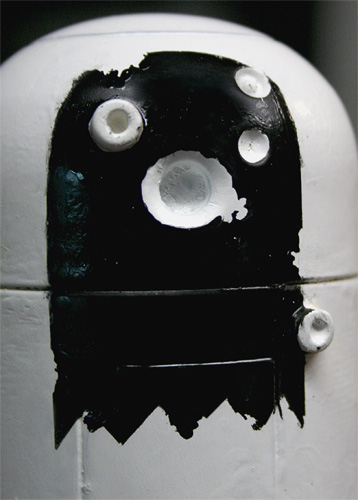
Step 3: Reference And Concept Art:
First off I collected some reference. Here's two pictures of the 1/6th
scale and 1/12th scale Ghost Hunter Square MK2...
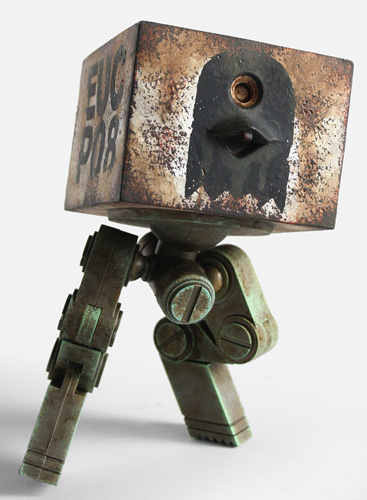
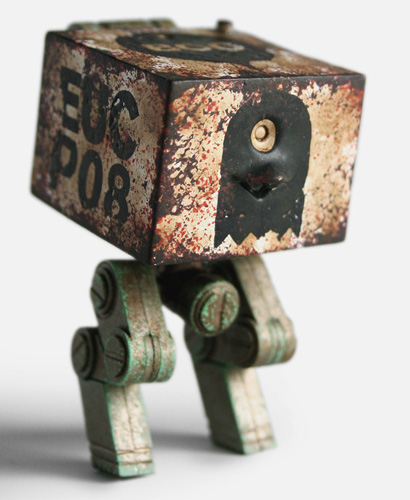
But even more than these toys, I was inspired by photos of the Life
Sized Ghost Hunter Square MK1...
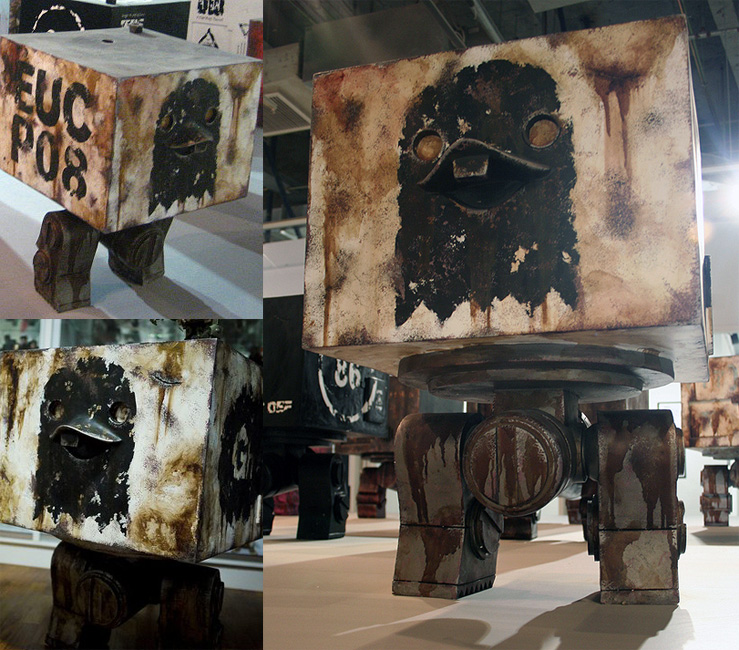
Please excuse me that I don't know who took these pictures, if you know who, let me know please so I can give proper credit.
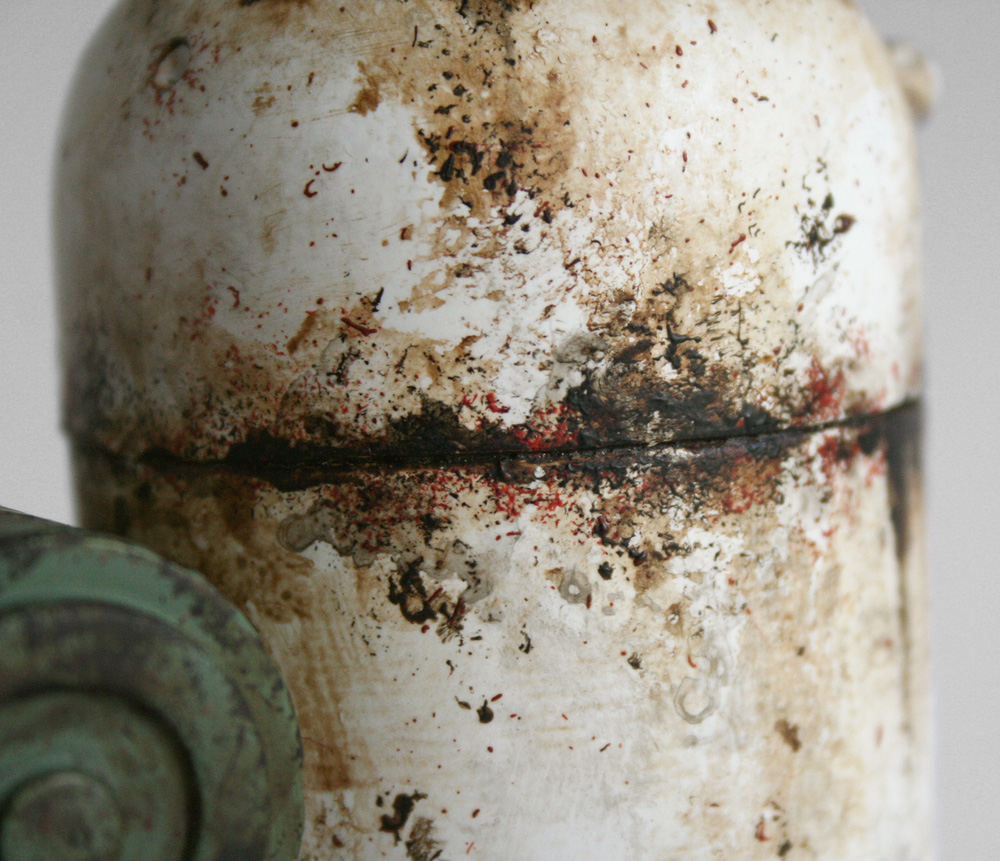
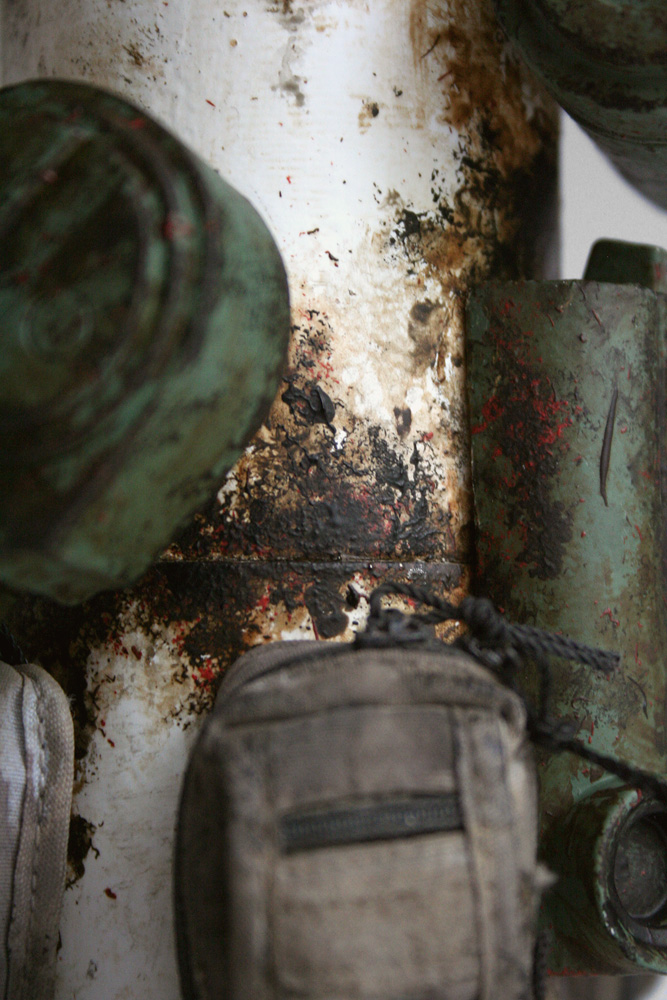
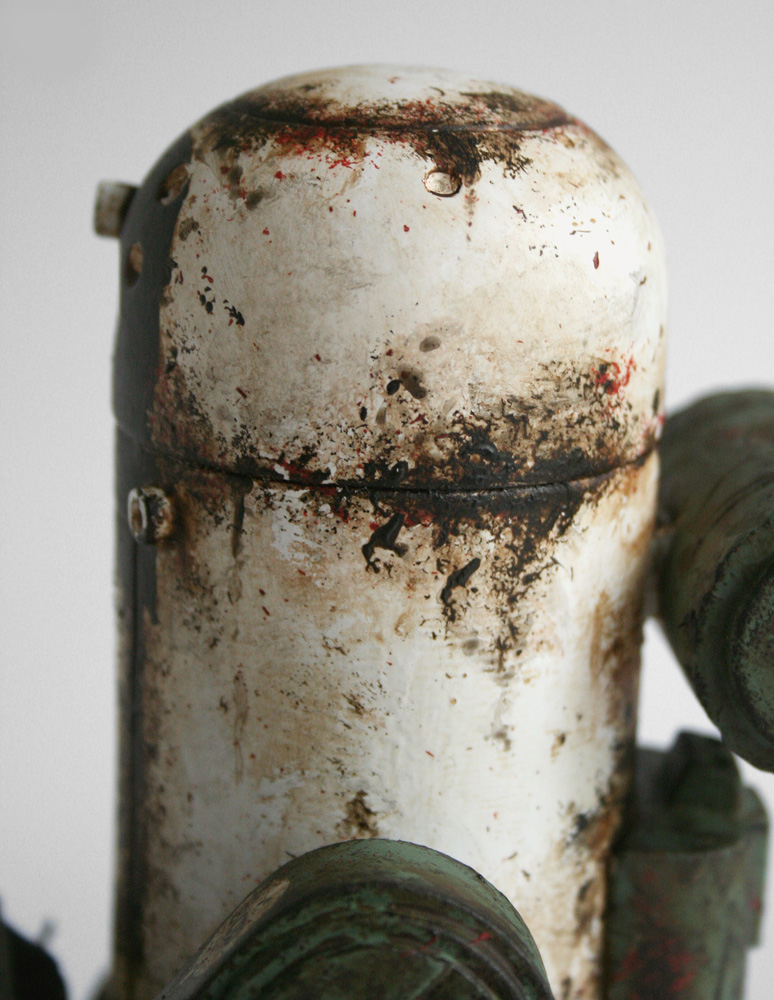
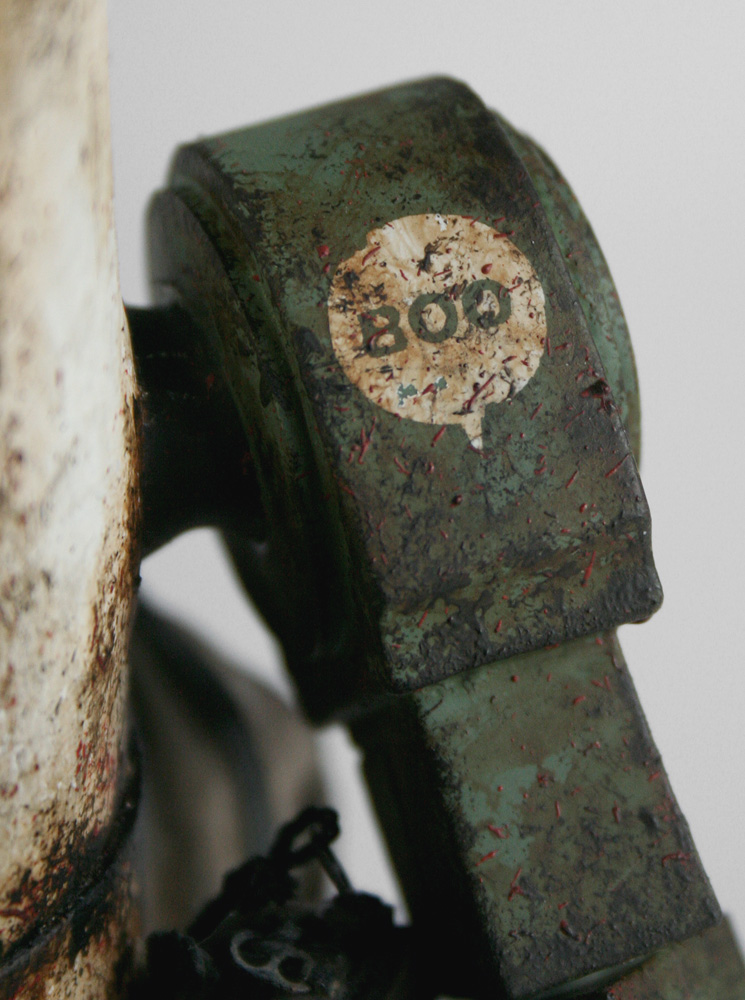
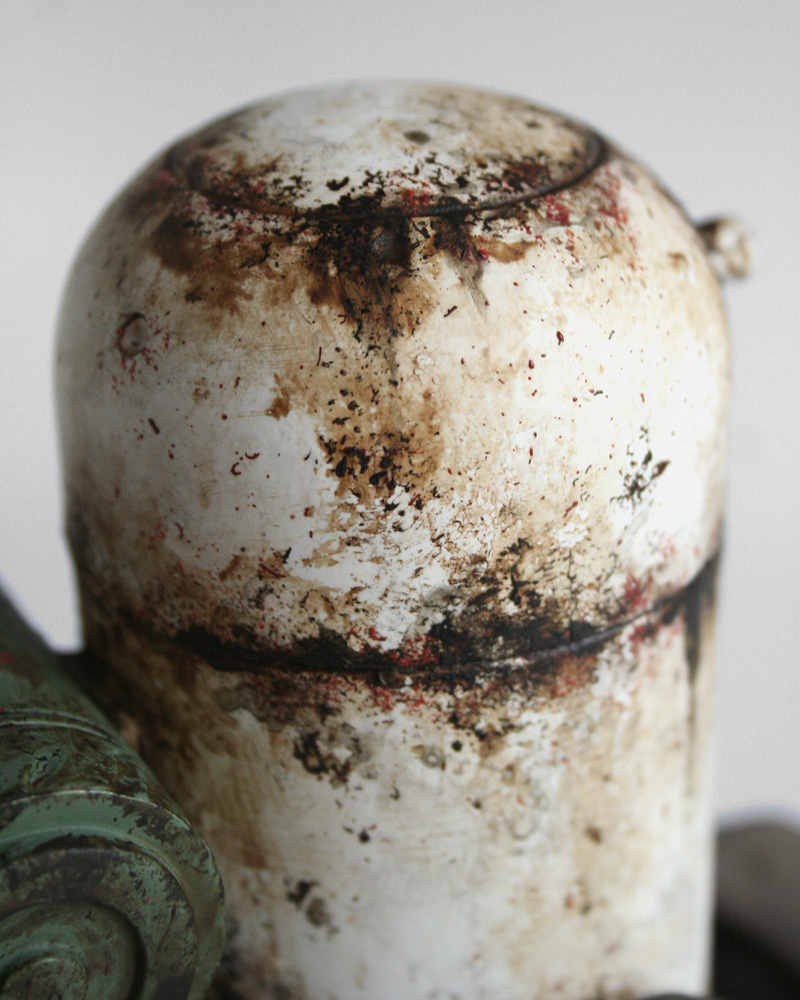
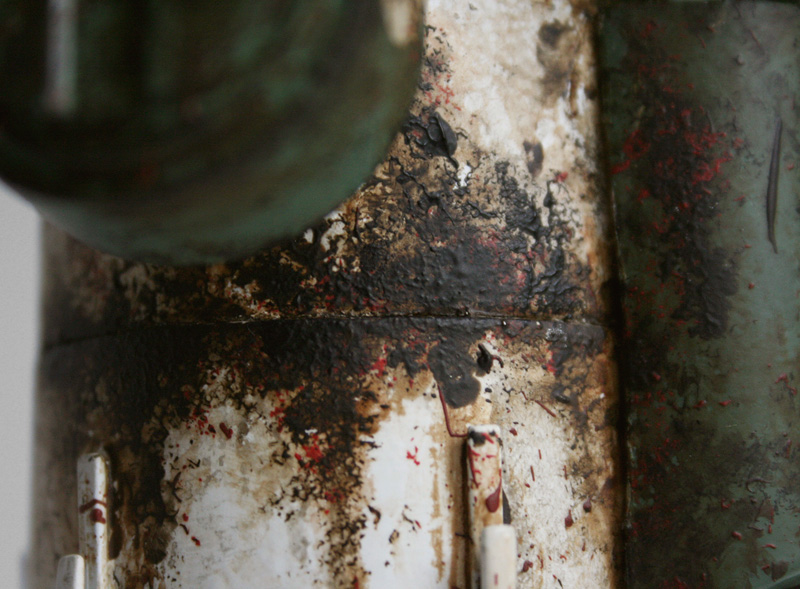
The Life Sized square just has some super cool weathering, he's a little whiter in spots than the MK2 squares, and I like the more muted colors of the green legs. So I use all of these pictures as inspiration, and then I digitally painted on top of the Daywatch MK3 Bertie photos in Photoshop. It's good to make some concept art so you're not experimenting on your actual toy, it's so much faster and so easy to make changes digitally. Even if you're a novice at digital painting, painting something simple showing the basic color scheme can really help you when it comes time to paint the figure in real life.
Here's my first stab, not sure which of the two designs to go for...
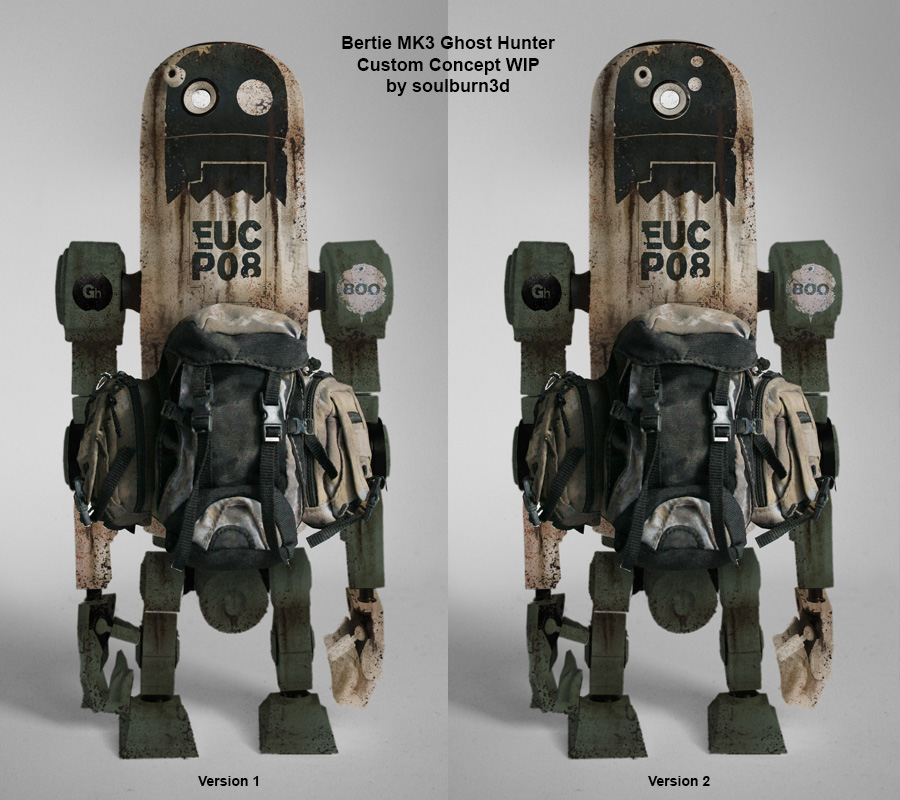
Here's my final design, I picked Version 2 with the single eye and
made some more modifications...
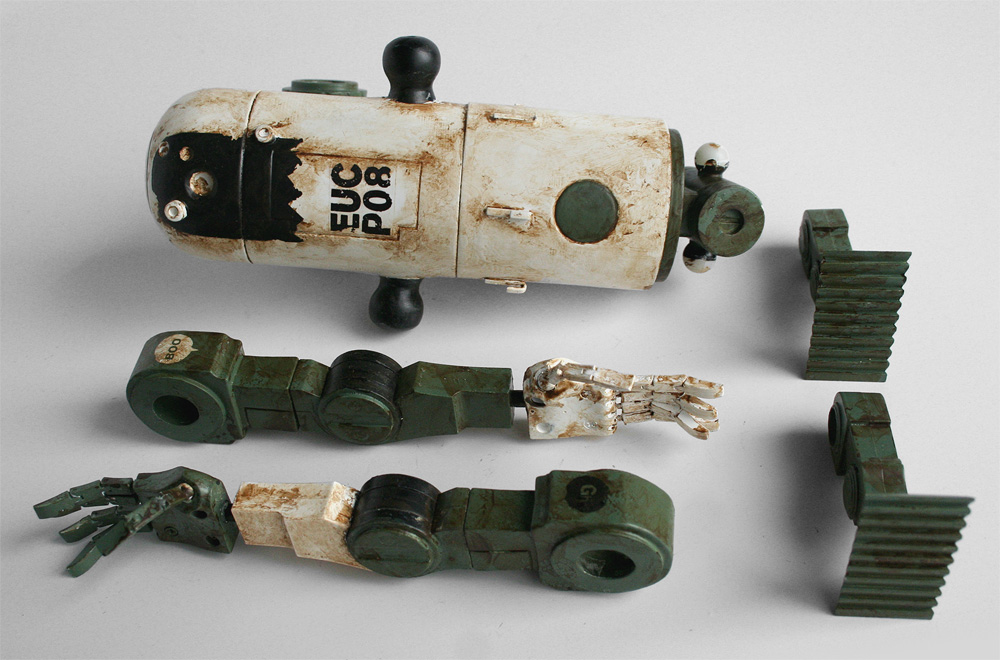
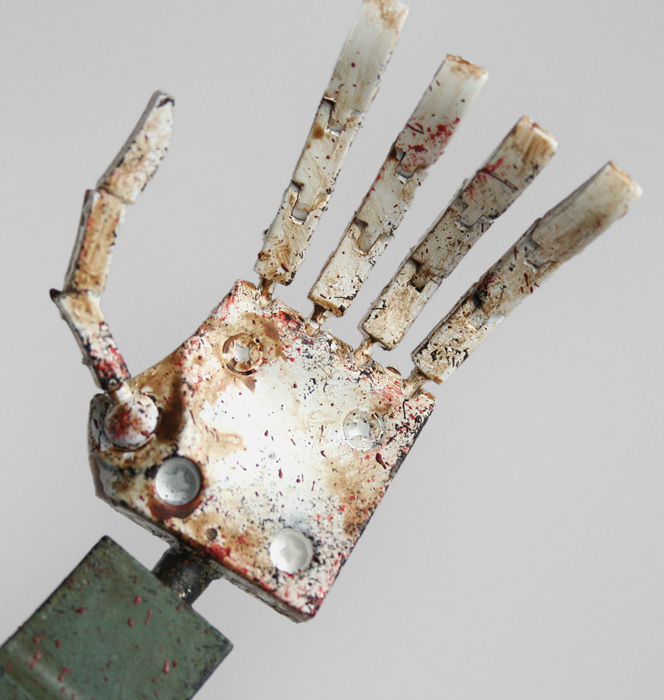
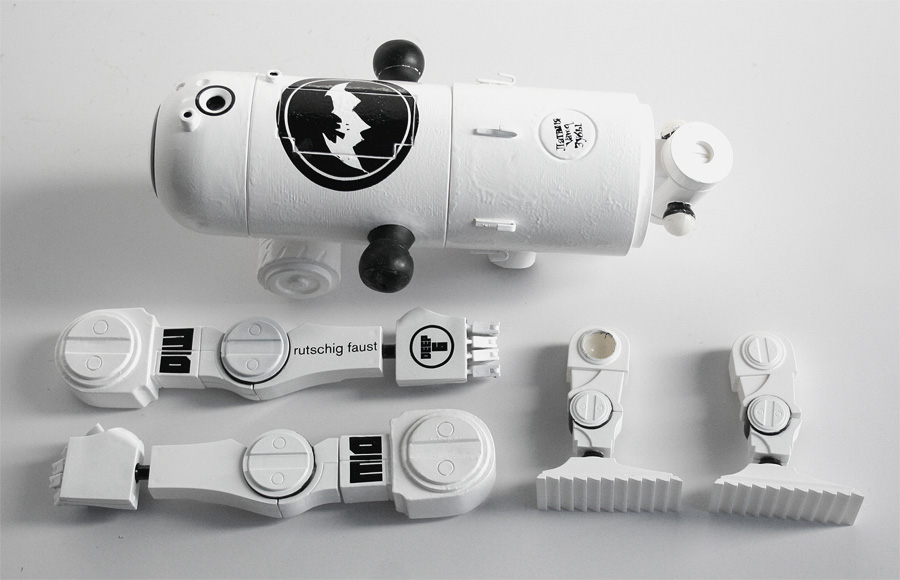
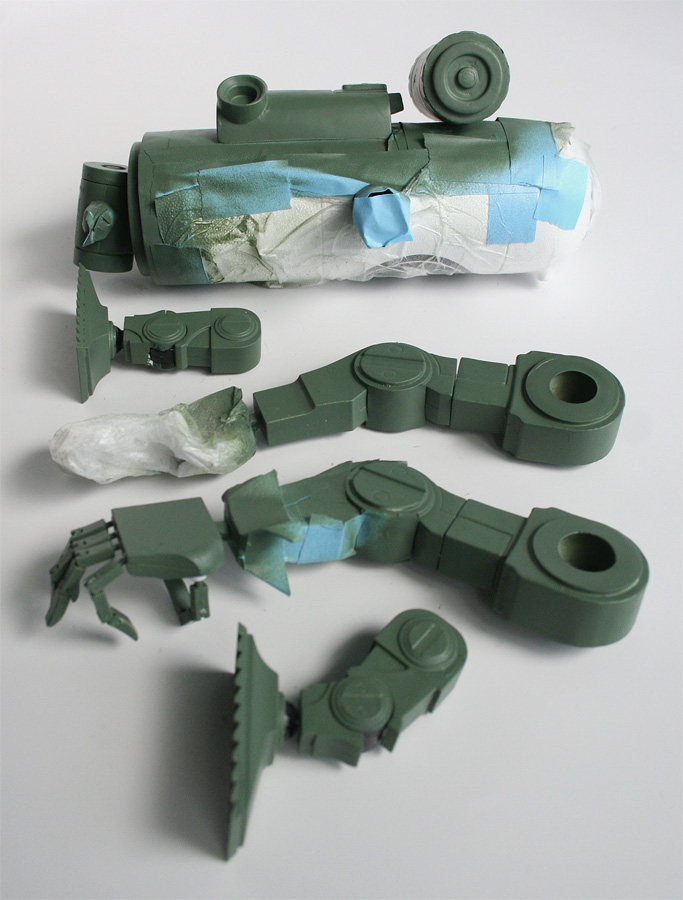
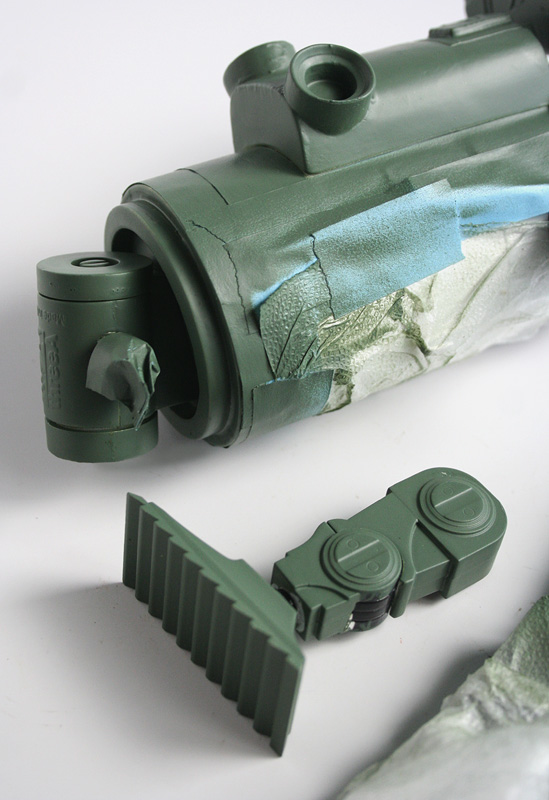
Step 4: Disassemble:
removed any part that can be removed for easier painting. Sadly, the
backpack and ammo can on the back of the Bertie can't be removed. Used
a hairdryer to heat the vinyl parts to make it easier to take him apart.
PART 2: BASE PAINT & PAINT STRIPPING
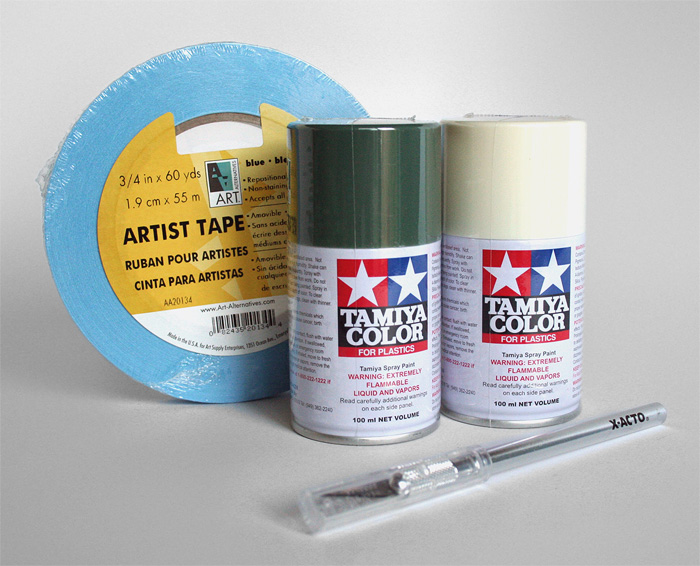
Equipment: Artist Tape, Saran Wrap, Tweezers, Fine Sand Paper, Exacto Blade, Gloves, Tamiya Base Layer Spray Paint, Paint Brushes of various sizes, Easy Off Oven Cleaner, Tamiya Laquer Thinner, Scrub brushes, Q-Tip, Paper Towel
Step 5: Primer: I'm told
it's best to add a primer before painting. In the case of this toy
though, he's already been painted, so I didn't bother with the primer.
This is probably a horrible mistake. :)
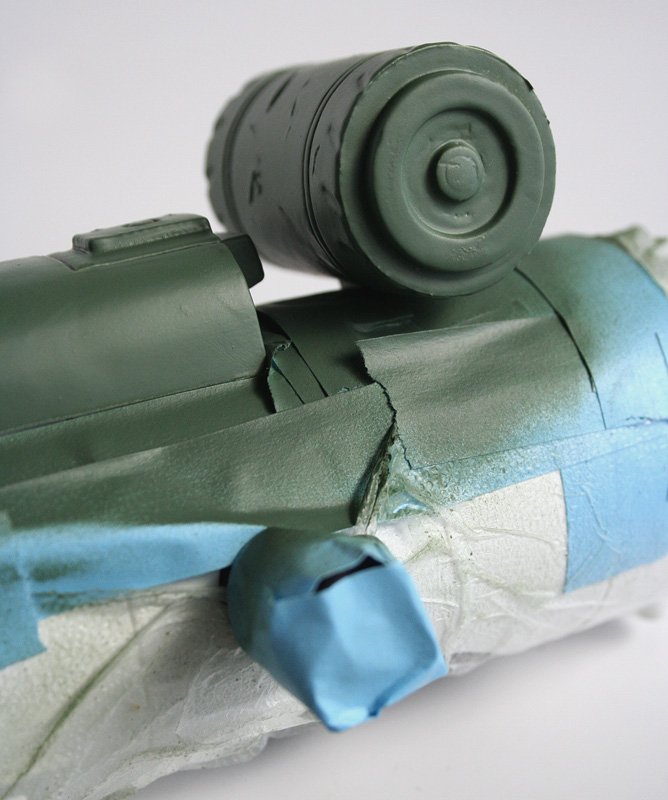
Step 6: Masking: Masked out
areas that I didn't want to paint, I used Artist Tape, which isn't as
sticky as normal tape (so it won't pull up the paint you put it on),
and cut it with an exacto blade. Some larger areas I covered with Saran
Wrap,
just so I didn't have to use up a lot
of tape for big areas I wanted masked.
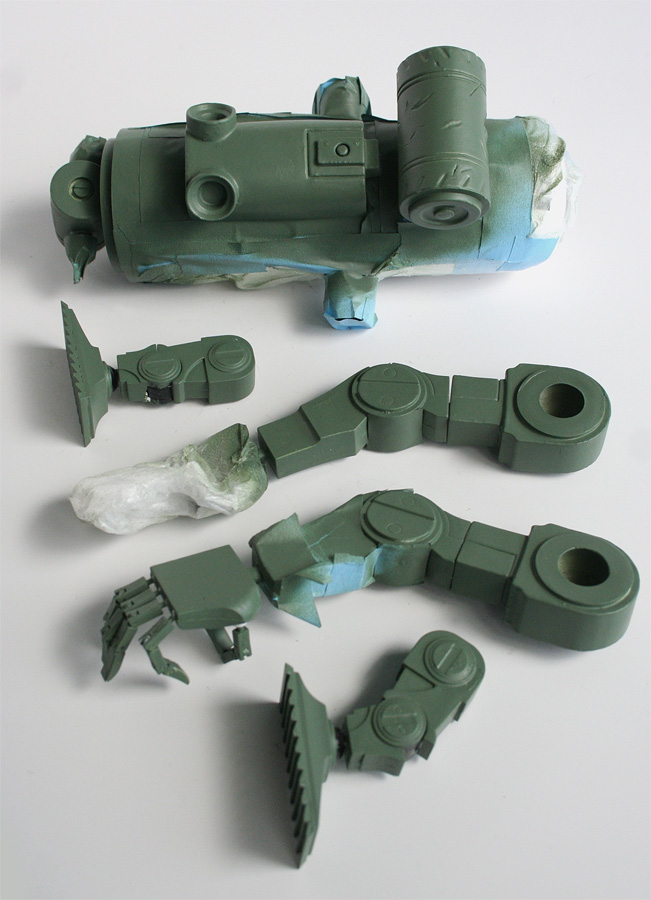
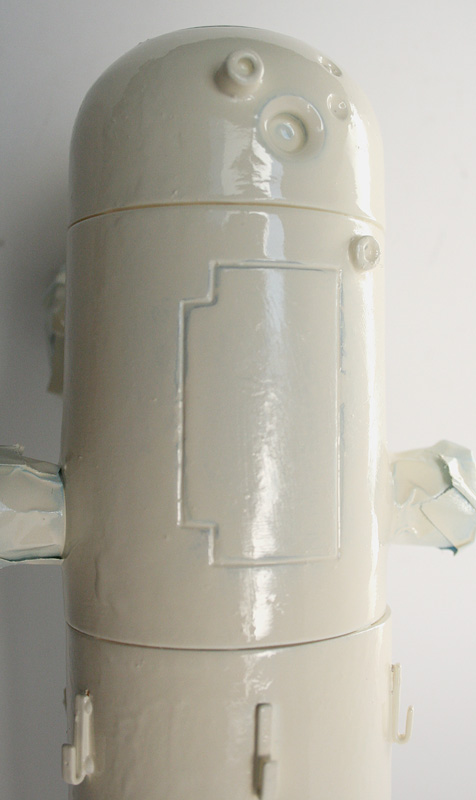
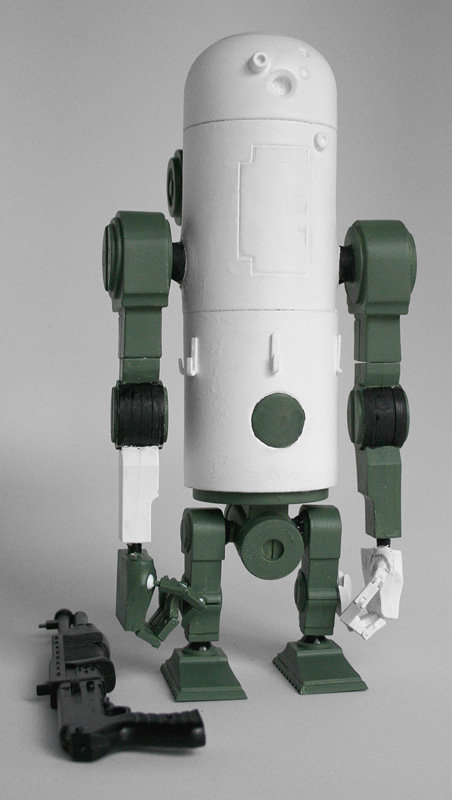
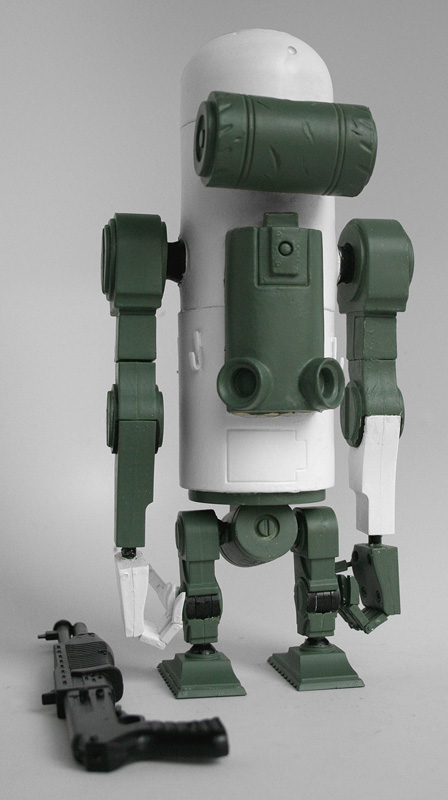
Step 7: Paint Base Layer:
For smooth paint application, I used spray paint, the Tamiya TS
Spray Paint Series, which is a specially formulated synthetic
lacquer. Used two colors, green (TS-78, Field Gray 2) and
offwhite (TS-7 Racing White). Wore gloves to avoid getting my hands all
painted.
Sprayed parts with the paint can about a foot away from the actual
toy (distance is very important, too close and the paint goes on uneven
with lots of drips). I
did 1.5 coats, basically 1 coat and then touchups in a few spots that
need it.
WARNING: Make sure to use these paints in a well ventilated area,
they are pretty toxic. I just sprayed them outdoors, but other people
make special spray hoods and such.
Next came the white paint, which was a bit more of an adventure than
I originally wanted.
I waited a week (although the paint should be dry after 24 hours)
and then I removed the masking with tweezers. Then remasked for the
white paint.
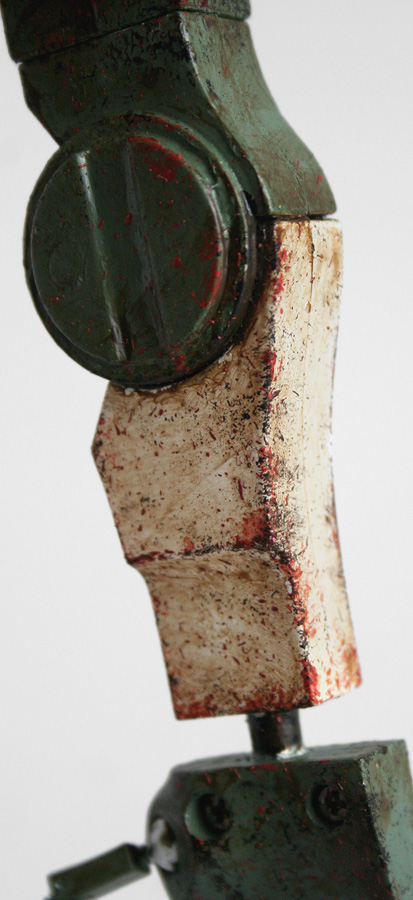
I used some
sand paper to carefully sand off the dark black logos on the daywatch.
If this had been a DIY robot, I wouldn't need to do this step, since it
won't have any graphics on it.
Disaster! The Racing White looked horrible! Not only is it way too
shiny, but it's also not opaque enough, so I can see the sanded areas
of the plastic through the paint!
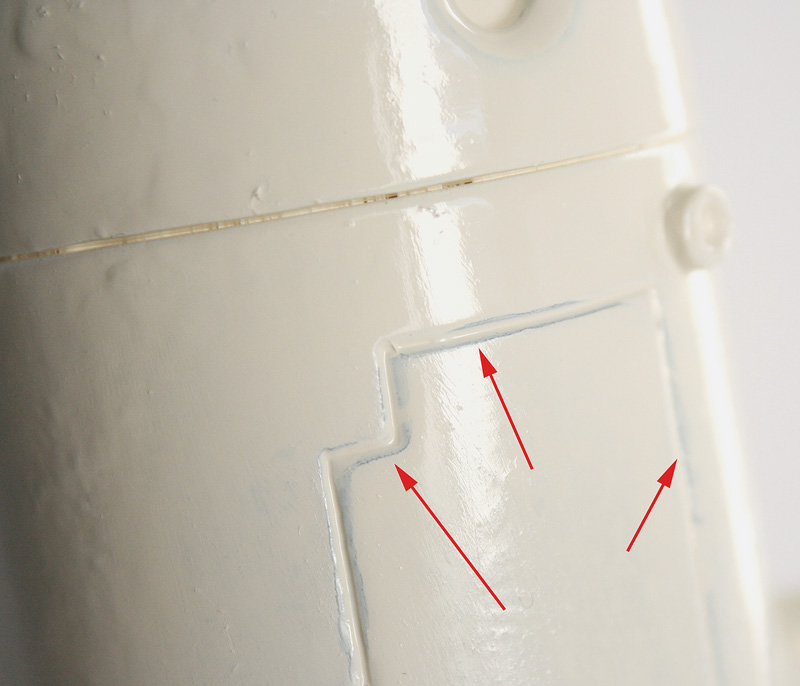
Had to find a good way to
remove the paint and start over.
Step 8: Strip Paint:
There's a lot of ways to strip paint, the first method I tried was
using Oven Cleaner. Works ok, but requires a lot of hard scrubbing. So
next I tried Tamiya Laquer Thinner.
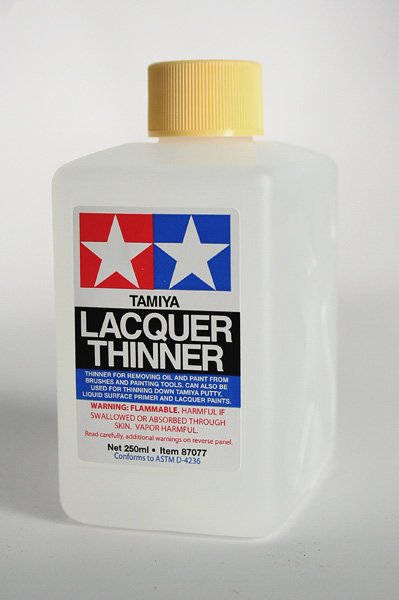
Worked great, you apply it with a Q-tip, rub it, and then the paint
comes right off with a paper towel. Note, highly toxic stuff, I did
this part outdoors so I'd have plenty of ventilation.
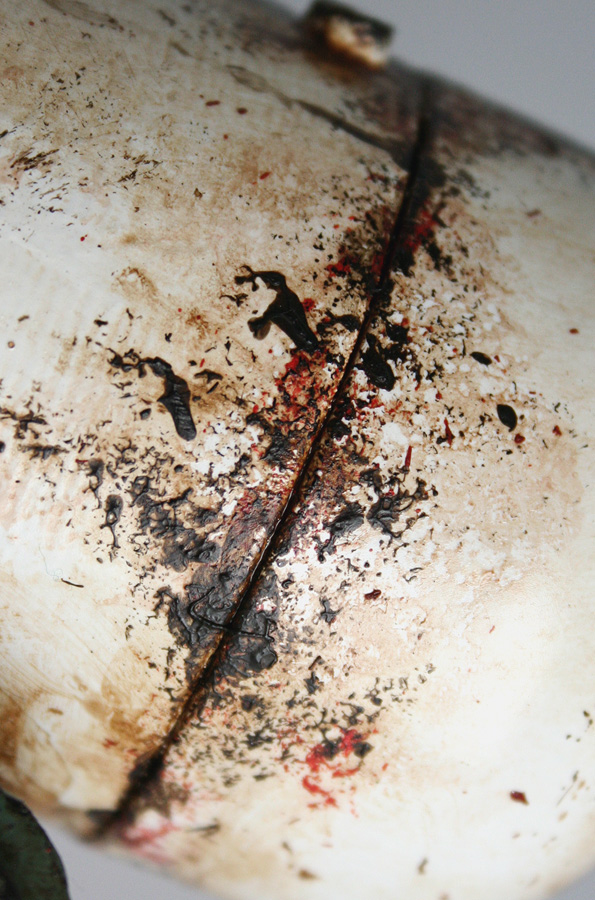
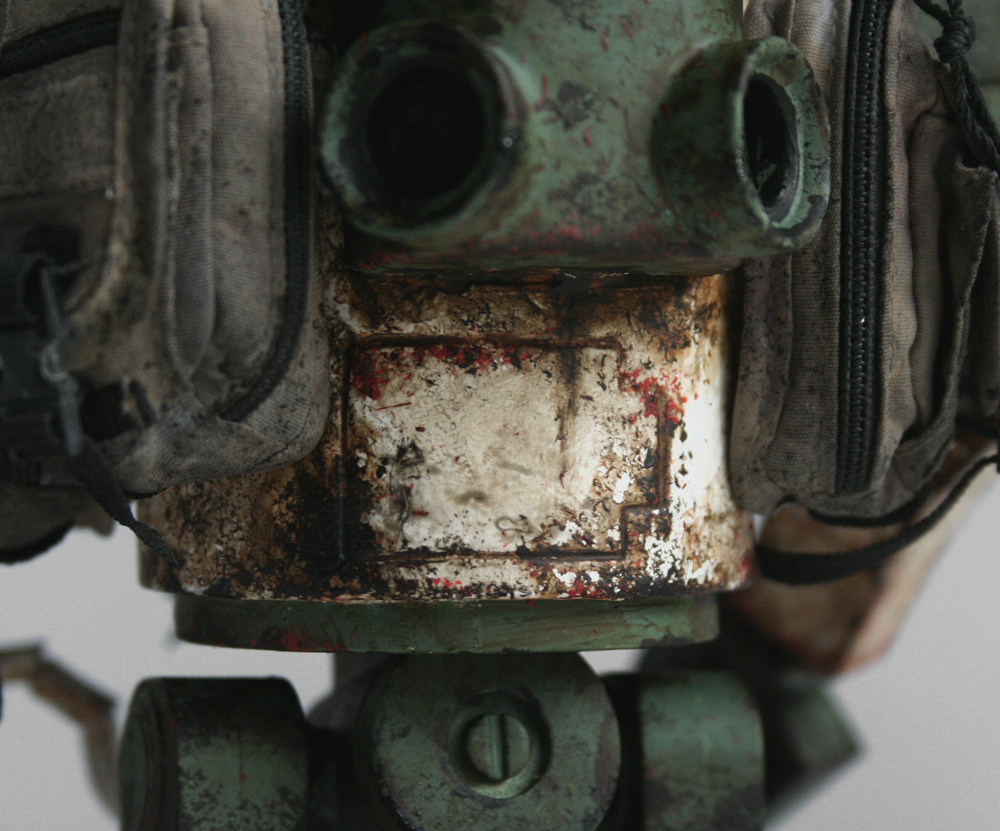
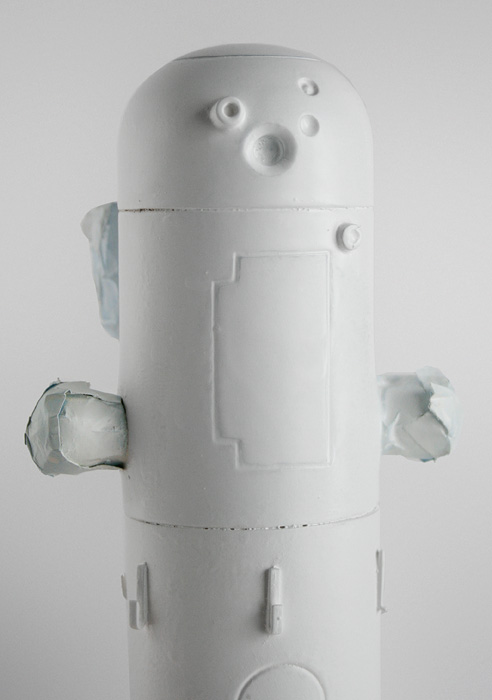
Stripped the paint off the head, body still in progress.
Step 7 Part 2: Used new white paint, TS-27, Matte White. The new
paint was much better, more opaque and less shiny.
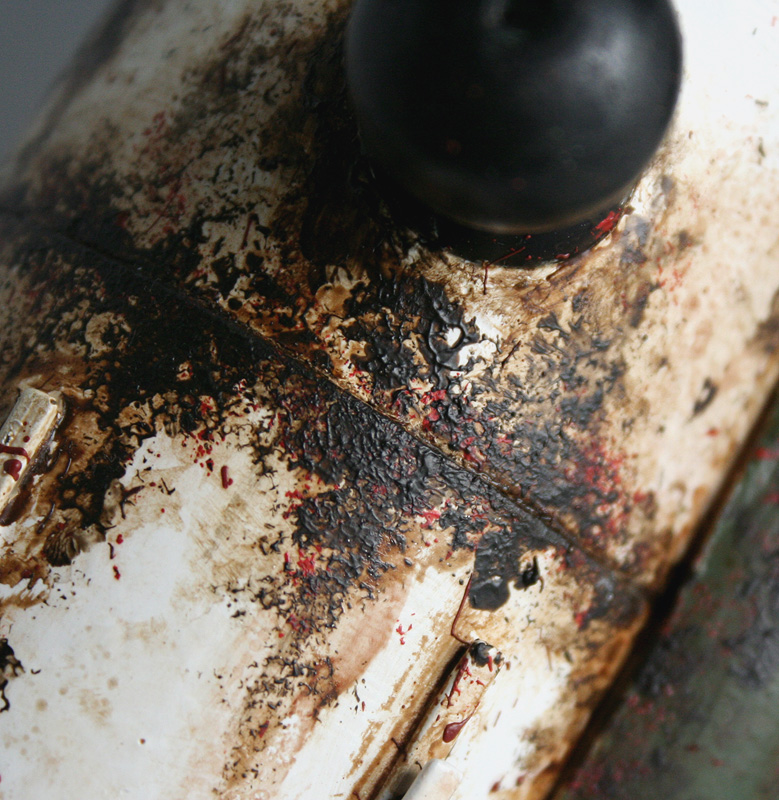
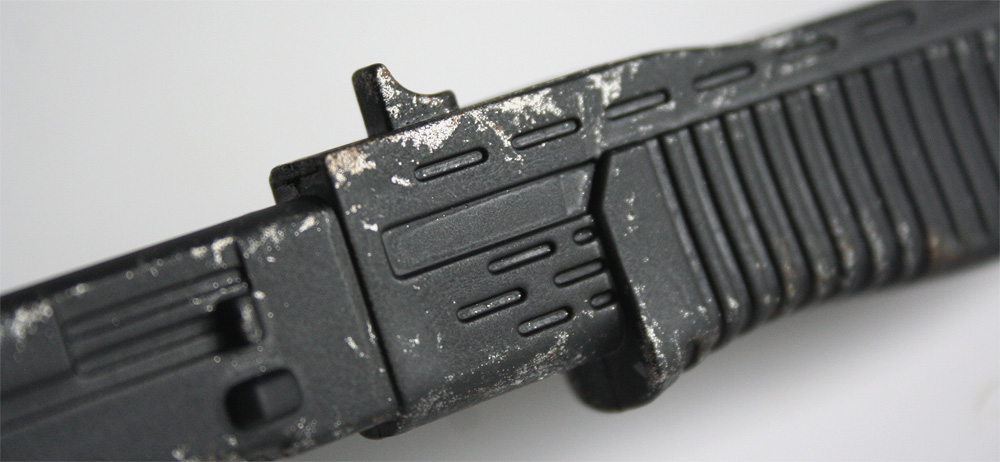
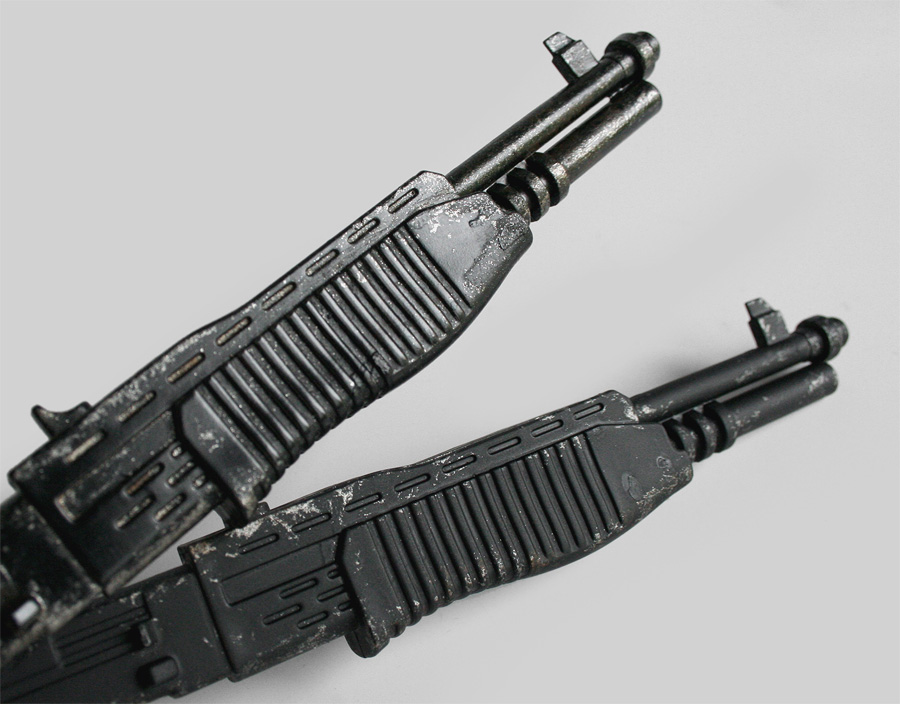
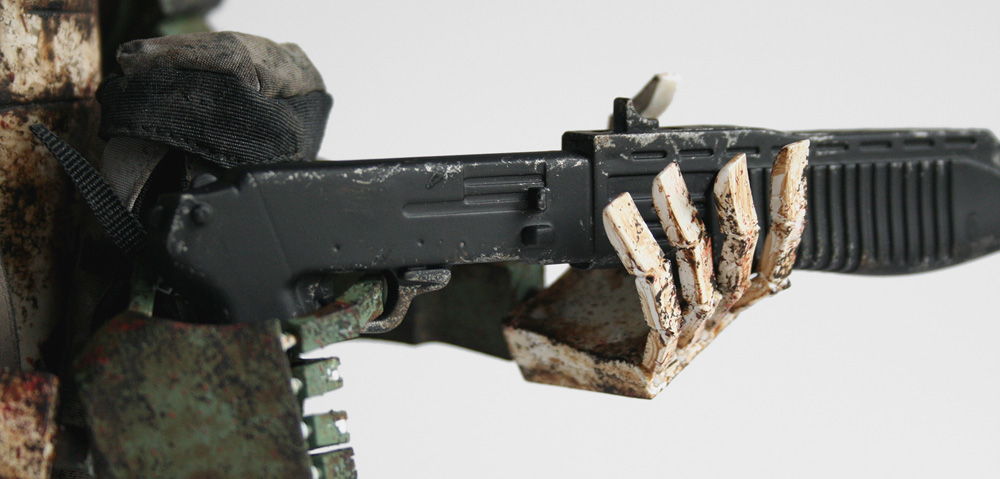
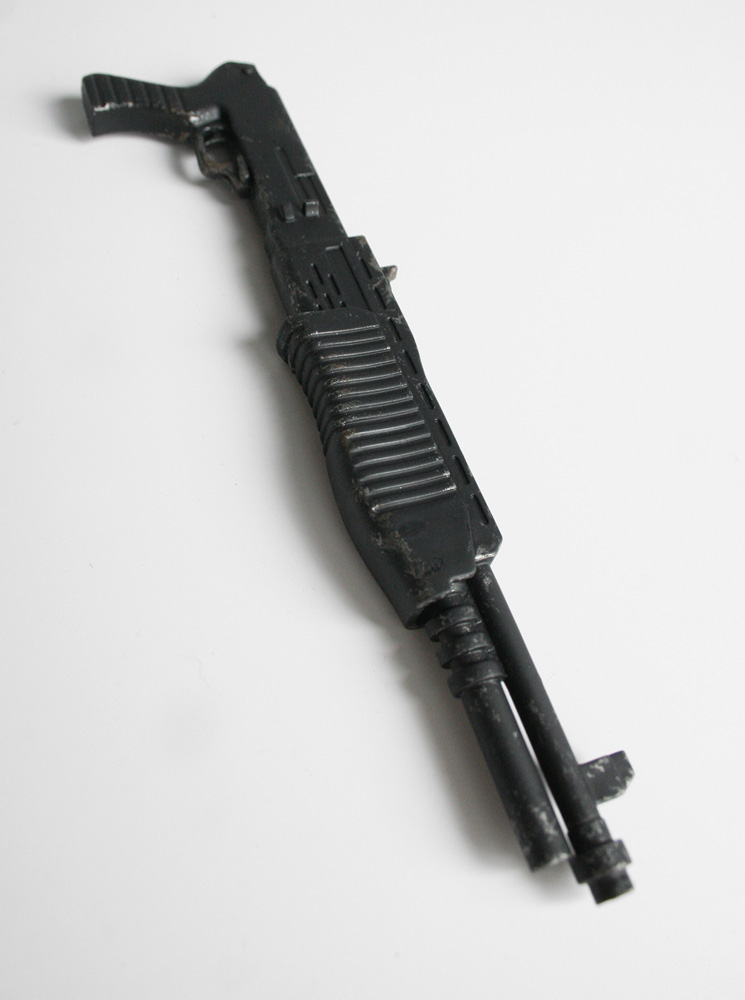
Then painted the gun with Matte Black (TS-6).
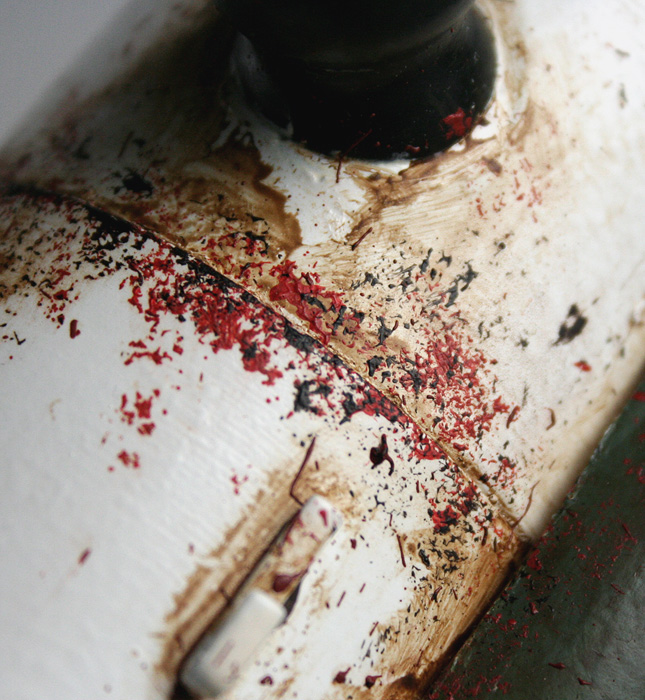
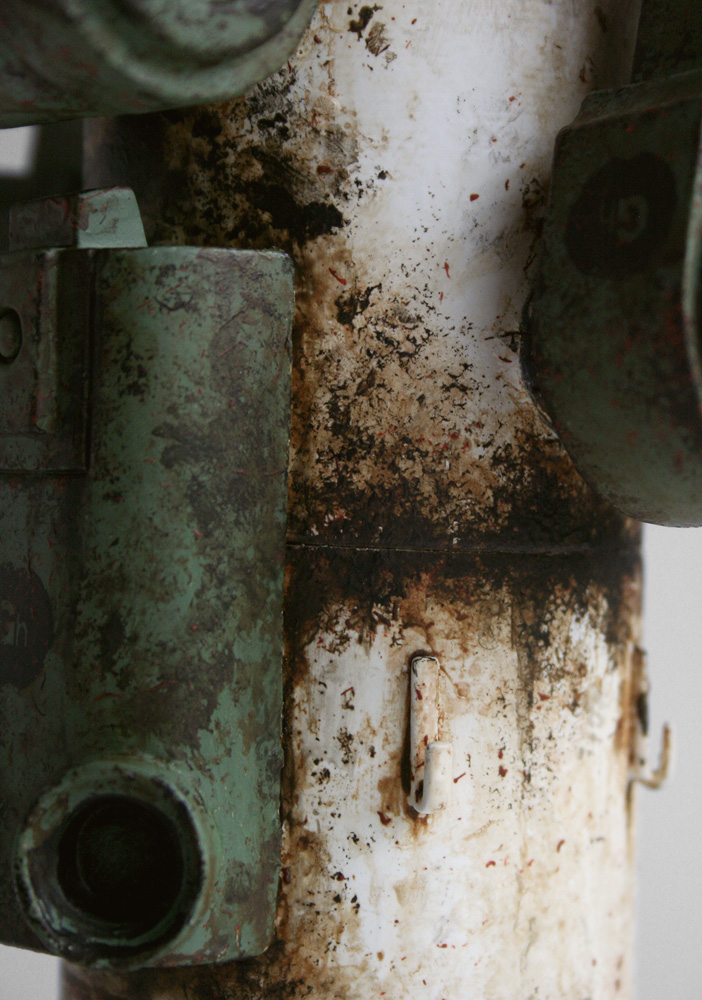
Did small touchups to the base layer with a paintbrush, areas that
weren't perfectly masked, and had a little bit of the wrong color paint
bleed through. I figured any
small imperfections in the paint are ok, because
it'll be weathered anyways, so imperfections will get covered over with
the dirt layers.
Here's the final base layer paint job...
PART 3: DECALS
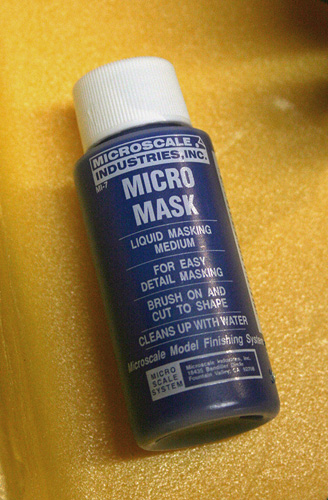
Equipment: Photoshop, Artist Tape, Saran Wrap, Tweezers, Exacto Blade, Paint Brushes of various sizes, Tamiya Masking Sticker Sheet (Plain Type 5 PCS), Microscale Industries Micro Mask Liquid Masking Medium, Microscale Industries Micro Sol Setting Solution,Tamiya TS-6 Matte Black, Tamiya Laquer Thinner, Q-Tip, Paper Towel, Lazertran Waterslide Decal Paper For Laser Printers, Tamiya Semi Gloss Clear TS-79
Step 9: Decals: For the
decals, I'm going to use 3 different methods, depending on the decal.
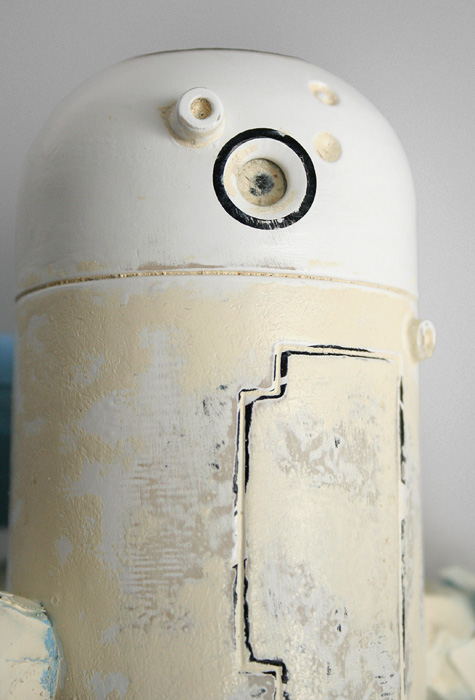
First up is the main black ghost around the eye. Since the shape of the
head involves a lot of curves, I decide to not use a standard decal,
but instead cut out a shape and then spray paint it.
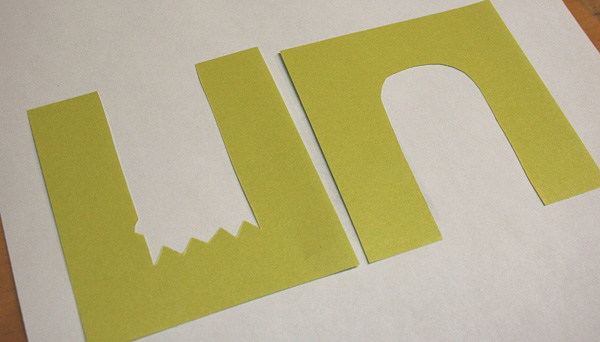
I then bring this into Photoshop and extract the ghost shape (you
can also just trace it using standard photoshop brushes to paint the
shape). I then print out the shape to the proper size on regular
paper...

I then use this to cut a Tamiya Masking Sticker Sheet (Plain Type 5
PCS) into two pieces, one for the lower portion, one for the upper
portion. Think of this as really good Artist Tape for fine details...
I then apply these two masks to the face of my Bertie...
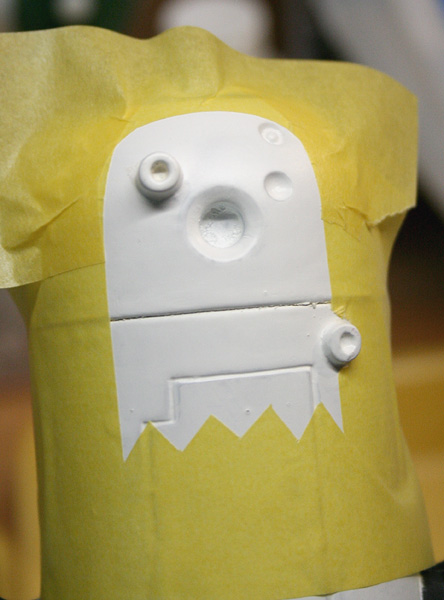
Then I use some Microscale Industries Micro Mask Liquid Masking
Medium...
with a brush to mask a few extra areas, include some large wear
around the edges of the ghost symbol...

Then I sprayed it with Tamiya TS-6 Matte Black...
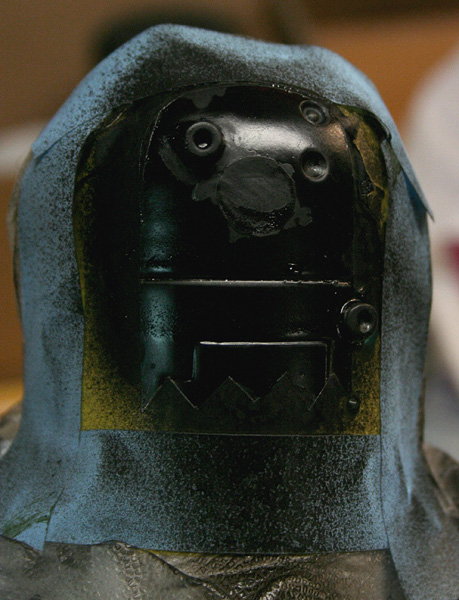
After pulling the masking off, I used a little Tamiya Laquer Thinner
to remove some black paint that had spilled underneath the masking. And
then used a little black paint to do a few touchups. Here's the
result...
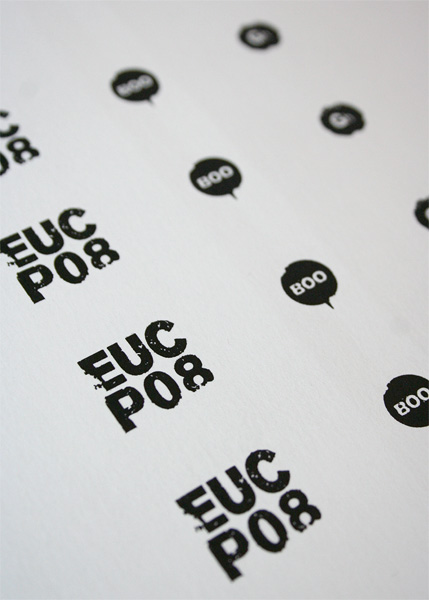
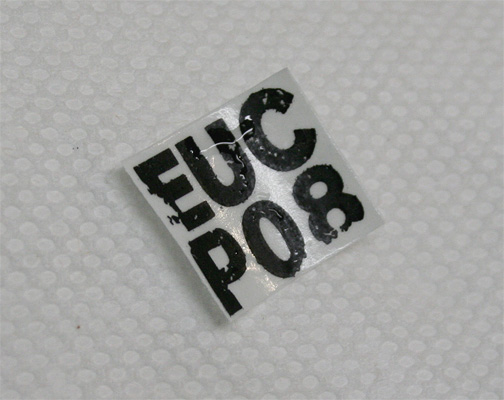
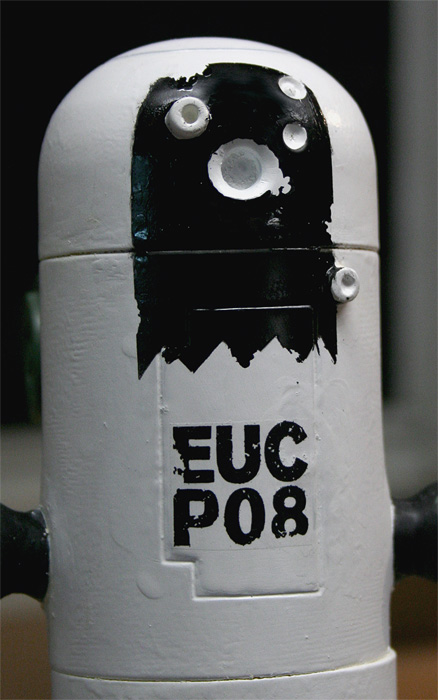
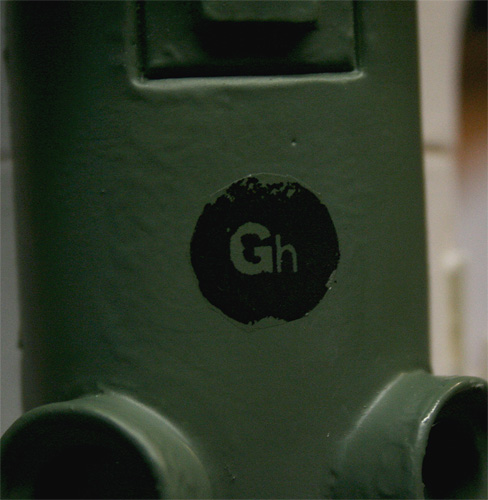
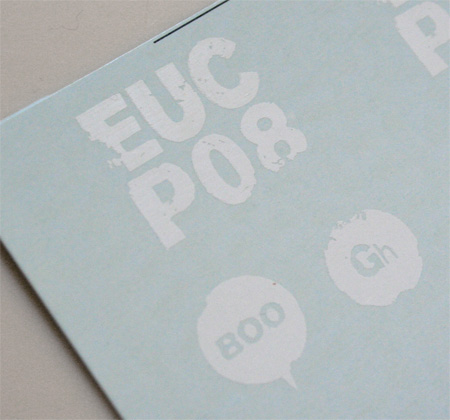
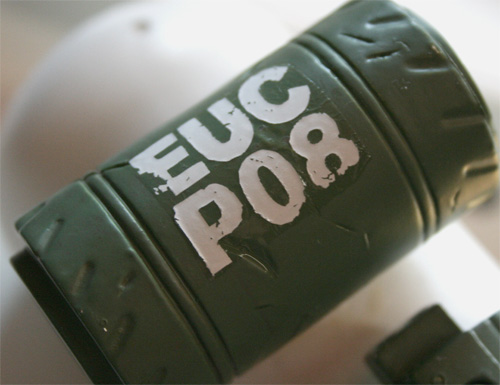
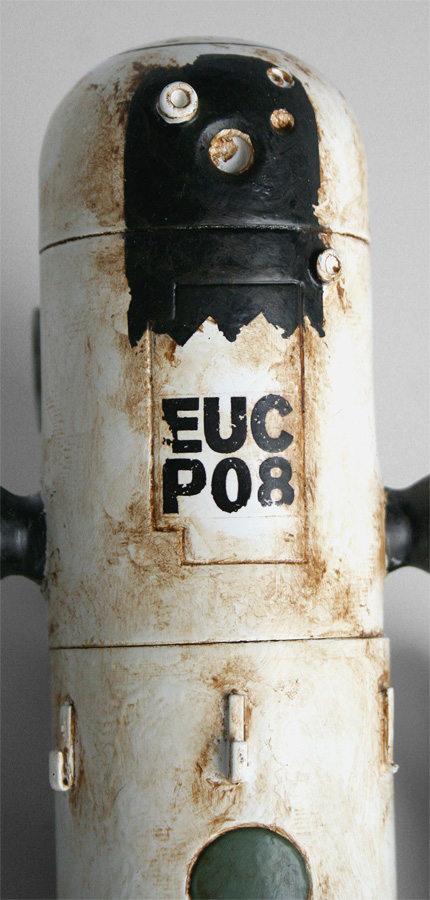
Step 9b: Waterslide Decals: For
the black logos, I will be using the Waterslide Decal Technique. Here's
a great YouTube video of someone using this technique: http://www.youtube.com/watch?v=1ne8tcRWkW4
I grab the logos again from photos of the square, turn them black
and white, and then print them on Lazertran Waterslide Decal Paper For
Laser Printers (Similar paper also exists for Inkjets, check out the
Testors brand).