
Translucency is a material phenomenon where light travels through an object's surface rather than simply bouncing off the surface. This is a diffuse phenomena, its specular equivalent would be something like transparency or refraction. Most non-metal surfaces contain a certain degree of translucency, so this lesson will discuss some of the physics behind how it works, some of the basic algorithms that try and simulate it, and gives a bunch of practical real world examples.
Translucency vs Pure Lambert
Translucency is one of those phenomenon that goes a bit beyond your everyday Lambertian diffuse.
With good old Lambert, light hits a surface and bounces, leaving the surface from the same point it hits. Now lets consider something like human skin.
Simple "2D" Translucency (Flat Surfaces)
If you've ever placed a light behind a piece of paper, you've noticed light gets through. What's more, if you stick you hand between the light and the paper you see the shadow of your hand through the paper.
This is simple 2d translucency, and is the simplest kind of transluceny to simulate. It's frequently refered to as thin traslucency, great for paper, curtains, lamp shades, anything that has no great thickness to it.
Simple "3D" TranslucencyFor 3D objects, you need something a bit more complex than the 2D
Translucency. The easiest to calculate is say you have light enter a
point on a surface, you then have the light continue to go through the
object until it hits a back face, i.e., it leaves the object. You
calculate
a rough distance between those two points, the deeper the distance the
less light works its way to the other side, and then you add that extra
light to the other side of your surface.
A few disadvantages of this technique:
Full-Blown Volume Rendering
For complete realism, what you actually want is a full volume render of your surface. When dealing with, for example, polygons, we're dealing with a surface, not a volume. If you've ever taken a sphere and deleted some faces, you've noticed the sphere is in fact hollow. A volume means at any point inside that sphere, there is still sphere, not empty space. The two main problems with this approach though involve speed and the data set. First, calculating a full volume gets very slow because of all the info you have. And then there's the question of how do you generate that information? Say you have a human muscle you want to render volumetrically, you now need some way to specify information about every point inside your surface. Do you want to start modeling every atom that makes up your object? Because of these factors, volume rendering is still somewhat impractical for mimicking say the way light reacts to human skin (in the entertainment industry anyways, volume rendering is being heavily researched in the medical industry as it relates to the human body). This desire to simplify is a lot like how the artistic wants to avoid worrying about the chemical composition of your material. "Can't you just give me a button that makes it look cool?"
Kubelka-Munk Pigment Model
Fortunately there are other ways to approximate translucent surfaces. If you start doing some research through various papers, the first one you're likely to run into is the Kubelka-Munk Pigment Model. This was developed in the 1930s to describe light bouncing off wall paint. The idea is, how much of what pigments do you need so that when you paint a wall with x thickness of paint you get the desired color. Research was done, and some useful models were created. For more information, check out Andrew Glassner's "Principles of Digital Image Synthesis" book available on Amazon and other spots.
The method has several problems though, such as it assumes the substance is homogenous all the way through. It does not take into account layers of different materials or different densities in a single surface.
Hanrahan-Krueger Multiple Layer Model
This updated model allows you to solve a similar equation for multiple layers. Much like human skin, it does calculations as your light ray travels from one layer to another layer to another layer. Layers are described in terms of their refraction, absorption and scattering coefficients, the depth of the layer, and a Henyey-Greenstien phase function. Again, check out Glassner's book for more information.
Henrik Jensen's BSSRDF
A far more advanced and accurate model comes from a well known paper by Henrik Wann Jensen, inventor of the photon map. This paper is entitled "A Practical Model For Sub-Surface Light Transport".
His experimentation started with using a laser pointer to send a beam of light through a glass of milk (an experiment I recreate below). He noticed how a beam would enter the milk and scatter reasonably uniformly through the material.
After a lot of research with colleagues, he proposed a new method for simulating sub-surface scattering. The problem with many previous single scattering methods is they don't work well with highly scattering materials (multi-scattering) such as milk and human skin. These materials tend to scatter light in an isotropic fashion (i.e., uniformly in all directions). Methods for simulating this already exist using diffusion theory. The answer Henrik found was to combine both methods, add a single scattering term to a diffusion term, to get the full effect. His results were physically correct while retaining reasonable speed.
His proposed BSSRDF (Bidirectional Surface Scattering Reflectance Distribution Function) made use of a generalization of the Hanrahan-Krueger Model for the direct component (due to single scattering), and a diffusion approximation (due to multiple scattering). For example, human skin's diffusion term is very high, whereas it's single scattering term is very small. A substance such as marble or wax will have a much larger contribution from the single scattering effect, and consequently less contribution from the diffusion component (in Henrik's experiments, he calculates that the two components are approximately equal to each other for marble).
Example: Leaves
Lets take a look and discuss a few real world examples of Translucent materials (Thanks to Steve for help with the laser pointer)...
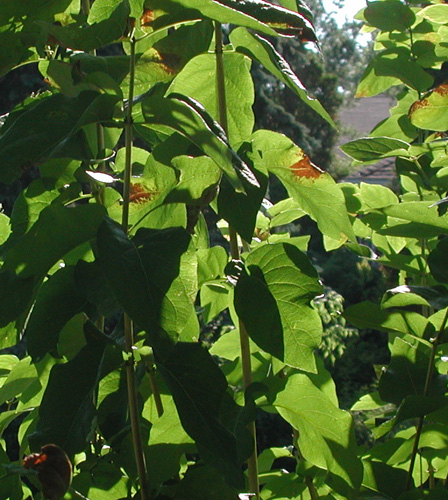
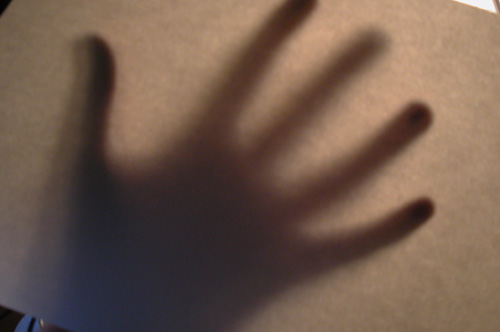
Leaves are a good example of thin translucency. Notice how multiple layers of leaves eventually blocks the light. This is one of the simplest cases since the surface is so thin.
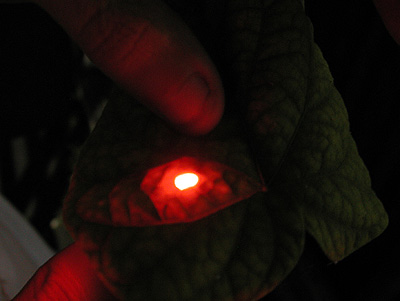
This is a good place to discuss Single vs Multi-scattering (as mentionned in Henrik Jensen's BSSRDF). We now shoot out laser light into a leaf. Notice the strong, focused center to the light beam, which is the laser entering one side of the leaf and exiting through the other in a very directed manner, much like light travels through a piece of glass and comes out at a different angle due to refraction. In cg, this would be best approximated with a single scattering component. The soft glow surrounding the leaf would be best approximated with a multiscattering component.
Here's a second leaf, same exposure and settings on the camera, only a thicker leaf from a different kind of plant. Notice there is almost no soft glow, just the strong focused light beam coming through. To replicate this substance in cg, you'd do so with a strong single scattering component and a very small multiscattering component.
Example: Grapes
Here's some photos of grapes...
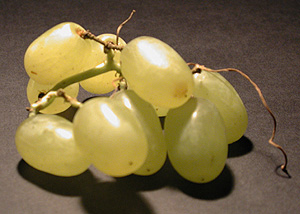
First the grapes under normal light.
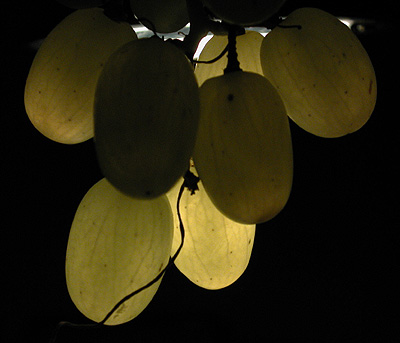
Now backlit, notice the light coming through the surfaces, illuminating the veins.
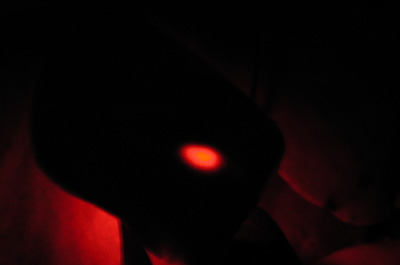
Here's a laser going through the grapes. Notice the light moving
from the "entry grape" into the rest of the grapes, which would be best
approximated in cg with a strong multiscatter term.
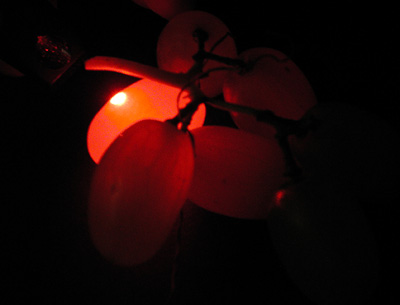
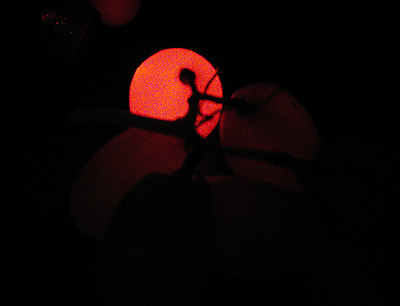
I've increased the exposure time to see the light transport a bit better. As well as the light diffusing out in an isotropic fashion, notice the specular highlight created on the grape stem from the light scattering inside the grape.
Example: Plum
Here's two shots of a laser going through the plum. Despite thinking the skin would be too thick, it's surprising how much light scatters inside.
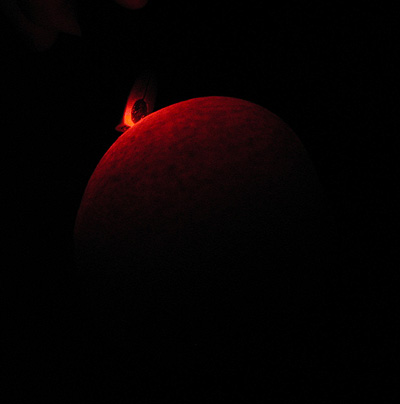
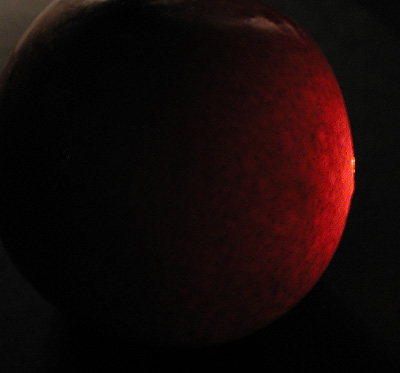
Note: The plum was very tasty after the experiment was finished.
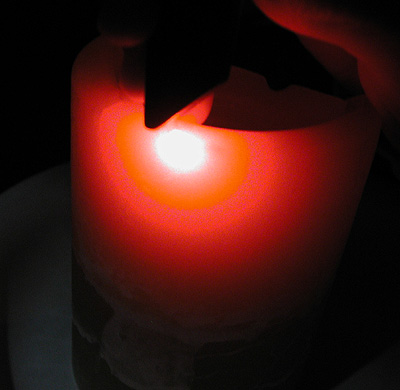
Example: Wax
Here are a few photos of a wax candle. Notice the soft even distribution of light, which makes this material a good candidate for a strong multiscattering component. But interestingly, our experiments showed that wax (when lit by a directed beam of light) would require a strong single scattering component as well.

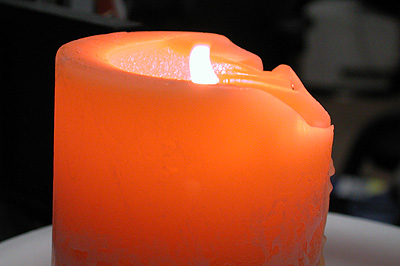
Here's a laser being sent through the candle.
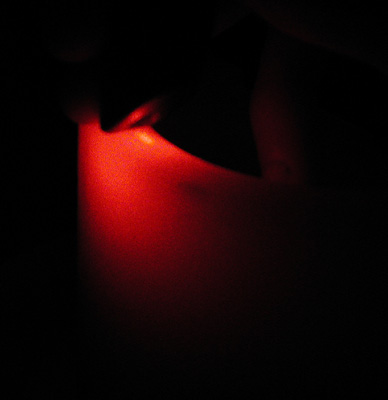
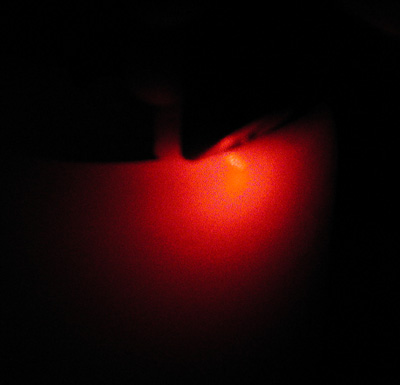
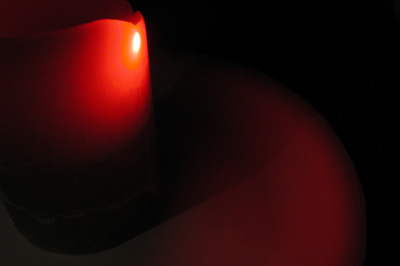
Notice the light coming through the substance and lighting the plate.
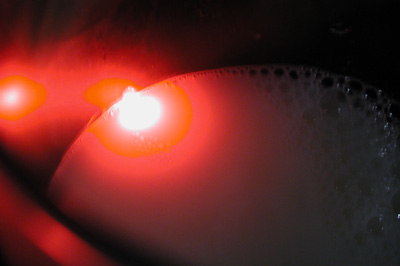
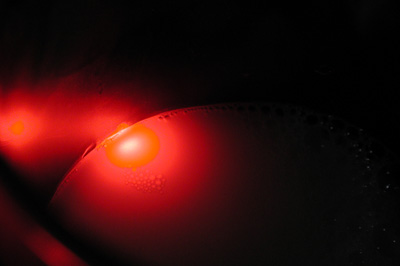
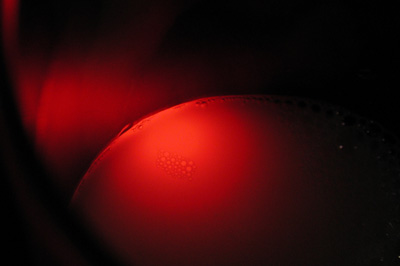
Example: Milk
The following three photos are an action shot. The laser is placed
very
close to the top of the milk, and you get a very directed light, which
would be best approximated with a single scattering component.
As the laser is moved down so that more if it enters the milk, you'd
want to use a stronger multiscattering component. As an experiment, try
starting with a glass of water, put a laser through it (the result will
be a refraction) and slowly add milk to the water. With a little bit of
milk, you'll see the light scattered somewhat, but it will still remain
reasonably directional, which would be considered a strong single
scatter in cg, and as the water became thicker with more and more milk,
the single scatter would slowly transform into a multiscatter.
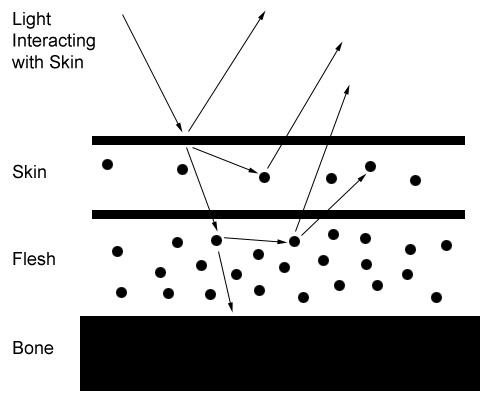
Example: Human Skin
Human skin is by far the most complex of these situations, since it is comprised of many layers, each with a very different composition.
For example, after the skin layer comes the fleshy layer. Light that hits this layer and then comes back out of the skin tends to contain a reddish tint. This makes sense, since there's plenty of reddish things to hit under the skin. That is why some people have noticed skin tends to get a little bit redder in the shadow areas.
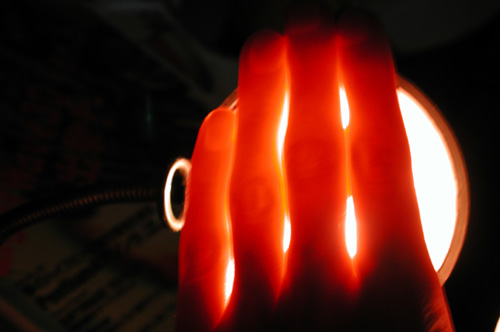
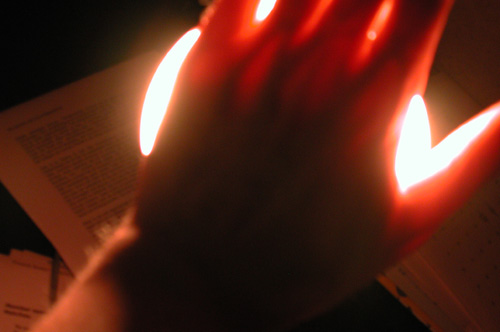
Another phenomenon that occurs is the softening of shadow areas. Think of it like this, you're a ray of light, you enter the skin, you leave at a slightly different location than where you entered (back-scattering). So if some of the skin is in shadow, and some is receiving direct illumination, it is quite possible to have a light beam enter through a lit area and leave through a shadowed area. This is why areas of shadow on skin don't falloff harshly, it's as though the skin is slightly illuminated in areas that are near shadow / lit areas. However, areas that are totally in shadow remain totally dark, hence this phenomenon is not the same as just making your material self illuminated.Then notice light that travels all the way through the skin, exiting the other side (forward scattering). Here's a photo of a hand on a light. Notice the light going through the skin. This phenomenon also happens at other parts of the body, especially the ears if light goes behind them.
Also notice, even though you have bones that block some of the light, you can't make out the bones clearly. This is because the light rays are bouncing all around your skin and flesh molecules, and as discussed with Jensen's work, multiscattered light tends to become isotropic, even on a highly anisotropic material like skin, so the light becomes evenly distributed in all directions. However, as you enter areas of more concentrated bone (not thicker bone, just more of it in a specific location), less light travels through.
Conclusion
Hopefully that gives you a high level overview of what Translucency is, the science behind some of the different shading models, and lots of experimental examples of Translucency in the real world. In the future, I'll write a second tutorial that shows off how to achieve these sorts of looks in CG with actual shaders in our favorite renderers. Until then, hopefully this is a good overview of the more scientific end of the phenomena.