Chipped Paint Material
By Neil Blevins
Created On: June 11th 2009
Updated On: Dec 18th 2024
Software: Blender
or 3dsmax (vray)
Go here
to read this tutorial in Russian.
Here's a tutorial on how to create a basic chipped paint material. Old
paint tends
to flake off, or gets chipped off by blunt objects hitting it. Adding a
little chipping to the paint in your model can add a lot of realism,
and gives your objects a sense of history. Afterall, it's not just the
dialog that provides the story, but every detail on every object.
Chipped paint lets the audience immediately know how old the object is,
or how often it's been used.
Reference
Here's some reference of what I'm talking about. The first is some
nice patterns of paint
chipped off a radio antenna.
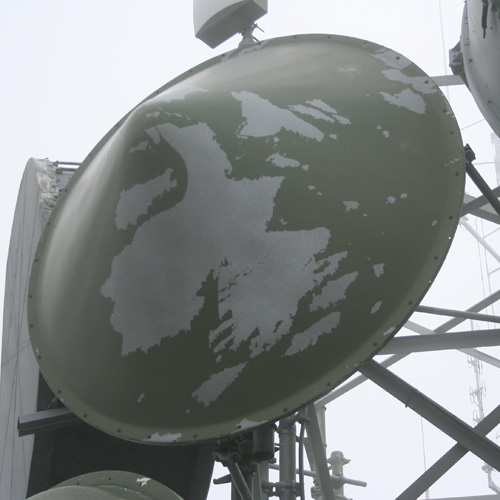
Here's some paint flaking off a fire hydrant, notice that the paint
flakes off to reveal an undercoating of other paint.
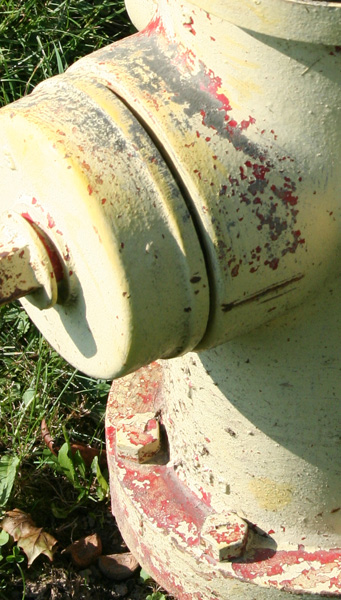
And here's a nice image showing the bulging that occurs around the
areas where the paint flakes off.
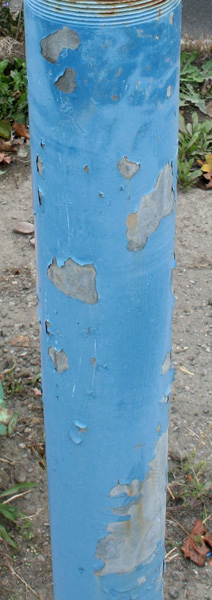
Software Agnostic Material
The basic ingredients are as follows:
- Shading: 3 different materials mixed together, a Metal Material,
a Undercoat Material, and a Paint Material.
- Metal Material
- Any sort of metal material, I'm just going to create a
temporary material that's greyish.
- Undercoat Material
- Color: whitish so it's like a primer paint layer
- Spec: low gloss reflections (blurry), low intensity
- Bump: very bumpy with noise to show distress (water and
moisture creep into the wound,
causing the surrounding undercoat paint to bulge out)
- Opacity: Areas that are chipped off revealing the layer
underneath
- Paint Material
- Color: whatever the paint color is (I'm chossing a pastel
yellow)
- Spec: Something reasonably specular
- Opacity: Areas that are chipped off revealing the layers
underneath
Ways to make it more realistic:
- Replace the Metal Material with a real metal material, for
example the one here: Distressed
Metal
- Replace the Paint Material with a more complex paint that
includes a triplanar projected paint bump map
Blender Example
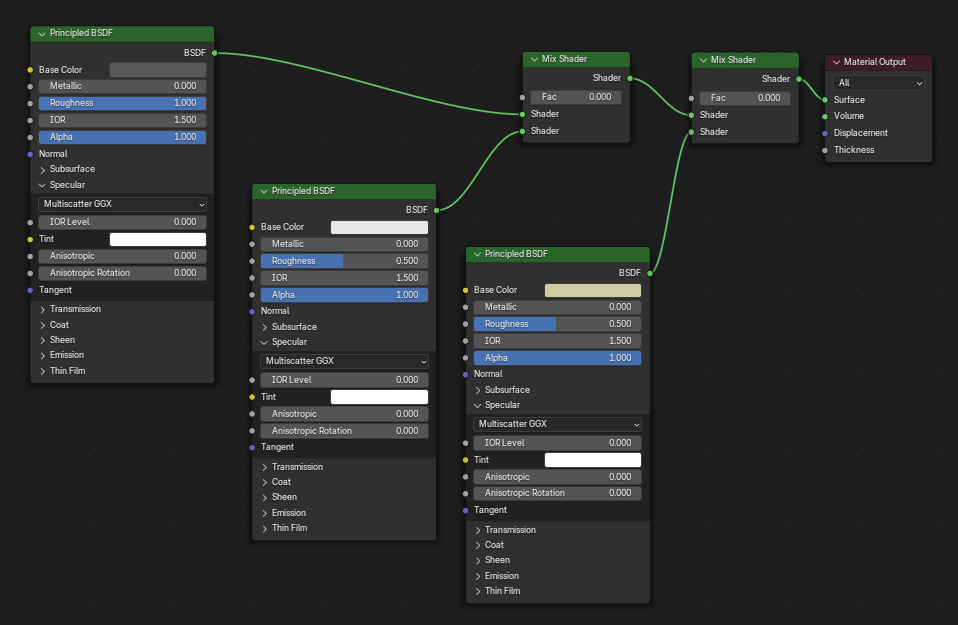
Here's the Blender Material Graph
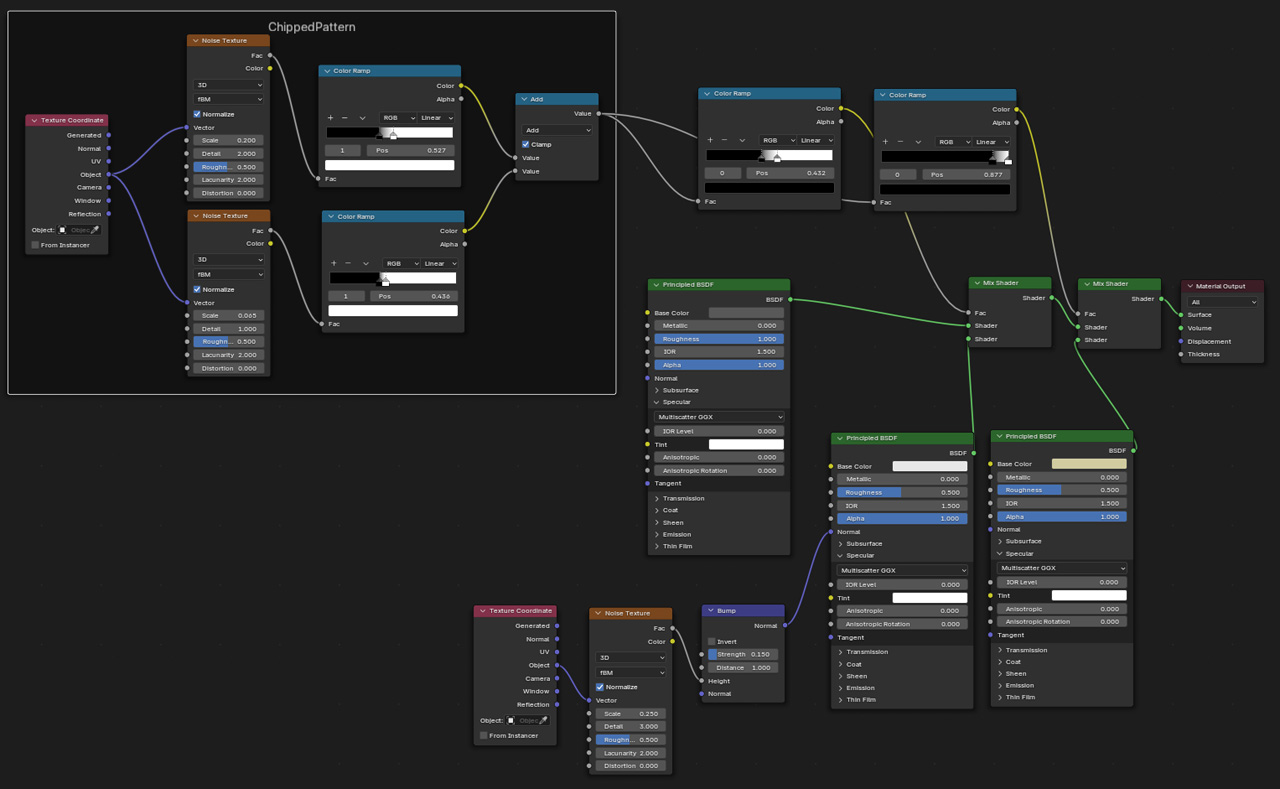
Go here for a higher res one.
Step 1 is to create 3 seperate Principled BSDF nodes, one Base
material, one Undercoat material, one Paint Layer. Then hook them up to
2 Mix Shaders, so we layer the Paint material (the pastel yellow base
color) on top of the underpaint material (the white base color), which
is layer on top of the base material (the grey base color).
Now lets work on the chipped paint pattern.
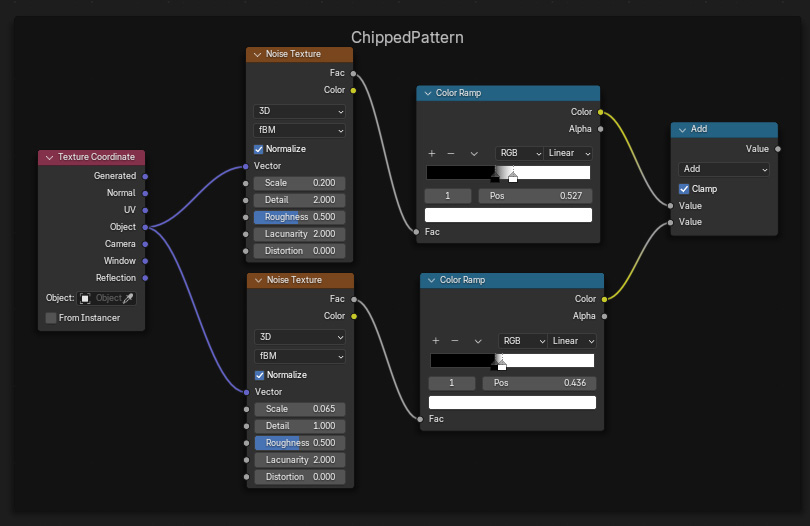
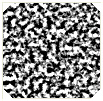
We will be mixing two different two noises, the first noise
looks a little like this...
The second noise looks like this...
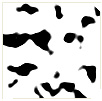
We add a Color Ramp to each to get them more contrasty. Then we combine
them together with a math node set to Add, and clamp on, so the end
result returns values between 0 and 1. I then put these nodes inside a
Frame which I've named "ChippedPattern".
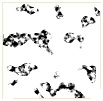
Combined, they form this pattern...
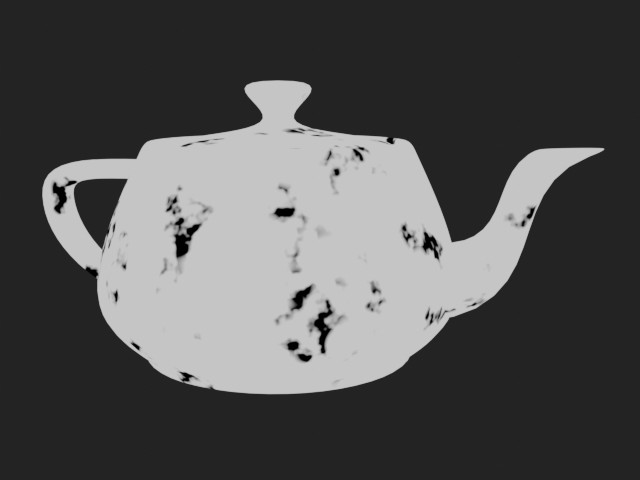
Here's the ChippedPattern on our test object.
Now we want to use a variation of this to mix between our base layer
and our underpaint layer.
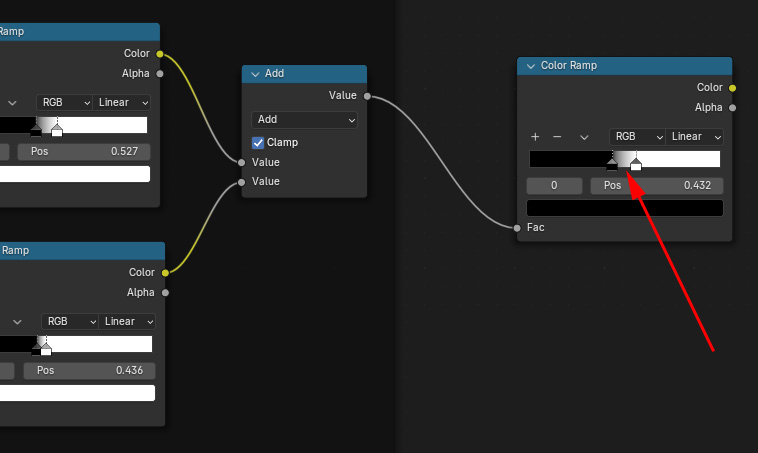
To do this, we will clamp the pattern to produce a sharper edge.
Clamping means taking a pattern and cutting off low and high values.
Create another Color Ramp node, hook up the ChippedPattern, and set the
flags like the diagram below...
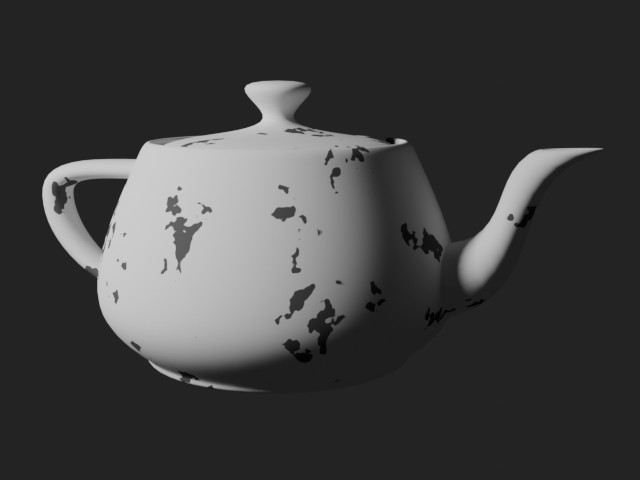
Now hook this node into the Factor of our first mix shader. That gives
us this result, blending between the base material and the underpaint
material.
Now to
make the mask for our Paint material layer that sits on top of both the
underpaint material and base material.
To do this, create yet another Color Ramp node, hook up the
ChippedPattern, and set the
flags like the diagram below...

Now hook this node into the Factor of our 2nd mix shader. That gives
us this result, blending between the base material, the underpaint
material, and the paint layer.
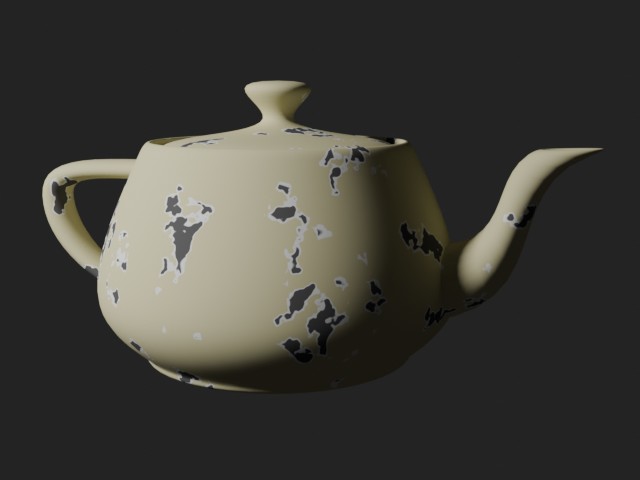
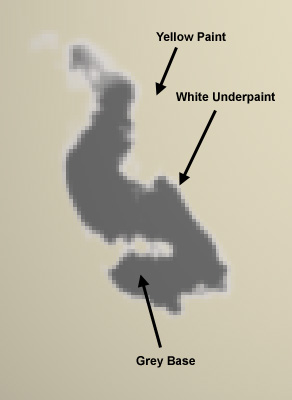
So here's the reason for the two color ramps.
You want a hole that
goes through both the paint and underpaint layer revealing the base
layer. However, the paint layer would chip off first, followed by the
underpaint layer. So you want to see a little bit of the underpaint
layer at the edges of the holes in the paint layer. So by using two new
color ramps (that reference the same ChippedPattern) and clamping their
values
a little differently, you pull
a little of the white material into the chipped areas. And if you
adjust your ChippedPattern, both the paint and underpaint layers will
be affected at the same time.
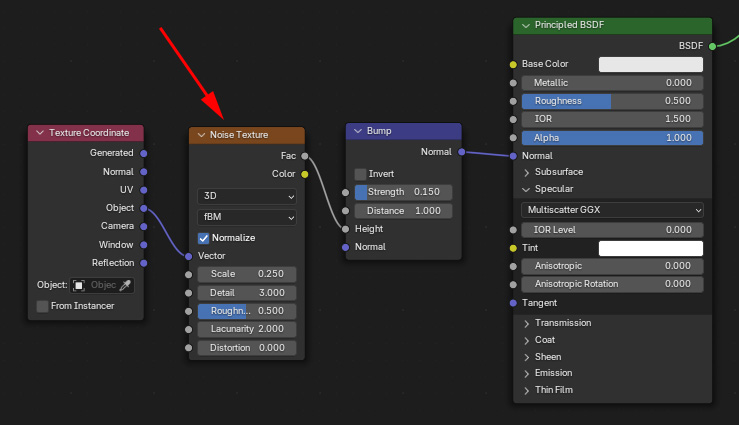
One final tweak. We want to see some damage and bulging around the
chipped paint areas. So Add a Noise Texture node to the bump of the
underpaint
material.
Here's the resulting render.
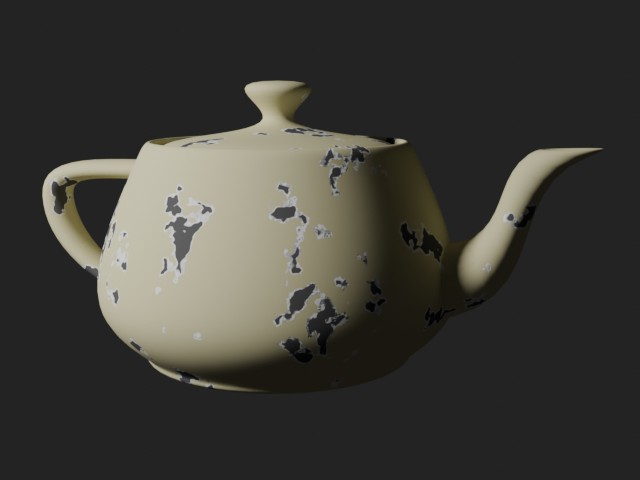
Here's the blend file, Blender 4.3: chipped_paint_blender.zip
3dsmax (vray) Example
Here's the shader for 3dsmax for the vray renderer renderer.
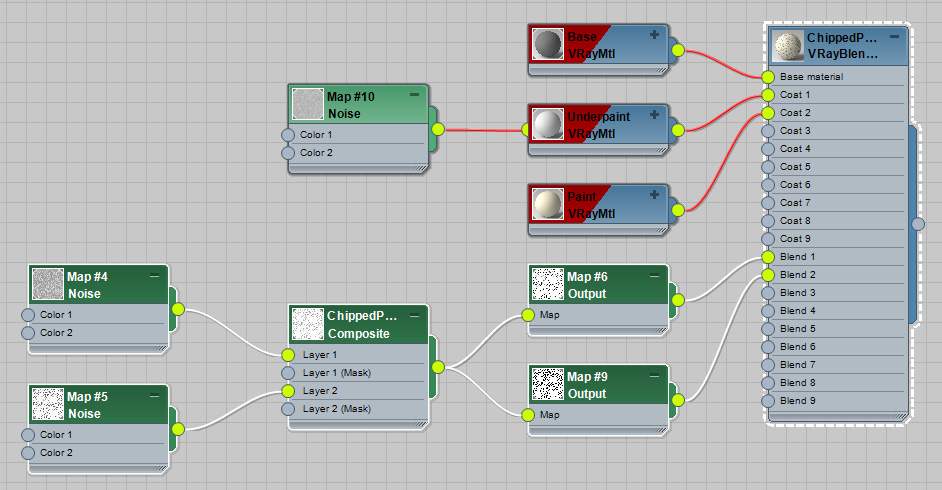
The first thing I do is set up a Vray Blend Material so we can layer a
bunch of other materials together. The
lowest layer is a Base material, Coat 1 is the Undercoat material, Coat
2
is the Paint Layer.
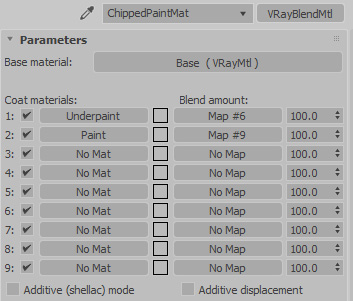
The Base Layer is just a grey VrayMtl, feel free to replace it with a
more detailed metal material to add more detail.
The Diffuse Color of the Underpaint Material will be a slightly
yellowish white.
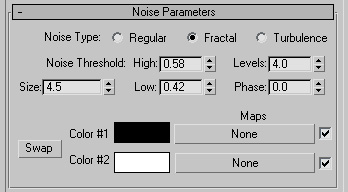
Now lets work on the chipped paint pattern. In a new material editor
slot, create a composite map. We will be mixing two different two
noises, the first noise
looks
like this...

The second noise looks like this...

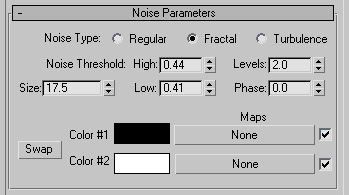
Combine them in the Composite map, setting the second one to "Lighten
mode". Name this ChippedPattern.
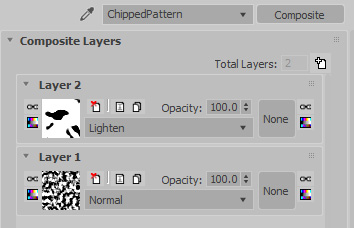
Combined, they form this pattern...

Here's the ChippedPattern on our test object.
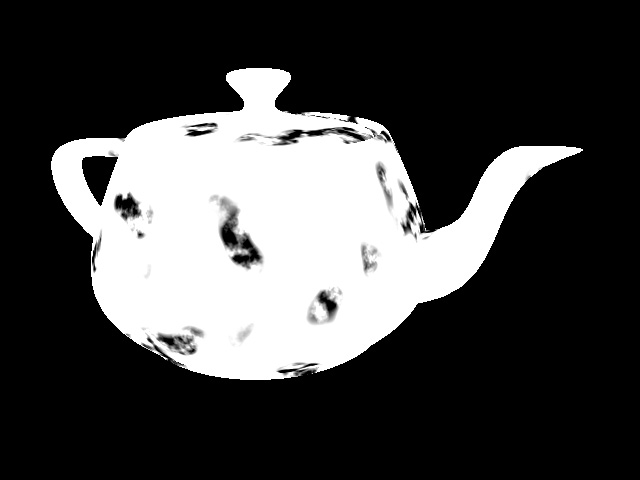
Now we want to use a variation of this as the Blend Amount of our
underpaint layer in the VryaBlendMtl.
To do this, we will clamp the pattern to produce a sharper edge.
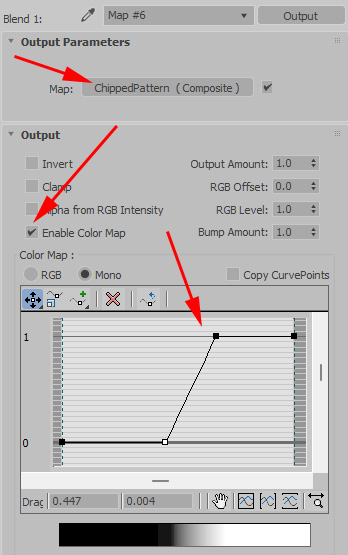
Clamping means taking a pattern and cutting off low and high values. In
the Underpaint layer's Blend Amount, add an Output map. In the map of
the output, place an instance of our ChippedPattern map. Then turn on
the "Enable Color Map" and set the Curve to look like the image below.
Here's the result of the underpaint layer ontop of the metal material,
using the output map we just made as the mask between these two
materials.

Now the
Paint material layer. It's a normal VrayMtl set to a pastel yellow
color.
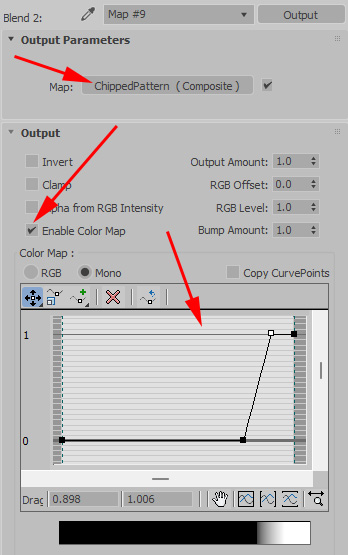
Now go back to the VrayBlendMtl, and put a brand new Output map in the
Blend Amount slot for the paint layer. In the map of the output, place
an instance of our ChippedPattern map.
Then turn on the "Enable Color Map" and set the Curve to look like the
image below.
Here's the result showing all 3 materials layered together.
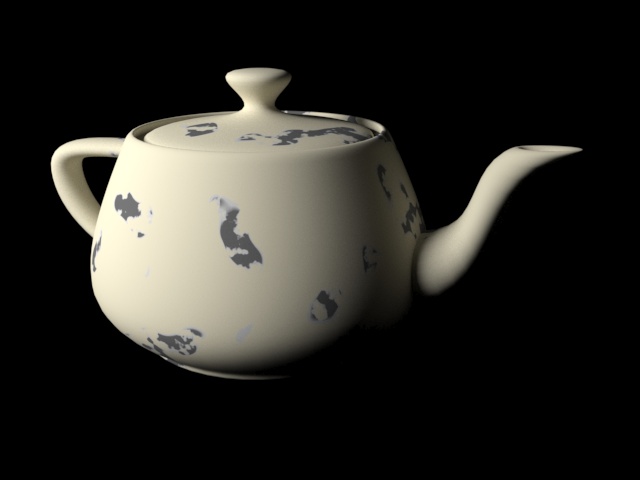
So here's the reason for the two Output maps.
You want a hole that
goes through both the paint and underpaint layer revealing the base
layer. However, the paint layer would chip off first, followed by the
underpaint layer. So you want to see a little bit of the underpaint
layer at the edges of the holes in the paint layer. So by using output
maps (that reference the same ChippedPattern) and clamping their values
a little differently, you pull
a little of the white material into the chipped areas. And if you
adjust your ChippedPattern, both the paint and underpaint layers will
be affected at the same time.

One final tweak. We want to see some damage and bulging around the
chipped paint areas. So Add a noise map to the bump of the underpaint
material.
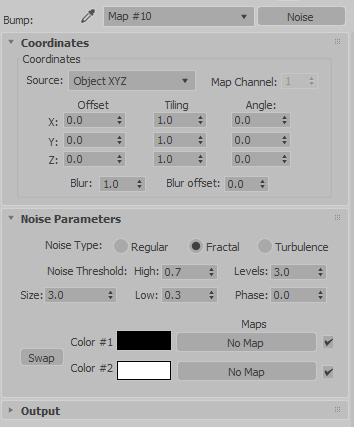
Here's the resulting render.
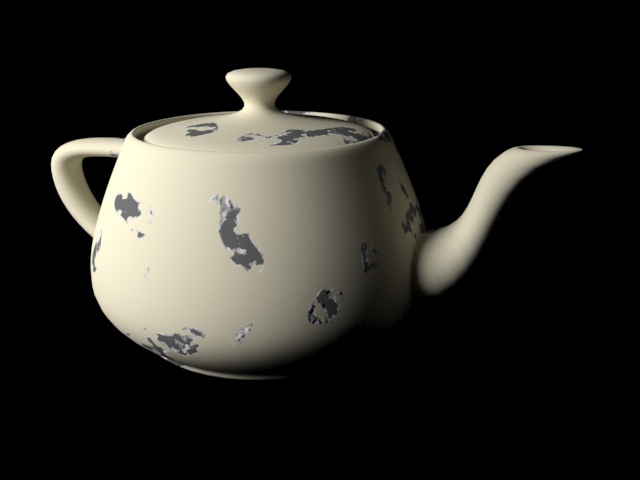
Here's the max file, 3dsmax 2022: chipped_paint_3dsmax_vray.zip
This site is ©2025 by Neil Blevins, All rights are reserved.
Return to
NeilBlevins.com


