How Do I Shade / Texture Stuff?:
Shading Workflow Overview
By Neil Blevins
Created On: Nov 12th 2013
Updated On: Dec 10th 2024
Software: Any
So this lesson discusses my workflow for shading / texturing
models. This topic is of course huge, so consider this an overview.
This workflow is the process I go through when shading any sort
of object, regardless of whether its a character, vehicle, set, or
prop, hard surface or organic, maya, 3dsmax, blender, this workflow is
pretty
much the same no matter what software you choose (I use 3dsmax as my
main example software in this lesson, but all the theory applies to
all of the 3d apps and renderer out there).
Most of us when
texturing are doing something similar to this workflow instinctively,
but the nice thing about laying it all out is it may help you make more
informed decisions on which techniques to use for what objects. There
are many, many ways to go about texturing cg models, and rather than
choosing one technique and trying to use it for every situation, there
is value in using a number of different techniques, ones that are
better suited for the specific situation. At many companies, they have
decided to UV and then paint everything. Which is fine, but they're
missing out on a lot of time saving methods like Triplanars,
Procedurals and Projections. This article hopes to show that there are
lots of methods for shading, and using many instead of few has a lot of
advantages.

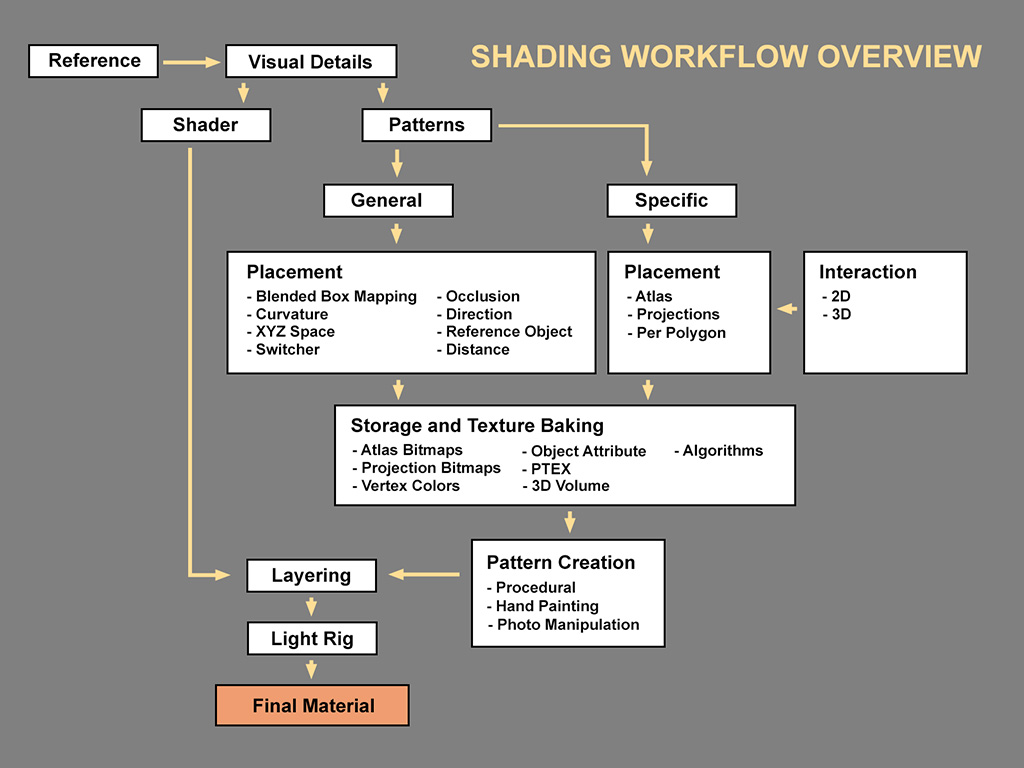
Here are the basic steps of my shading / texturing workflow...
- Reference
- Visual Details List
- Splitting Details Into Shaders And Patterns
- Shaders
- Patterns
- Splitting Patterns Into General and Specific Patterns
- General Patterns
- Specific Patterns
- General Pattern Placement
- Specific Pattern Placement
- Pattern Storage And Texture Baking
- Pattern Creation
- Layering
- Light Rig
- Final Material
Now lets look at each stage one by one.
1) Gathering
Reference
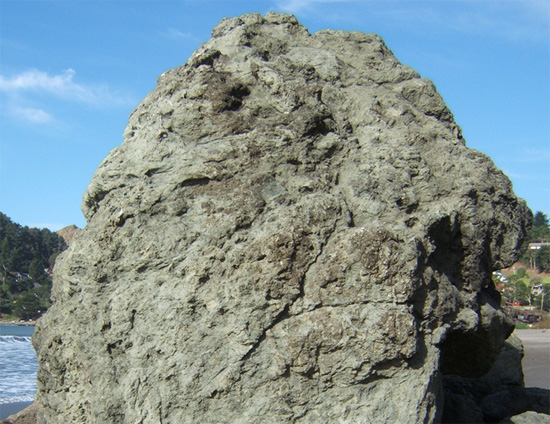
Probably the most
important thing you can do to make your project successful, even for
objects that don't exist in real life. Sometimes we get
so excited making an object in 3d that we don't stop to first think
about and observe the thing we are going to make. Spend the time to get
good reference! Use original
sources (real photos, observation) more than processed sources (other
people's paintings, images, films).
Here's some places to get Reference:
- Take your own
photos (get a camera, even a cheap camera, iphone is fine most of the
time)
- Client
- Get photos from
library, books, web
- Films
- Other artists work
- Create an Archive
(Morgue) of reference photos (Mine is 92,000 files / 41 Gig)
2) Identifying
Visual Details
Pick the 5 to 10
things that make this object look the way it looks and write them down.
Example, Rock:

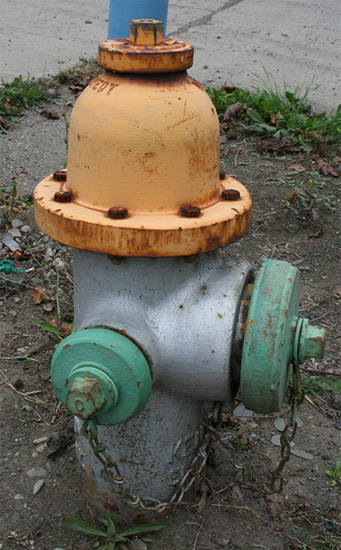
Example, Fire
Hydrant:
- Three
color of paint (Yellow, Grey, Green)
- Paint
has a slight bump
- Paint
is slightly reflective
- Paint
chips off to reveal metal base
- Metal base is dull, dark grey
- Rust

3) Splitting
Visual Details Into Shaders And Patterns
A Surface Shader
is a set of equations used to determine the appearance of a surface and
how it responds to light. A Shader is combined with Maps (Patterns) to
form a Material. Sometimes your material is referred to as a "shader",
but for clarity sake, I will only refer to the Illumination portion of
your material as a shader.
Now lets look at your Visual Detail List, what on the list is part of
the shader?
Example, Hydrant (3 shaders):
- Paint Shader
- Metal Shader
- Rust Shader
Look at your
Visual Detail List, what on the list are patterns?
Example, Hydrant (8 patterns):
- Paint
requires several colors, has a paintbrush bump pattern, a pattern to
change how reflective the surface is, and the paint is worn off to
reveal
the metal in a specific pattern (4 patterns).
- Metal
has some slight blemishes in color (1 pattern)
- Rust
has a specific color, specific bump, and then is placed on the surface
of the hydrant in a specific pattern (3 patterns).
4) Shaders
Common
Shaders
in the CG World:
- Lambert (Simple
Diffuse)
- Phong (Highlight)
- Blinn (Highlight,
less distortion at glancing angles)
- Oren Nayar
(Diffuse for Rough Surfaces)
- Ward Anisotropic
(Anisotropic Highlights)
- Cook-Torrance
(Metals)
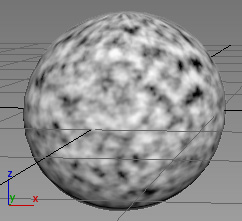
- GGX (the most common default shader these days)
Now lets choose the most appropriate shaders...
Example, Hydrant:
- Paint
could be a Lambert with a Blinn shader for shininess
- Metal
could use a Cook-Torrance shader, or a Lambert/Blinn made to look
metallic
- Rust
could use a lambert, or Oren Nayar since it's very rough, and doesn't
need a specular Highlight
Here's a few lessons on shaders...
Now we look at our list of patterns. To make a successful material, you
generally want at least 3 patterns per material...
- Color
- Bump / Displacement (Disp)
- Specular Amount (Spec)
Although some specialty shaders require more patterns like a
Translucency amount, subsurface color, emissive, etc.
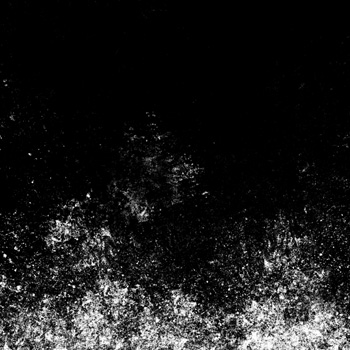
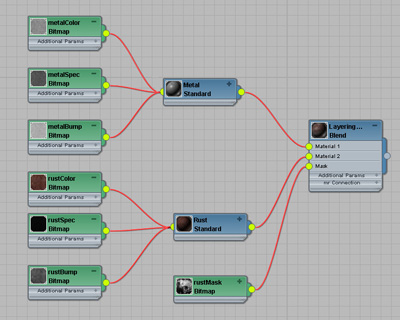
Patterns tend to be chains of nodes (maps) that are layered together
and then plugged into a particular channel of a material. Like in this
example, a Placement node places a Pattern, that Pattern is Color
Corrected (CC), then these Color Corrected Patterns are layered
together using a Layer node, the result of that is Color Corrected, and
then plugged into your material as a color, a bump, a specular amount
etc. At its most basic level, pretty much all Pattern Map Chains you do
for any material take on a form like this...

6) Splitting Patterns Into General And Specific Patterns
- General
Patterns: General Patterns
are non-specific, stuff that pretty much covers your entire object. In
the Fire Hydrant example, a General Pattern
would be the brush strokes in the paint. They don't need to be anywhere
specific to read as paint.
- Specific
Patterns: Specific patterns
are patterns that appear in only very specific spots. In the Fire
Hydrant example, a Specific Pattern would be the spots
that show rust, since that appears only in very specific places on the
hydrant (such as where two objects
intersect).
Think of this with a traditional painters metaphor. Many painters start
by blocking
in the basic colors over the entire canvas, then they add details
on top. So your basic color would be the General Patterns, and your
details would be the Specific Patterns.
Also, some companies have a specific "Shader" job and a specific
"Painter" job, usually the Shader handles the
Materials and General Patterns, Painters handles
Specific Patterns. Or in some companies you have Shader Writers and
Painters, in which case the Shader Writer
codes the shader, and almost everything else is handled by the Painter.
Some companies, one person does both the
shader, specific and general patterns.
7) General
Patterns
In our Fire Hydrant Example, these are the General Patterns:
- Paint Color
- Paint Bump
- Paint Specularity
- Metal Color
- Rust Color
- Rust Bump
8) Specific
Patterns
In our Fire Hydrant Example, these are the Specific Patterns:
- Worn Off Paint Placement
- Rust Placement
9) General
Pattern Placement
Patterns can be
thought of as having three components, how you
place that pattern on your object, how the pattern is stored, and
creating the pattern itself.
These three
components are tied together, but for the purpose of choosing
techniques, lets keep them conceptually separate for the moment.
No one
pattern
placement method works in all cases, generally a material will need to
use several different pattern placement methods.
All pattern placement methods can be used for General and Specific
Patterns, but for the most part a placement method tends to work best
for one
or the other. So lets look at the 8 General Pattern Placement methods,
and then you can decide which ones work best for the General Patterns
in your material:
- Blended Box Mapping
- Curvature
- XYZ Space
- Switcher
- Occlusion
- Direction
- Reference Object
- Distance
9.1.1) Blended
Box
Mapping
This is also sometimes refered to as Triplanar mapping. Its like
regular box
mapping, a bitmap is projected from 6 different directions onto a
surface, but the edges
are blended, so you don't see any seams.

Here's a lesson on Blended Box Maps...
Examples In Software:
- 3dsmax Plugins: Vray "VrayTriPlanarTex" map
- 3dsmax Base Package: BlendedBoxMap (max 2017 Ext1 and up, set to
1 or 3 map mode)
- 3dsmax Scripts: SoulburnScripts blendedBoxMapMaker
- 3dsmax Plugins:
InstantUV did this, but the plugin was discontinued in 2000.
- Substance Designer: Triplanar Node
- Blender: Image Texture set to Box
Advantages:
- Easy to assign any
bitmap to a whole set of objects.
- Since you can use any bitmap, you're not limited by procedural
patterns.
Disadvantages:
- Only good for
noisy textures, textures with an obvious pattern such as scales or
large contrasty dots do not work well because you can
see the pattern fade in and out at the edges.
9.1.2) Curvature
This pattern creates a
gradient. The gradient depends on the concavity or convexity of an
area.
You use the resulting gradient to mix between
materials or maps. Similar to Ambient Occlusion.

Here's a lesson on Curvature...
Examples In Software:
Advantages:
- A real Curvature
map is faster to calculate than Ambient Occlusion
- Captures convex areas that Ambient Occlusion doesn't
Disadvantages:
- The Gradient isn't
terribly useful as a pattern directly, has to be enhanced using some
other method, like for example using Procedural
Noise in XYZ Space.
- Captures edges and
concave areas, but doesn't deal with object interpenetration.
9.1.3) XYZ
Space
The pattern exists
in a 3 dimensional space. This is generally
used by Procedurals. XYZ Space can be
in world space or object space. For example, if you rotate your object,
the object space changes, but the world
space will not.

Examples In Software:
- Blender: Noise and Voronoi Textures
- 3dsMax Base Package: Most
procedurals (Noise, Smoke, Dent, etc.)
- Maya Base Package: Most Procedurals (Cloud, Marble, Stucco, etc.)
Advantages:
- Very quick to
assign to your object.
Disadvantages:
- You're limited by
the types of available procedural patterns.
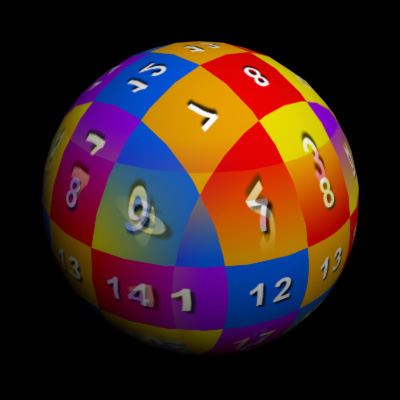
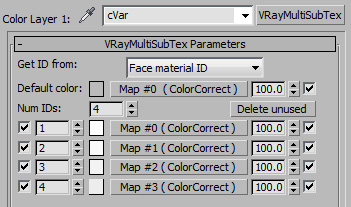
9.1.4) Switcher
A switcher is the simplest of pattern placement. Basically, you define
a set of patterns, and they get assigned to specific groups of objects,
faces, etc., usually using some sort of ID value that connects the
pattern to the thing its being applied to. So for example, you create a
rock material that has 5 different rock colors, and then spread
randomly the ID 1 to 5 on a bunch of rocks, and each rock receives one
of the 5 rock colors.

Here's a lesson on switchers...
Examples In Software:
- 3dsMax Base Package: material
switcher: Sub-object Material
- 3dsMax Plugins: map
switcher: MultiIDMap by Grant Adam compatible with other renderers (not
mr compatible, limited to 15 slots)
- 3dsMax Plugins: map
switcher: VrayMultiSubTex (vray only)
- 3dsMax Plugins: map
switcher: VrayHDRI (vray only)
- 3dsMax Plugins: texture map
switcher: CG Source's MultiTextureMap
- Maya Base Package: Single
Switch, Double Switch, Triple Switch, Quad Switch
Advantages:
- Great for adding
variety to your scene without the need to create almost identical
materials with only one or two small things changed.
Disadvantages:
- The Switcher
result isn't terribly useful as a pattern directly, has to be combined
with another pattern placement method (like UVs, for example).
- Objects / faces inside max can only have a single Material ID, so
you can't switch multiple parameters independently of each other
without using Mat IDs AND Object IDs. VrayHDRI can use User Defined
Properties, which means any object can have unlimited named IDs, but
it's Vray only and works only with bitmaps.
- In 3dsmax, there isn't a single full featured Switcher map that
works in all renderers.
9.1.5) Occlusion
Ambient Occlusion (AO) is a pattern that creates a
gradient. The Gradient is based on how much of a particular surface
sees of the sky (Or for the more technical minded, its the amount a
particular point sees
of
a hemisphere centered at the point and oriented by the face normal
(unless you have a cutoff distance, in which case it's far more likely
you'll be simply calculating how close you are to adjacent surfaces)).
You then use the resulting gradient to mix
between materials or maps.

Here's a lesson on Occlusion...
Examples In Software:
- 3dsMax Plugins: Vray "VrayDirt" map
Advantages:
- Great for placing
stuff like rust or dirt into the spots these things would naturally
occur.
- Unlike Curvature,
deals well with interpenetrating objects.
Disadvantages:
- The gradient isn't
terribly useful as a pattern directly, has to be enhanced using some
other method, like for example using Procedural
Noise in XYZ Space.
- Not terribly
intuitive to control.
- If rendered in realtime, can be slow to compute, if you decide to
bake out the occlusion, you have
to deal with a lot of extra files, and possibly
applying good uvs to all your objects to bake to.
- If for animation,
result must be baked so that you don't see dynamic occlusion. This
requires you to deal with a lot of extra files, and
possibly applying good uvs to all your objects to bake to.
9.1.6) Direction
Map that creates a
gradient. Areas pointing in a particular direction get one color,
areas pointing away get a second color, and a soft transition in
between. This can be in camera space (so faces pointing towards the
camera get 1 color, faces perpendicular to the camera get another
color), or this can be in world space (all faces pointing up in Z get
one color, all other faces get the second color.) You use the resulting
gradient to mix between
materials or maps.

Here's a lesson on direction...
Examples In Software:
- Blender: Layer Weight node
- 3dsMax Base Package: Falloff Map set to "Perpendicular / Parallel
- Viewing Direction" or "Perpendicular / Parallel - World Z Axis", etc
Advantages:
- Useful for fresnel effects
- Useful for glowing energy effects
- Useful for dust / snow / wear that's landed on the up facing
surfaces
Disadvantages:
- The Gradient isn't
terribly useful as a pattern directly, has to be enhanced using some
other method, like for example using Procedural
Noise in XYZ Space.
9.1.7) Reference
Object
Map that creates a
gradient. Areas inside a particular reference object is one color,
outside is a second color, with controls for a
soft transition (object can be Geometric, a special widget, even
lighting). You use the resulting gradient to mix between
materials or maps.

Examples In Software:
- 3dsMax Base Package: doesn't exist
- 3dsMax Plugins: Vray "VrayDistanceTex" map
- 3dsMax Plugins:
Chameleon
Advantages:
- Specific placement
of a feature using an easy to manipulate object in 3d space.
Disadvantages:
- The Gradient isn't
terribly useful as a pattern directly, has to be enhanced using some
other method, like for example using Procedural
Noise in XYZ Space.
9.1.8) Distance
Map that creates a
gradient. Areas that are a certain distance from an origin point get
one color,
areas near a second origin get a second color, and a soft transition in
between. Origins can be a point object in space, a coordinate in world
space, the distance from a camera, etc. You use the resulting
gradient to mix between
materials or maps.

Examples In Software:
- 3dsMax Base Package: Falloff Map set to "Distance Blend - Viewing
Direction" or "Distance Blend - World Z Axis", etc
Advantages:
- Useful if you want to fade colors on something as it gets further
from the camera.
- Useful if you want everything above a certain height in your
scene
to receive some other material.
Disadvantages:
- The Gradient isn't
terribly useful as a pattern directly, has to be enhanced using some
other method, like for example using Procedural
Noise in XYZ Space.
10) Specific
Pattern Placement
Now lets look at the 3 Pattern Placement methods for Specific Patterns:
- Atlas
- Projections (UV Projections, Camera
Mapping (Perspective Projections), Ortho Projections)
- Per Polygon
Once you decide how you will place your specific patterns, they can be
interacted with in one of two ways:
- 3D Interaction
- 2D Interaction
10.1.1) Atlas
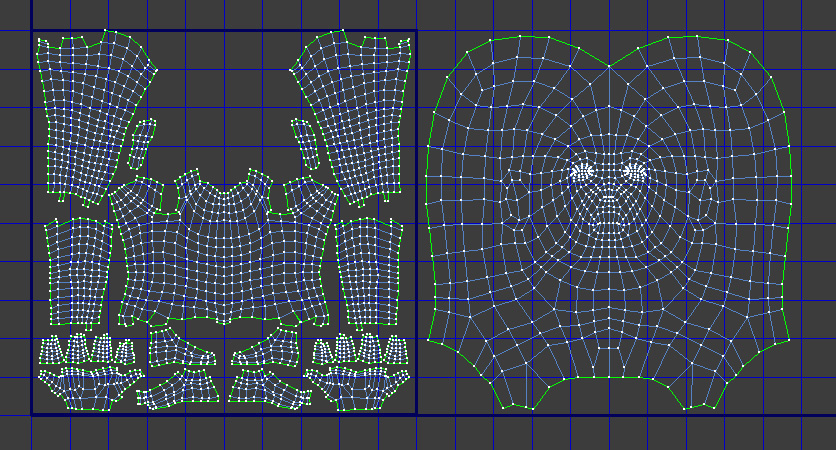
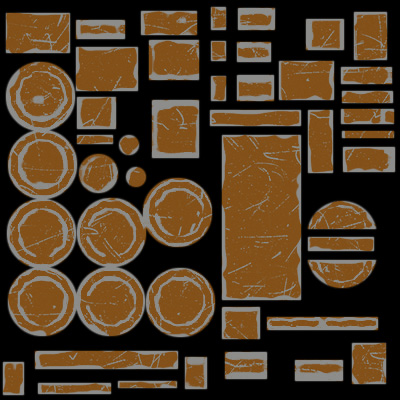
A texture atlas is a large 2D image containing a collection of
sub-images, or "atlas" which contains many smaller sub-images, each of
which is a texture for some part of a 3D object. In other terms, this
is breaking up your 3d model into flat sections and then applying the
pattern to these. Frequently this is done using UVs, where you set up a
set of
flat 2D uvs that correspond to the vertexes of your 3d object.

Here's a few lessons on Atlases...
Examples In Software:
- 3dsMax Base Package: UVWUnwrap
Modifier (Manual Hand Editing, Pelt Mapping, Flatten Mapping,
UVPacking)
- Maya Base Package: UV Texture Editor
- ZBrush: Auto
Mapping
Advantages:
- Common technique that exists in pretty much every 3d app and very
videocard friendly
- You have a lot of
control over how the pattern is placed on the surface
- Some patterns are more easily applied to a flattened object (like
a stitch
pattern on cloth)
Disadvantages:
- Extra memory is required if your object has multiple UV sets
- Changing the mesh
can sometimes mess up your atlas.
- Takes time to
setup, may not be the best method if you have 20,000 objects to shade.
- Sometimes hard to
visualize the relationship between the atlas and the 3d model.
- Texture stretching can occur because you're trying to represent a
3d object in 2 dimensions.
- Possible artifacts at shell edges.
10.1.2) Projections
Your pattern is projected
from a projector source, which is usually a primitive shape such as a
planar projection, although sometimes the projection can be spherical,
cylindrical, etc. Projects come in 3 different flavors, each with their
own advantages and disadvantages.
10.1.2.1) UV Projections
Your pattern is projected
from a projector source and then applied via UVs.
Ideally, this projector source is procedural
so you can make tweaks to its size and position later on. Since they're
applied as UVs, you can flatten the projector and then just treat the
resulting UVs as an Atlas.

Here's a lesson on projections...
Examples In Software:
- 3dsMax Base Package: UVW Mapping
Modifier: Planar, Cylindrical, Spherical, Shrink Wrap, Box, Spline
Mapping (but this is not a procedural modifier, so
once you're done editing, you can't go back and tweak)
- Maya Base Package: Polygons
-> Create UVs -> Planar Mapping, Cylindrical Mapping, Spherical
Mapping, etc.
Advantages:
- Changes to your
mesh will not mess up your projection
- Changing the projection can affect many objects at the same time
Disadvantages:
- Limited to certain
shapes (plane, sphere, cylinder, etc.)
- In 3dsMax, difficult to add
an object to an existing projection because of the way the modifier
system works
10.1.2.2) Camera
Mapping
(Perspective Projections)
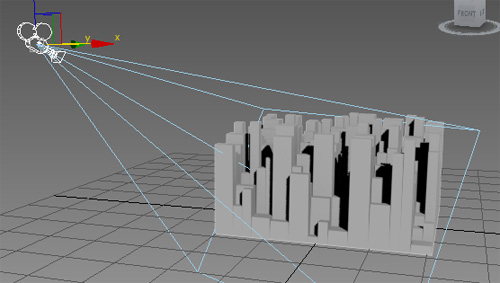
This is another subset of Projections, but you project your pattern
from the
viewpoint
of your final perspective camera, or a camera or set of cameras similar
to your final
camera. Frequently used in Matte Painting.

Examples In Software:
Advantages:
- Easy to visualize detail placement, since you're looking through
the final Camera.
- Lets you add
detail to only where you need it for your shot.
Disadvantages:
- If the camera
moves a lot, you need to setup a lot or projections to avoid stretching
- In 3dsMax, map aspect
ratio is locked to the final aspect ratio of the render, and doesn't
allow Orthographic Cameras
- Since these projections are almost always planar, they are
difficult to deal with if the object is round
- If your objects
have a lot of overlaps, you need to assign many camera maps to add all
the details.
10.1.2.3) Ortho Projections
The Projection Source is decoupled from the
object
(like in
Camera Mapping), but your camera isn't your final scene camera, and
the camera is orthographic.
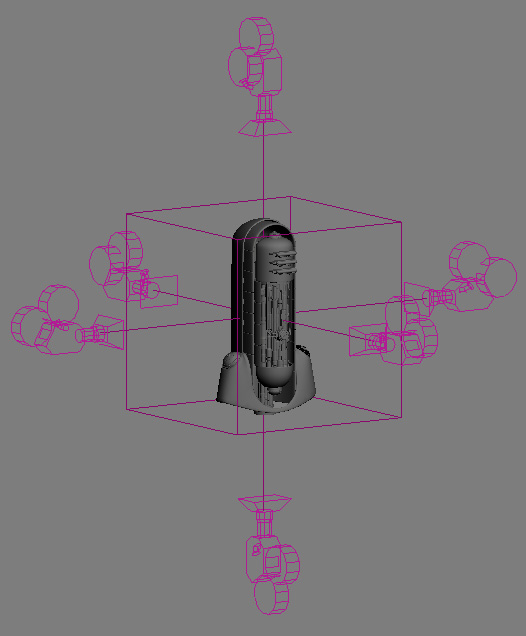
Here's a lesson on projections...
- 3dsMax Base Package: BlendedBoxMap (max 2017 Ext1 and up, set to
6 map mode)
- 3dsMax Plugins: CameraMapGemini http://www.projectgemini.net/CameraMapGemini/
- Maya Base Package: Hypershade,
Create Maya Nodes, General Utility, Projection
Advantages:
- Projections can be applied
easily to an ever changing number of objects.
Disadvantages:
- Since these projections are almost always planar, they are
difficult to deal with if the object is round
- If your objects
have a lot of overlaps, you need to assign many projections to add all
the details.
10.1.3) Per Polygon
Software that lets
you apply your pattern directly on your 3d model, applying the pattern
to the faces
and / or vertexes of your mesh. Pattern data can be stored in a number
of
formats such as PTEX (for detailed face paint) or Vertex Colors (for
sparser patterns).

Examples In Software:
- 3dsMax Base Package: Viewport
Canvas
- 3dsMax Base Package: Vertex Paint
Modifier
- Mudbox (Autodesk)
- ZBrush: Polypaint (Pixologic)
- Mari (Foundry)
Advantages:
- Easy To Visualize
Detail Placement since you're viewing the polygons of your model
directly
- See results as you
paint them
- Round objects or
objects with overlaps are no longer difficult to apply your pattern to.
Disadvantages:
- Usually requires
model to be transferred to a separate application, and if so, you need
to buy and
learn separate application
- What you paint in
the viewport isn't always 100% what's rendered due to OpenGL
limitations
- If painting using per polygon methods, the paint tools are
generally not as
full featured as a 2D paint program like Photoshop
- Has the disadvantages of either the Vertex Color or PTEX storage
methods, depending on which you use.
10.2.1) 3D Interaction
Applying your pattern on a model in a 3D view. If using 3d Paint
software, paint can be applied to a 2d plane above your surface,
and then the result gets projected onto your surface (Zbrush, Mari), or
the paint can be applied directly to the surface (Mudbox).

How This Technique Interacts With Pattern Placement:
- Painting in Mari in the 3D viewport with your paint being applied
to an Atlas made from UVs.
- Painting in Mari on a persistent projection in the 3D viewport to
be later baked to a UV based Atlas Bitmap.
- Painting in Mudbox in the 3D view to a PTEX file.
Examples In Software:
- 3dsMax Base Package: Viewport
Canvas
- 3dsMax Base Package: Vertex Paint
Modifier
- Mudbox (Autodesk)
- BodyPaint 3D
(Maxon)
- ZBrush (Pixologic)
- Mari (Foundry)
- 3D
Coat
Advantages:
- Easy To Visualize
Detail Placement since you're looking at it in 3D
- See results as you
paint them.
- Round objects or
objects with overlaps are no longer difficult to apply your pattern to.
Disadvantages:
- Usually requires
model to be transferred to a separate application, and if so, you need
to buy and
learn separate application
- For patterns that are naturally flat (like cloth), difficult to
get the pattern to wrap well in 3D.
- What you paint in
the viewport isn't always 100% what's rendered due to OpenGL
limitations
- Paint tools in a 3D paint package generally not as
full featured as a 2D paint program like Photoshop
10.2.2) 2D Interaction
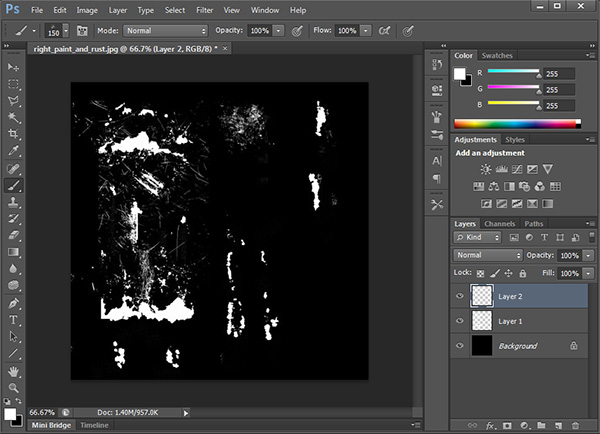
Applying your pattern on a model in a 2D view.

How This Technique Interacts With Pattern Placement:
- Painting inside Photoshop onto a Atlas to that will be saved
as an Atlas Bitmap.
- Painting inside Photoshop onto a projection bitmap that will be
projected
onto your surface in your 3d application using a projection
- Disney's paint3d software lets you flatten an area of your mesh
and paint on it in 2D to be saved as a PTEX file
Examples In Software:
- Photoshop (Adobe)
- Painter (Corel)
- 3dsMax Base Package: Viewport
Canvas
- BodyPaint 3D (Maxon)
- ZBrush (Pixologic)
- Mari (Foundry)
Advantages:
- For patterns that are naturally flat (like cloth), makes sense to
paint them flattened in 2D.
- What you paint in 2D is almost 100% identical to what's rendered.
- Programs like Photoshop are very full featured when it comes to
image manipulation and paint
Disadvantages:
- Harder To Visualize
Detail Placement since you're looking at it in 2D, and not at the final
3D object
- If using Photoshop, you can't see the result immediately on your
3d object as you paint.
- Round objects or
objects with overlaps can be difficult to paint on.
11.1) Pattern
Storage And Texture Baking
Once you decide how you want to place your pattern, you have to decide
how that pattern will be stored.
Now lets look at the 7 Pattern Storage methods:
- Atlas Bitmaps
- Projection Bitmaps
- Vertex Colors
- Object Attribute
- PTEX
- 3D Volume
- Algorithm
11.1.1) Atlas Bitmaps
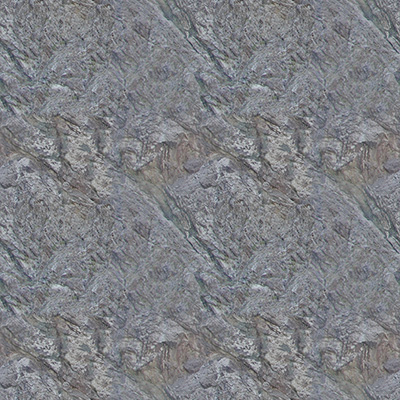
This is the most common Pattern Storage method. The
pattern is
stored in a bitmap image and is applied to your object using unwrapped
UVs.

Examples In Software:
- 3dsMax Base Package: Bitmap Map
- Maya Base Package: File map node
Advantages:
- Bitmaps are one of the most easily manipulated storage methods
because so many applications allow you to edit them.
- Bitmaps tend to filter (antialias) easily.
Disadvantages:
- Many bitmaps or large bitmaps can take up a lot of memory.
- Limited resolution, if you save a bitmap that's too small, it
will start looking bad as you get closer to your object.
- Has all the disadvantages of the Atlas based Pattern Placement
method.
11.1.2) Projection Bitmaps
The
pattern is
stored in a bitmap image and is applied to your object using
projections. Are frequently tileable.

Examples In Software:
- 3dsMax Base Package: Bitmap Map
- Maya Base Package: File map node
Advantages:
- Bitmaps are one of the most easily manipulated storage methods
because so many applications allow you to edit them.
- Bitmaps tend to filter (antialias) easily.
Disadvantages:
- Many bitmaps or large bitmaps can take up a lot of memory.
- Limited resolution, if you save a bitmap that's too small, it
will start looking bad as you get closer to your object.
- Has all the disadvantages of the Projection based Pattern
Placement method.
11.1.3)
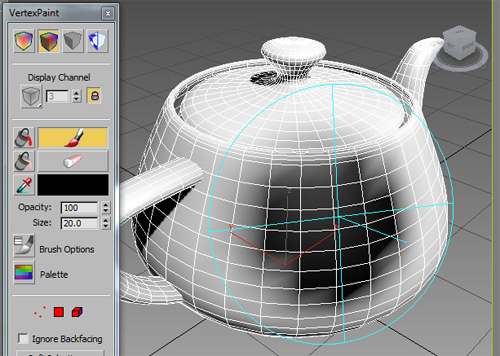
Vertex Colors
Pattern is stored on the vertexes of your object. Each vertex has a
color assigned.

Examples In Software:
- 3dsMax Base Package: EditablePoly,
Edit Mesh Modifier (does not exist in Edit Poly Modifier), Vertex Paint
Modifier
- Maya Base Package: Color Sets
- Zbrush: Polypaint
Advantages:
- Easy to visualize
detail placement
- See results as you
paint them
- Frequently built into the 3d
App, so you don't need a separate application to paint with.
Disadvantages:
- Map is only as detailed as the amount of vertices in your mesh.
So you need lots of geometry to get detail.
- Not a full
featured paint program
- Some mesh
operations can mess it up
11.1.4)
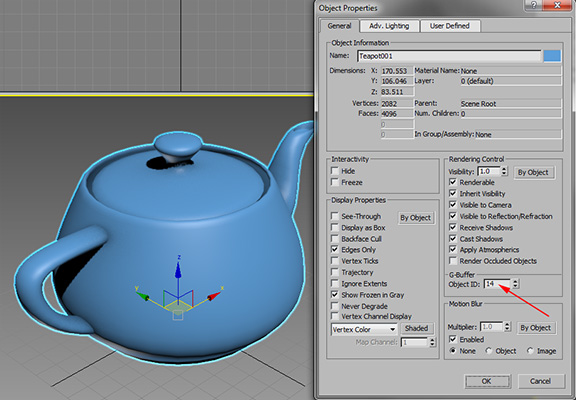
Object Attribute
Like Vertex Colors, pattern is stored on the 3d object. However, a
single uniform value is assigned to the entire object. Used almost
exclusively with Switcher Pattern Placement.

Here's a lesson on Object Attributes...
Examples In Software:
- 3dsMax Base Package: Object ID
- Maya Base Package: Custom Attributes
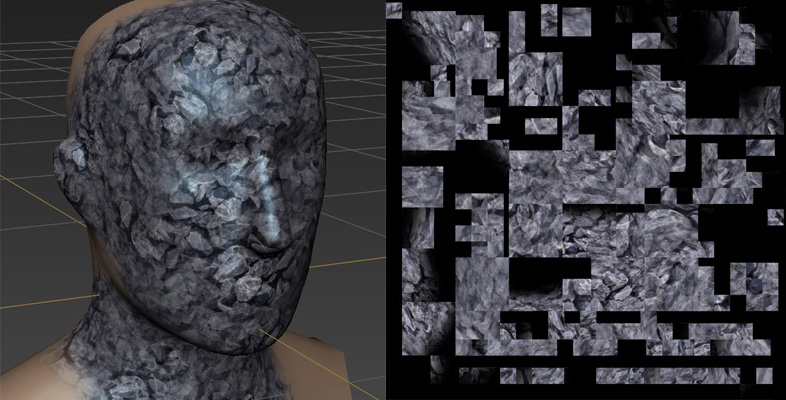
11.1.5) PTEX
A per face mapping developed originally at Disney. Each face gets its
own map, and these are collected
together into a ptex file.

Here's a few lessons on PTEX...
Examples In Software:
- 3dsMax Base Package: doesn't exist
- 3dsMax Plugins: Vray has ability to render Ptex maps.
- Mudbox: has ability to read and write ptex files
Advantages:
- No more uv setup, which means a lot of saved time
- No texture stretching. Setting up good uvs can be time consuming,
and even the best uvs sometimes lead to faces receiving too many pixels
compared to their neighbors, causing texture stretching to occur
- No artifacts at shell edges. When defining uvs, the edges between
uv shells frequently leads to artifacts. Not so with Ptex.
- Each face can have a different resolution, so it's quite easy to
add extra detail to a specific area of your model. More difficult to
set this up with UVs.
Disadvantages:
- Not widely available in 3d software.
- No photoshop support. Photoshop is the most common tool for
painting textures in the industry, but it does not allow you to paint
on Ptex files
- Changing the geometry of the model (like adding or deleting faces
or edges) requires you to bake the Ptex
file from the old geometry to your new geometry with possible quality
loss. This is a solvable problem, Mudbox for example has the ability to
transfer ptex from one model to another. But it is an extra step you
have to worry about.
- Ptex files are generally associated with their corresponding
object by name, so Hand01.ptx is assigned to the 3d object in your
scene called Hand01. So if you rename your model, you also need to
rename its corresponding Ptex file.
- Again, since ptex are associated to their object by object name,
if you have 200 objects that need an identical color map, its easier to
do that using uvs than to create and maintain 200 identical ptex files
that are named for each object.
11.1.6) 3D Volume
The pattern is stored in a 3d volume, such as a point cloud or brickmap
file, and then projected at rendertime onto a surface, or in some cases
the 3d representation is rendered itself.

From http://renderman.pixar.com/view/brickmapgprim
Examples In Software:
- 3dsMax Base Package: doesn't exist
- Prman: Point Clouds and Brickmaps
Advantages:
- Paint exists in 3d space, just like your model
- Automatic mipmapping, objects further from camera can read
coarser point clouds
Disadvantages:
- Can take up a lot of storage space
- Changing the mesh
can sometimes mess up your point cloud.
11.1.7) Algorithm
The pattern is not stored at all, but is generated at rendertime
by
evaluating an algorithm at a point in space.
Frequently this is true for procedural patterns.

Examples In Software:
- Blender: Noise & Voronoi Texture
- 3dsMax Base Package: Many procedurals
(Noise, Smoke, Dent, Gradient Ramp, etc.)
- Maya Base Package: Many procedurals
(Checker, Noise, Mountain, Ramp, Cloud, Marble, etc.)
Advantages:
- Takes up no disk space
- Changing your geometry doesn't affect pattern
- most algorithms produce more detail as you get closer to your
object
Disadvantages:
- Takes longer to render since it has to do calculations at
rendertime
11.2) Texture Baking
Texture Baking is the process of converting the storage
type from one type to another.

Baking Examples:
- Algorithm -> Projection Bitmaps: Say you have a procedural in
XYZ
Space, but you
want to edit it
in a paint program, you can bake the Procedural pattern into a bitmap
- Algorithm -> Atlas Bitmaps: 3dsmax UVWMapping
Modifier: XYZ to UVW, bakes procedural patterns using XYZ Space into
UVs, good for
deforming
objects
- Algorithm -> Vertex Color: Baking Curvature into Vertex Colors
using SoulburnScript CornerEdgeToVertexMap
- Algorithm -> Atlas Bitmaps or PTEX: Baking Occlusion into UVs
/ Bitmaps or PTEX, so the
occlusion doesn't change when the object moves / deforms
- Projection Bitmaps / Algorithm -> Atlas Bitmaps: Baking
Multiple
Maps Into Single Map Using UVs (which can speed up renders)
- Baking sculpted details into displacement map or normal map using
Atlas Bitmaps or PTEX (common workflow for transferring sculpted models
from
ZBrush or mudbox to max / maya / xsi)
Here's a lesson on Texture Baking...
Examples In Software:
- 3dsMax Base Package: Texture Baking
- 3dsMax Plugins:
Flatiron
12)
Pattern
Creation
So now that you've looked at the different ways to place your patterns,
and how to store them, you need to decide a method to create these
patterns. The 3 main ways
are...
- Procedurals
- Hand Painting
- Photo Manipulation
12.1) Procedurals
Algorithmically
defined patterns. Great for General Patterns.


Here's a few lessons on procedurals...
Examples In Software:
- Blender: Noise & Voronoi Texture
- 3dsMax Base Package: Many procedurals (Noise, Smoke, Dent,
Gradient Ramp, etc.)
- Maya Base Package: Many procedurals (Checker, Noise, Mountain,
Ramp, Cloud, Marble, etc.)
- Filterforge
- Substance Designer
Advantages:
- Unlimited
Resolution
- Easy To Create
Pattern Fast
- Easy to change
some features like overall size of pattern
- Takes up less
memory than large bitmaps
Disadvantages:
- Difficult to get a
complex look without layering lots of procedurals together, or
programming your own.
- Sometimes slower
to compute than a bitmap due to extra calculations
- Generally more
difficult to anti-alias than a bitmap, which means potentially longer
rendertimes or sparkling
- Very difficult to
place specific details exactly where you want them, hence not the best
option for Specific Patterns.
12.2) Hand Painting
Using brushes and filters in a piece of paint software and create a
digital pattern. Can be used to make General or Specific Patterns.

Here's a few lessons on painting textures...
Examples In Software:
- Photoshop (Adobe)
- Painter (Corel)
- 3dsMax Base Package: Viewport
Canvas
- BodyPaint 3D (Maxon)
- Mudbox (Autodesk)
- ZBrush (Pixologic)
- Mari (Foundry)
- 3D
Coat
Advantages:
- You can get a
pattern to look exactly how you want
- Sometimes faster
to calculate than procedurals, since the final color is read from a
bitmap rather than calculating a complex algorithm
- Easier to
antialias than a procedural
Disadvantages:
- It takes time
since much of the process is manual. The use of custom brushes can help
speed up the process.
- Resolution is not
unlimited, you have to pick a res and then stick with it.
- Large bitmaps take
up more memory than many procedurals.
12.3) Photo
Manipulation
Taking photos and
editing them to get the result you want. Many times
combined with Hand Painting. Source photos
should be preferably taken on cloudy day so you get pure flat color
without lighting
information. Can be used to make General or Specific Patterns.

Here's a few lessons on photo manipulation...
Examples In Software:
- Photoshop (Adobe)
- Affinity Photo
Advantages:
- You can start from
something realistic right off the bat.
- Sometimes faster
to calculate than procedurals, since the final color is read from a
bitmap rather than calculating a complex algorithm
- Easier to
antialias than a procedural
Disadvantages:
- Removing artifacts
from your photos can take time (such as removing lighting information
from your photo)
- You have to have a
photo of what you want in order to get a result (which is why this is
frequently combined with manual painting).
- Removing the
specific details from the Photo can take time
- Resolution is not
unlimited, you have to pick a res and then stick with it.
- Large bitmaps take
up more memory than many procedurals.
13) Layering
Now we combine the shaders and patterns to create your final result.

Three methods:
- Layering Materials
- Layering Patterns
- Layering In Paint Program
Here's a lesson on layering...
Examples In Software:
- Blender: Mix Shader, Mix
- 3dsMax Base Package: Composite
Material, Blend Material, Composite Map, Mix Map, Mask Map
- 3dsMax Plugins:
VRay: VRayBlendMtl
- 3dsMax Plugins:
CompositeMode (Michael Spaw, no longer available) and sciAnaComp (David
Gohara)
- Maya Base Package: Layered Texture
14) Lighting
Rigs
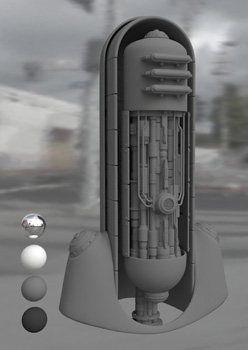
To see the results of your
material, I highly recommend you creating a standardized lighting rig
to view all your models in.

A lighting rig
should ideally…
- Show off
the
local color of the object
- Show off
your
Reflectivity, Spec and Bump
- Be similar
to
the rig your lighter will use.
- Be used to
show
off every model for consistency
Here's a lesson on creating a lighting rig...
15) Final Material
The final step is taking your layered material, testing it
in your lighting rig, and now you have your final material.
Conclusion
Personally I use a lot of
different methods to shade my objects. I always try and use whatever is
easiest for a particular situation. My
most commonly used techniques are...
Hard Surface Models:
- General Patterns:
- Blended Box Maps - Projection Bitmaps - Hand Painting / Photo
Manipulation
- Curvature - Vertex Colors - Procedural
- XYZ Space - Algorithm - Procedural
- Switcher - Object Attribute
- Occlusion - Algorithm - Procedural
- Direction - Algorithm - Procedural
- Specific Patterns:
- Orthographic Projection - 2D - Projection Bitmaps - Hand
Painting / Photo
Manipulation
Organic Models:
- General Patterns:
- Blended Box Maps - Projection Bitmaps - Hand Painting / Photo
Manipulation
- Switcher - Object Attribute
- Specific Patterns:
- Atlas - 2D - Atlas Bitmaps - Hand Painting / Photo
Manipulation
- Atlas - 3D - Atlas Bitmaps - Hand Painting / Photo
Manipulation
- Per Polygon - 3D - PTEX - Hand Painting / Photo
Manipulation
- Per Polygon - 3D - Vertex Colors - Hand Painting / Photo
Manipulation
So hopefully this gives you a little more information on not only how
to go about shading an object, but also the different methods you can
use and what are their advantages and disadvantages of each technique.
Now time to decide on your own favorite pipelines!
This site is ©2026 by Neil Blevins, All rights
are reserved.
To see hundreds of other tutorials similar to this one, visit the
Neil Blevins Education Site
